

 動画クリエイターさん
宣伝やブランディングのためにTwitterやinstagramのアカウントも作ったしポートフォリオページも出来たけど、全部のリンクをひとまとめにしたページとか作れたら便利なんだけどなー。。
 運営者
運営者そんな動画クリエイターさんのお悩みを解決します。
この記事でわかること
- LitLinkの登録方法
- LitLinkの操作方法
- LitLinkの活用方法
この記事の執筆者

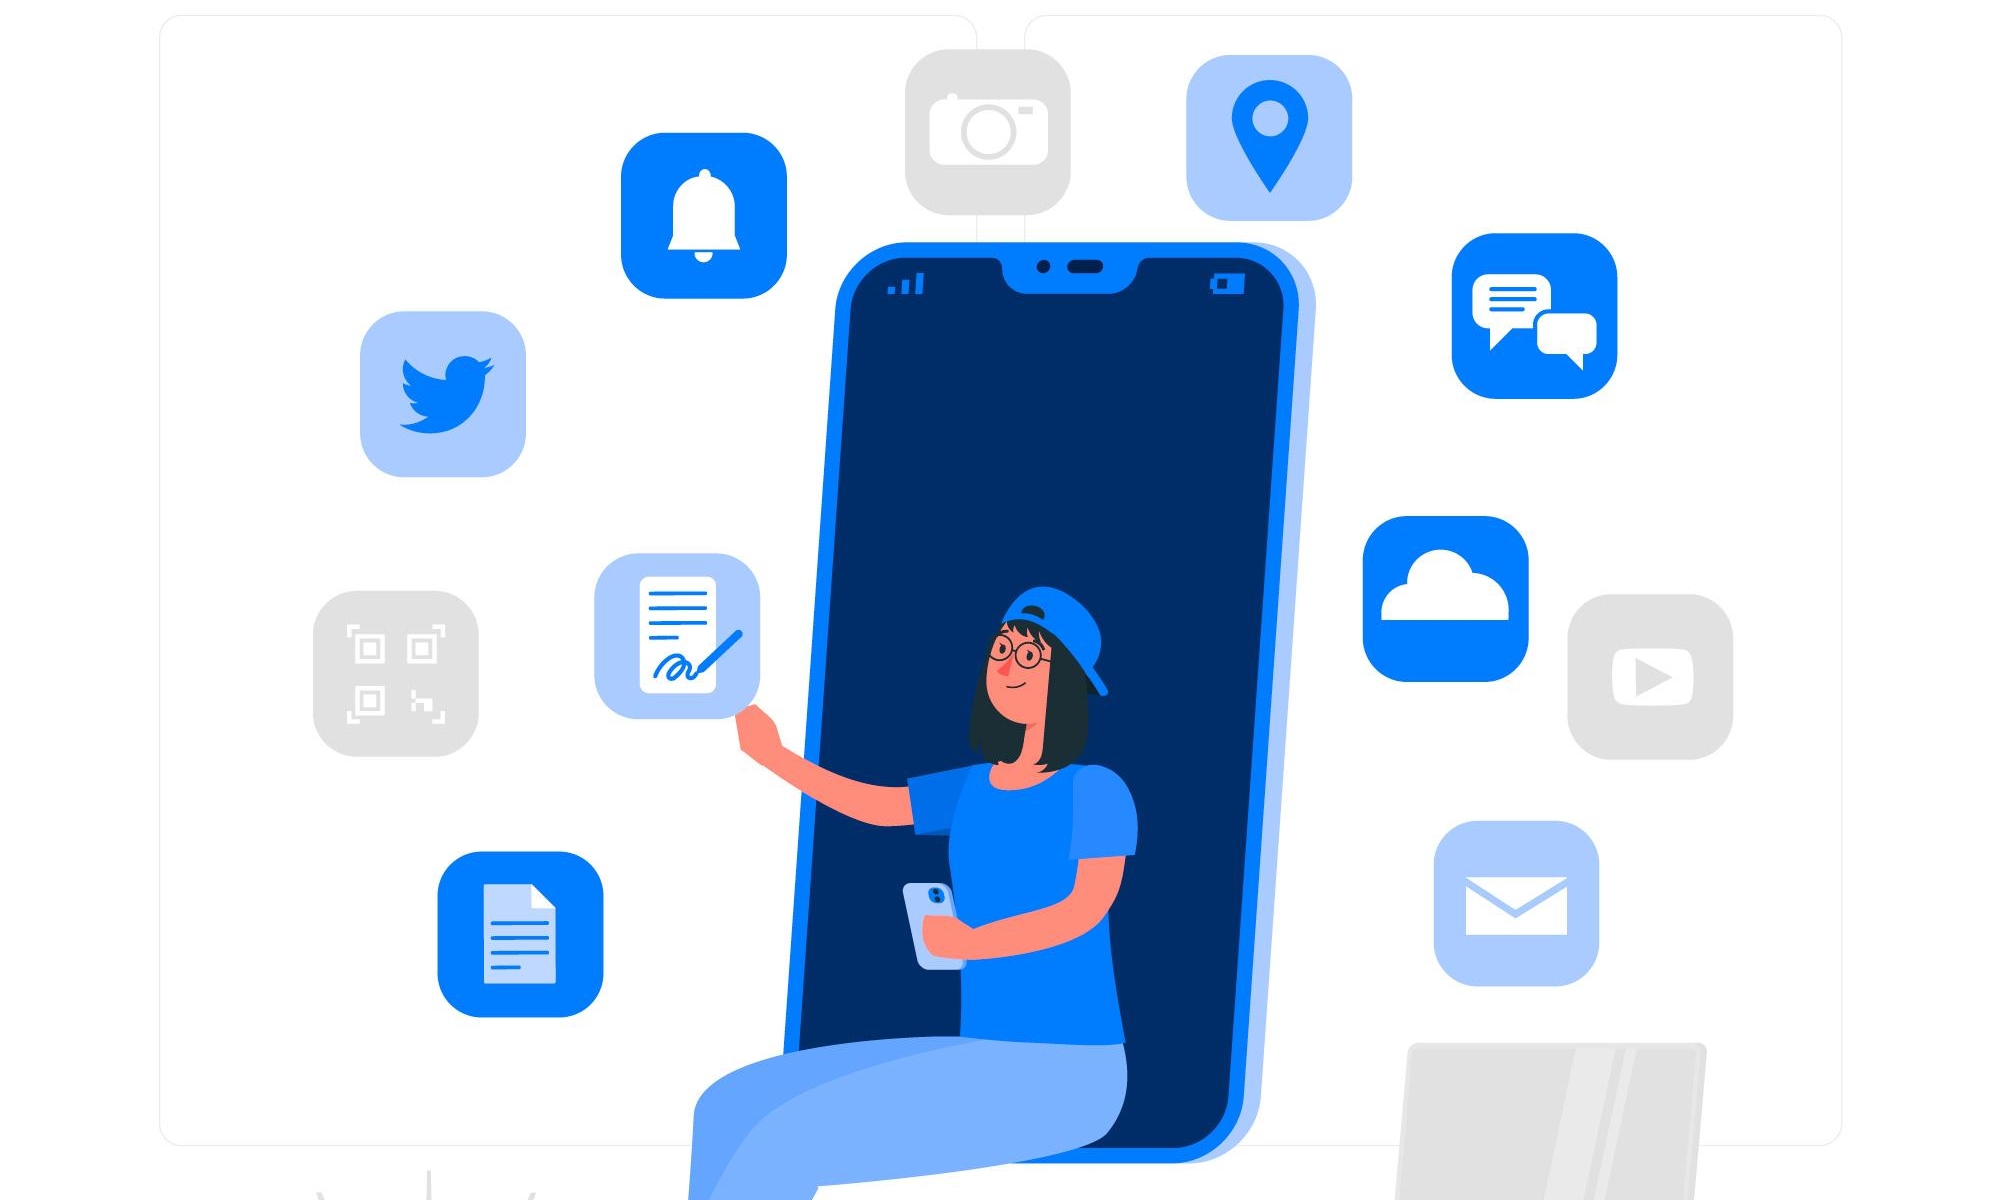
クリエイターとして活動していると各種SNSアカウントやYoutubeのチャンネル等、ブランディングや営業のために自分の持つメディアが多くなっていきます。
とはいえSNSのプロフィール欄は文字数も限られているので全てのリンクを貼り付けることはできません。またリンクだらけのプロフィール欄では見栄えも悪いです。
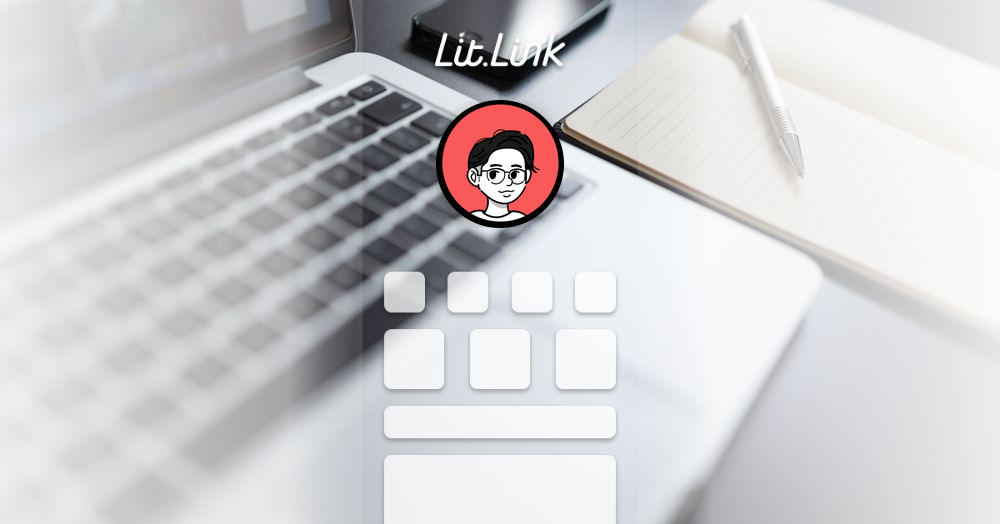
そんな時、非常に役に立つのがLitLinkという無料のリンクまとめツールです。
運営者私も自身のTwitterで活用していますが大変便利です。
LitLinkを導入することで自分のメディアをもれなく宣伝できる点はクリエイターからすると大変便利です。
SNSのリンク以外でも例えば
- 独自教材のリンク
- ブログのリンク
- 自分の商品があるネットショップのリンク
- noteのリンク
などのオリジナルコンテンツをまとめることもできます。
では本文をご覧ください。
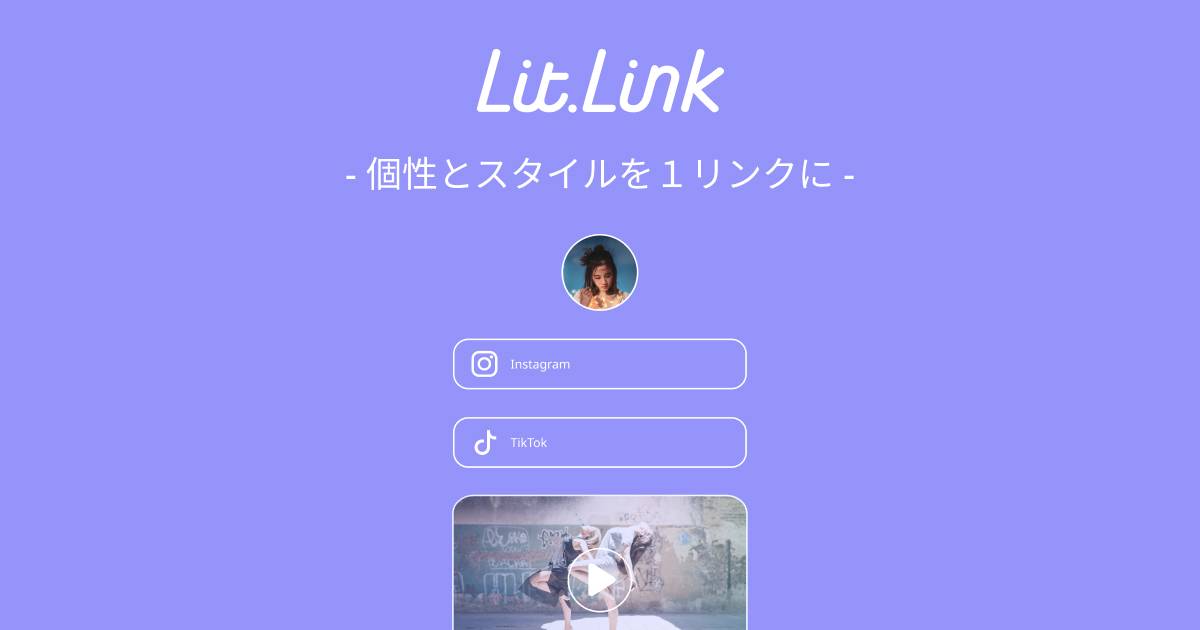
LitLinkとは
LitLinkは一言で言うとさまざまなリンクをおしゃれにまとめることができる無料ツールです。
運営者linktreeなどの同系サービスを一通り試しましたが、操作の体感性と見栄えの良さが段違いだったLitLinkに即決めしました。
LitLinkの登録方法
登録方法はLINE登録とメールアドレス登録の2種類あります。
①LINEで新規登録する方法
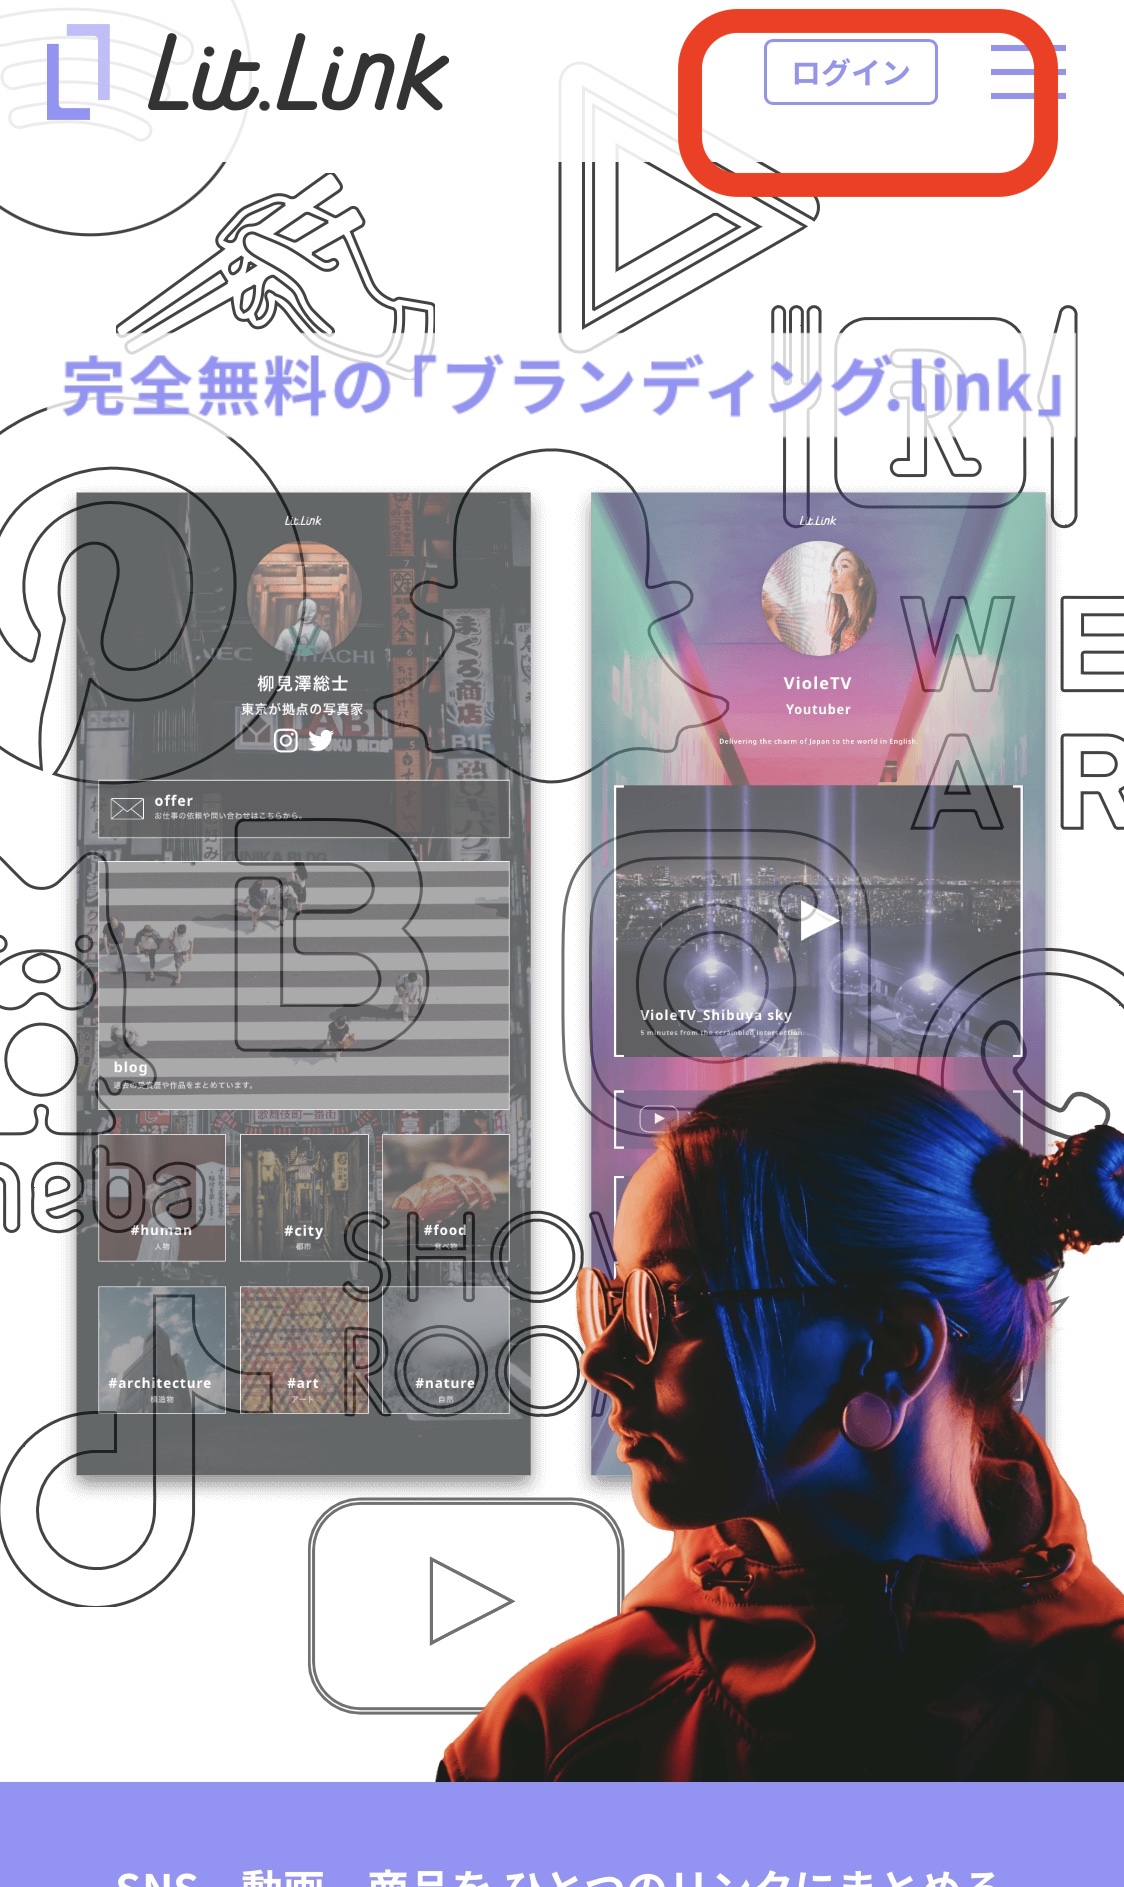
ステップ1
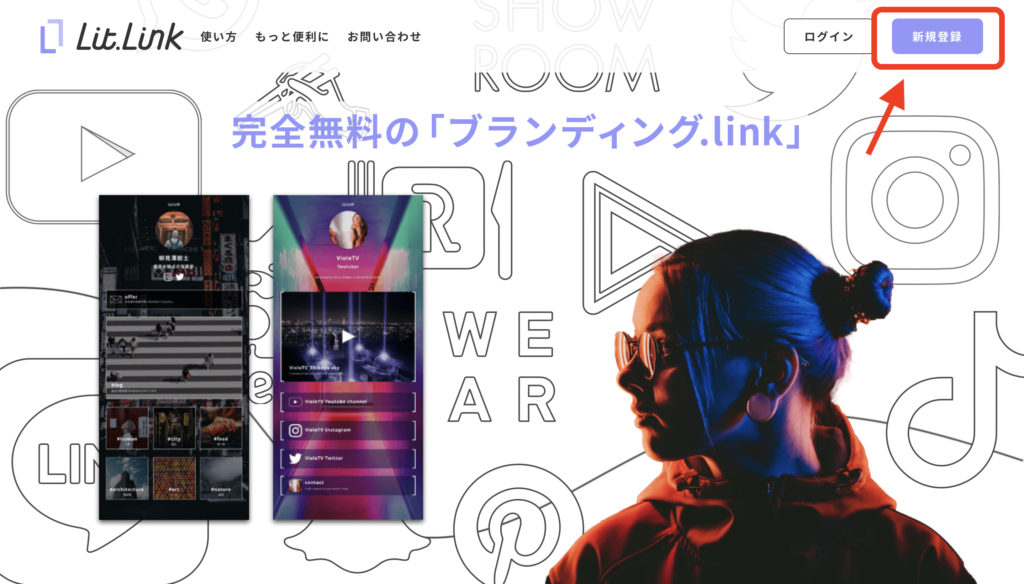
右上の新規登録を押します
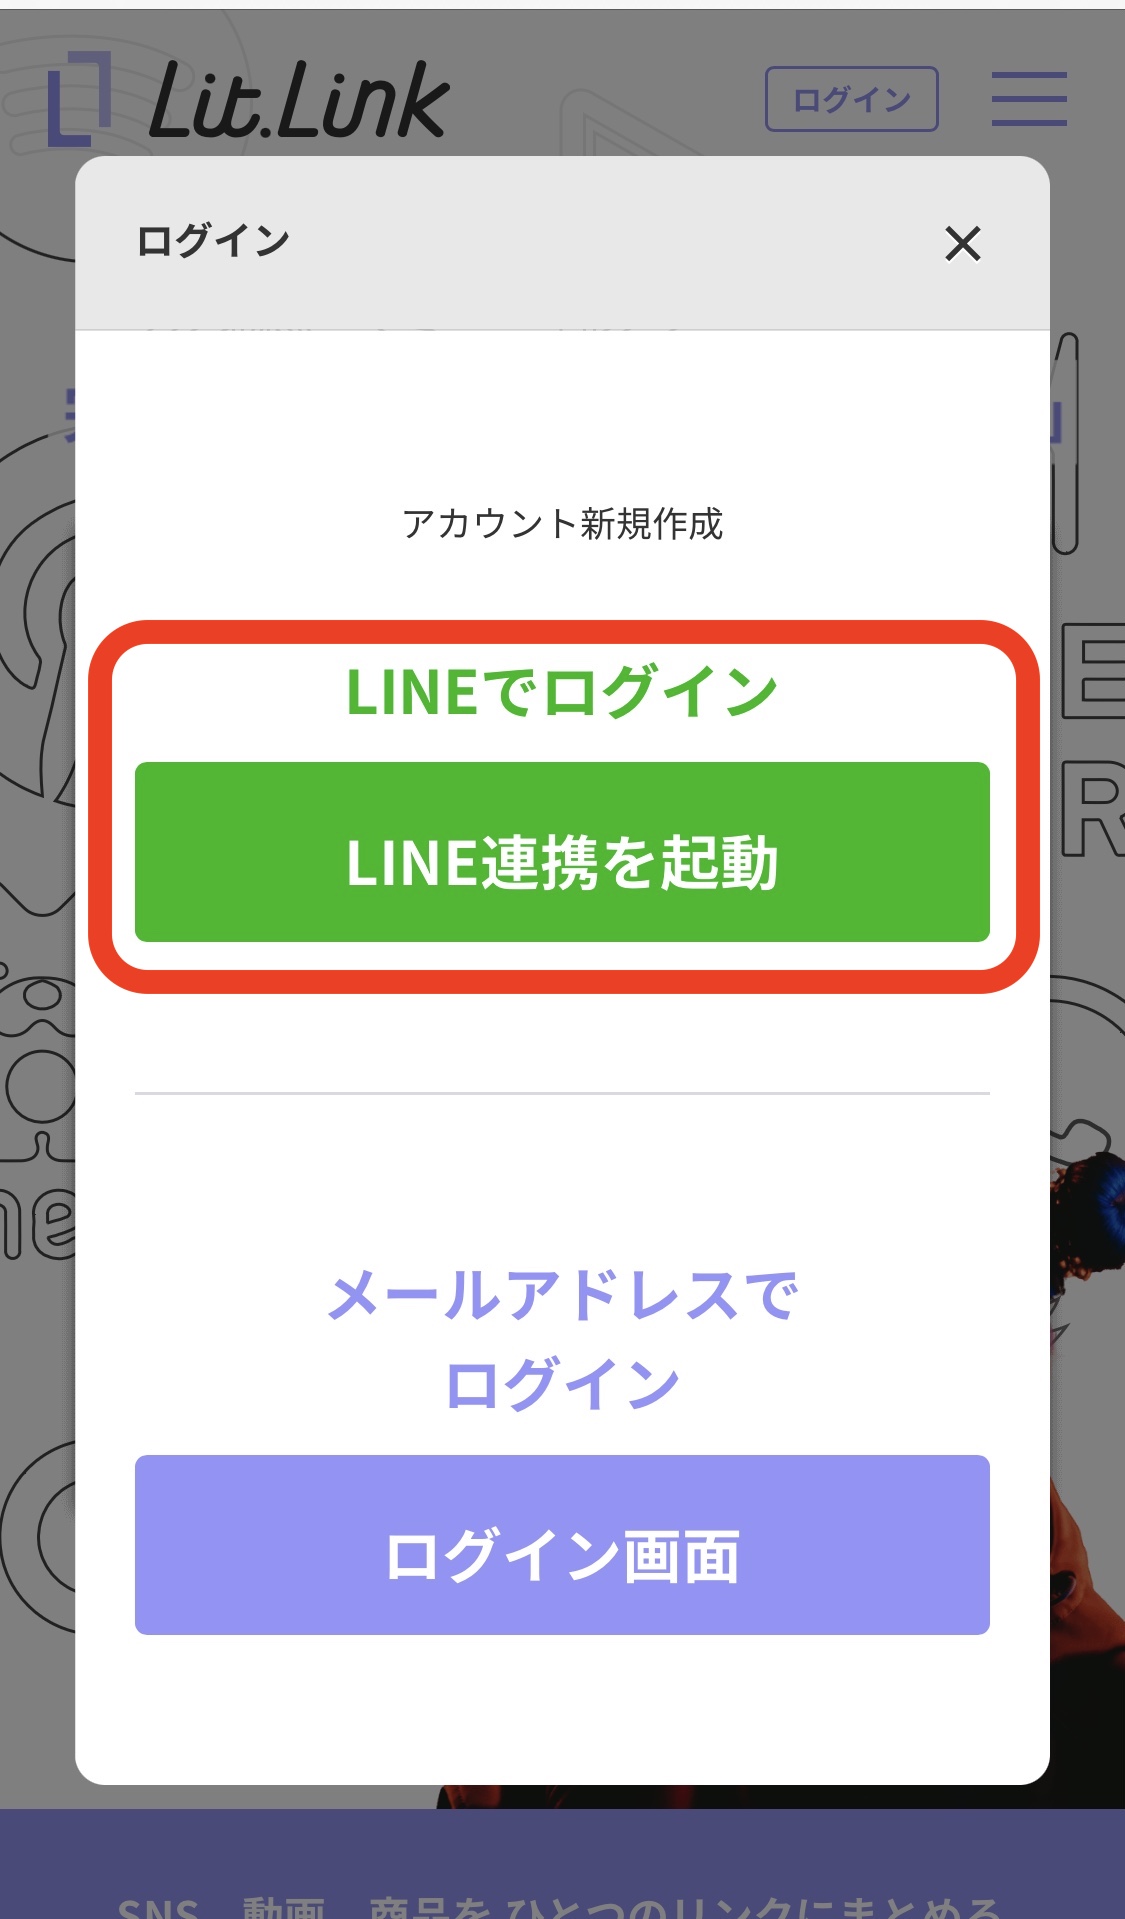
ステップ2
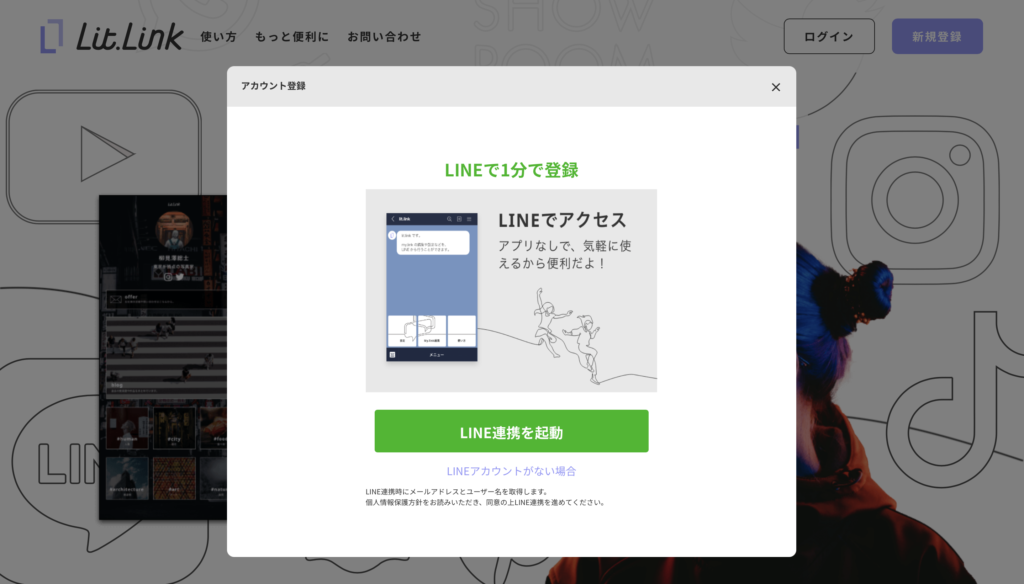
LINE連携を起動を押します
ステップ3
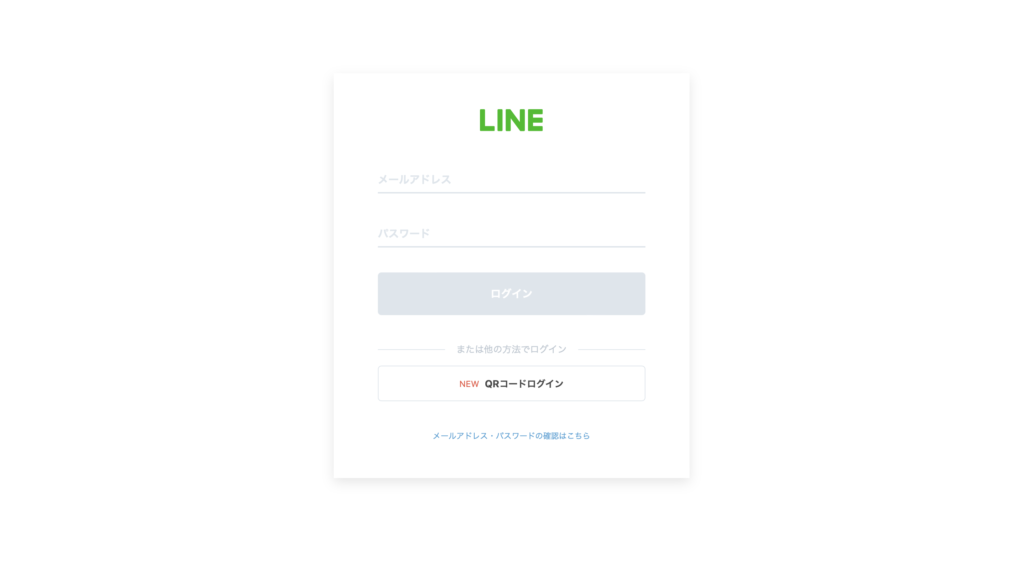
LINEに登録されてあるメールアドレスとパスワードを入力します
※LINEの登録メールアドレスは[ホーム]>[右上マーク]>[アカウント]から確認できます
ステップ4
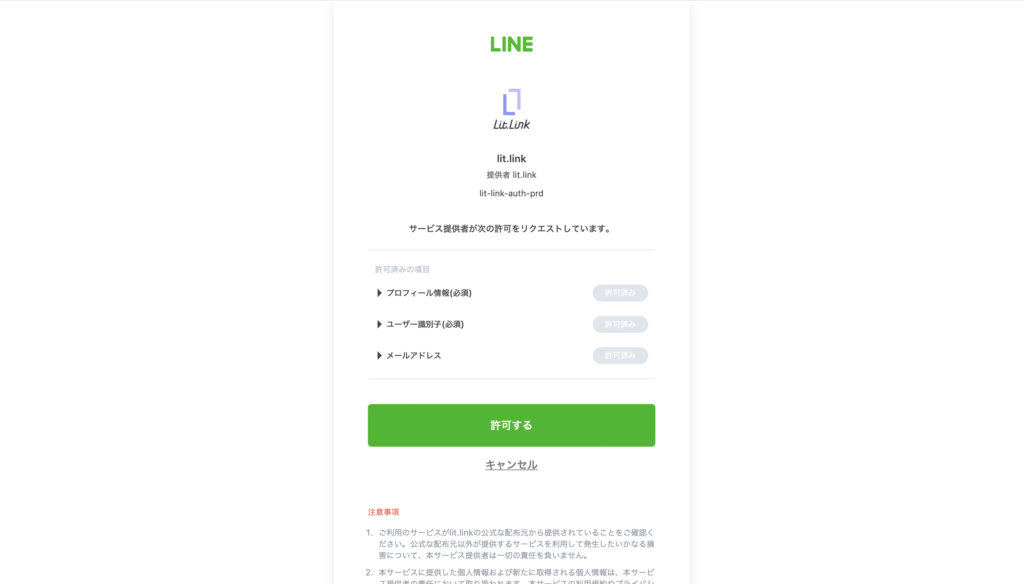
許可するを押します
ステップ5
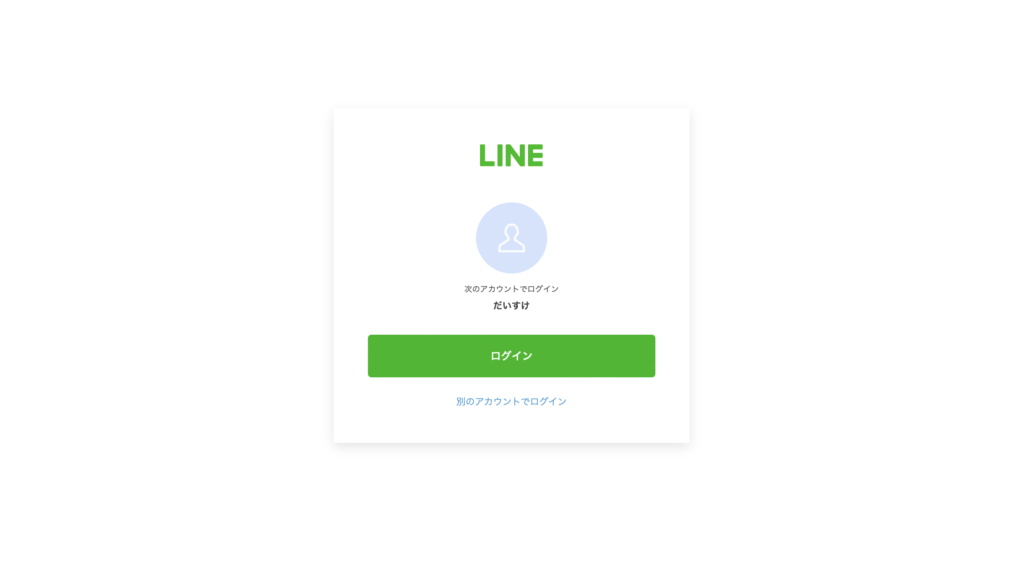
ログインを押して完了です
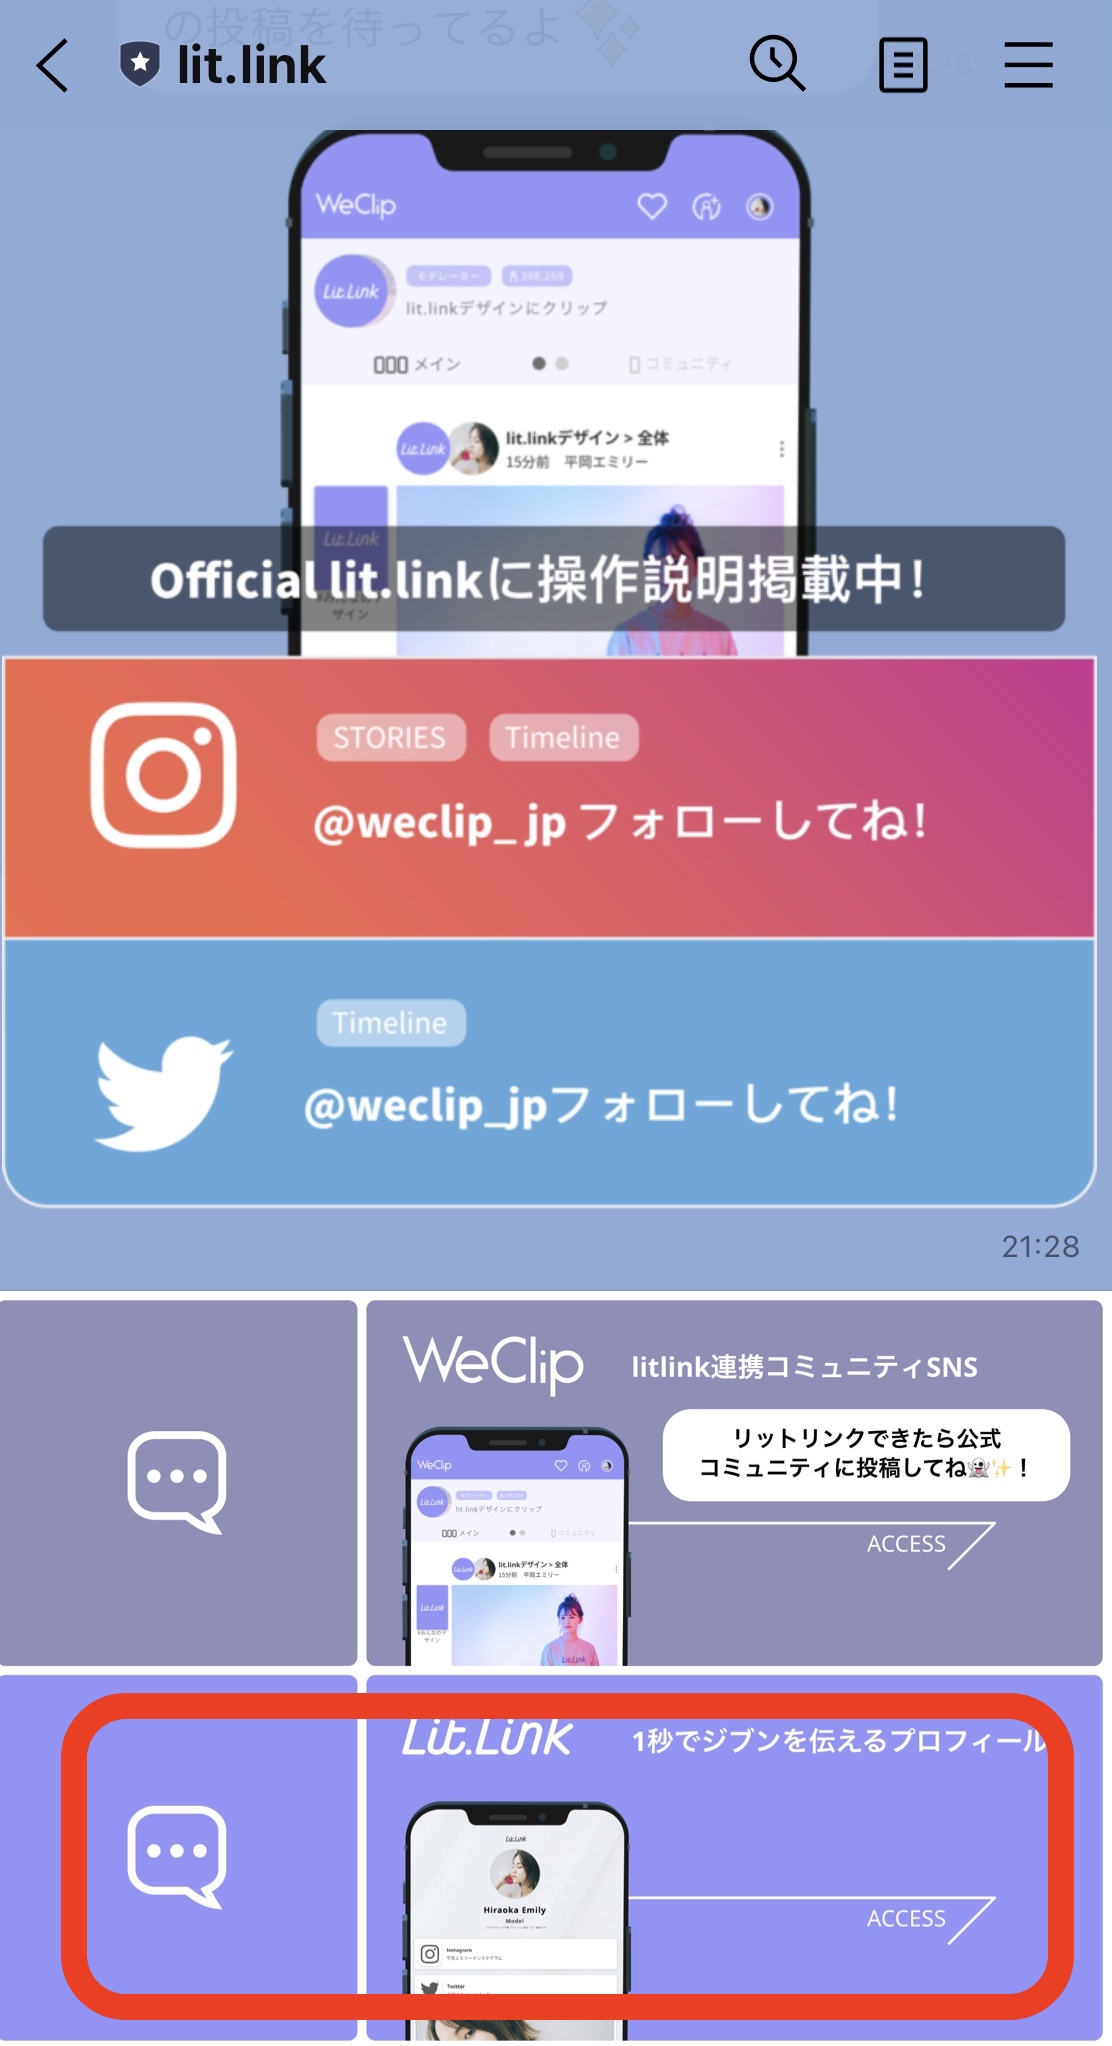
ステップ6
LINEのLitLinkでメニューを開き最下部の1秒でジブンを伝えるプロフィールをタップしてアカウント情報登録に進みます
※ページ遷移先でアカウント情報を入力すれば登録が完了します
運営者画面にしたがって進めば問題ないです。LINEで登録するとLINE上でLitLinkの編集が可能になります。
②メールアドレスで新規登録する方法
ステップ1
右上の新規登録を押します
ステップ2
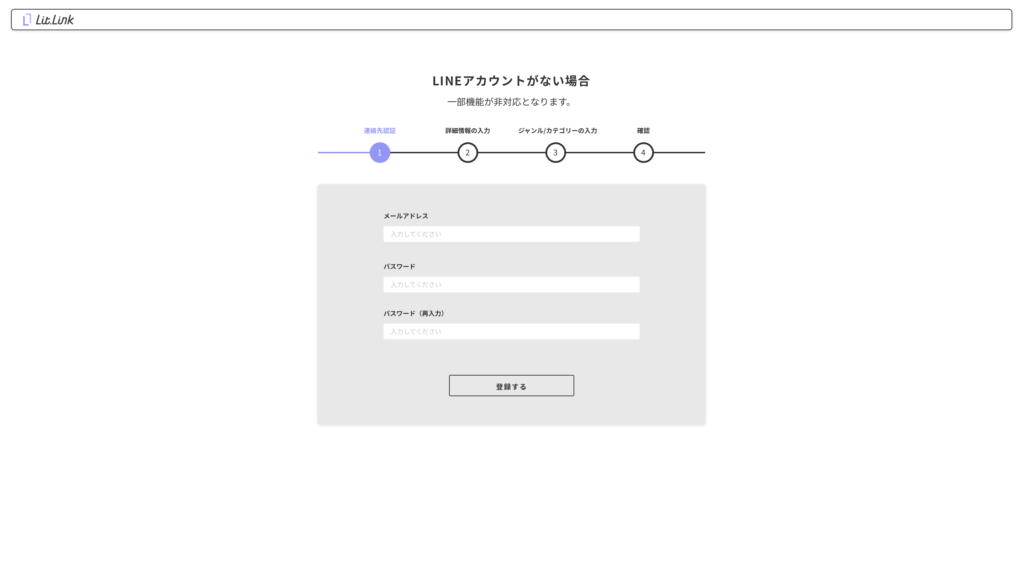
メールアドレスと任意のパスワードを設定し[登録する]を押します
ステップ3
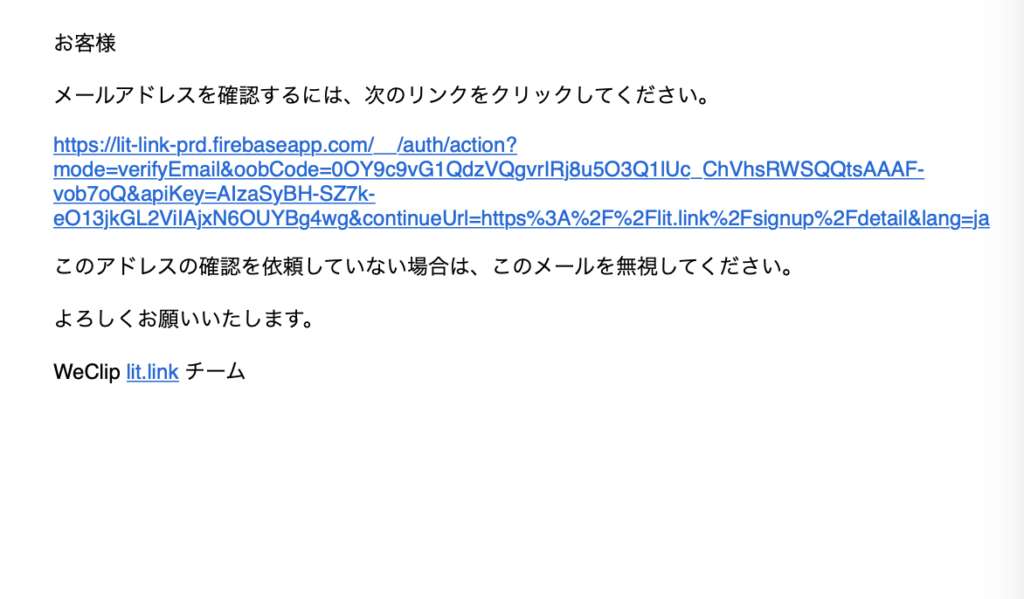
届いたメールに記載のあるリンクを押します
ステップ4

アカウント情報を入力すれば登録が完了です
運営者こちらも特に難しいことはないですね。
LitLinkの操作

LitLinkの基本操作からカスタムまで網羅的に説明していきます。
編集画面への遷移(スマホ)
ステップ1
LINEのLitLinkから最下部の1秒でジブンを伝えるプロフィールをタップ▶︎ログインします。
ステップ2
LINE連携を起動をタップ▶︎編集モードをONにします。
別の方法
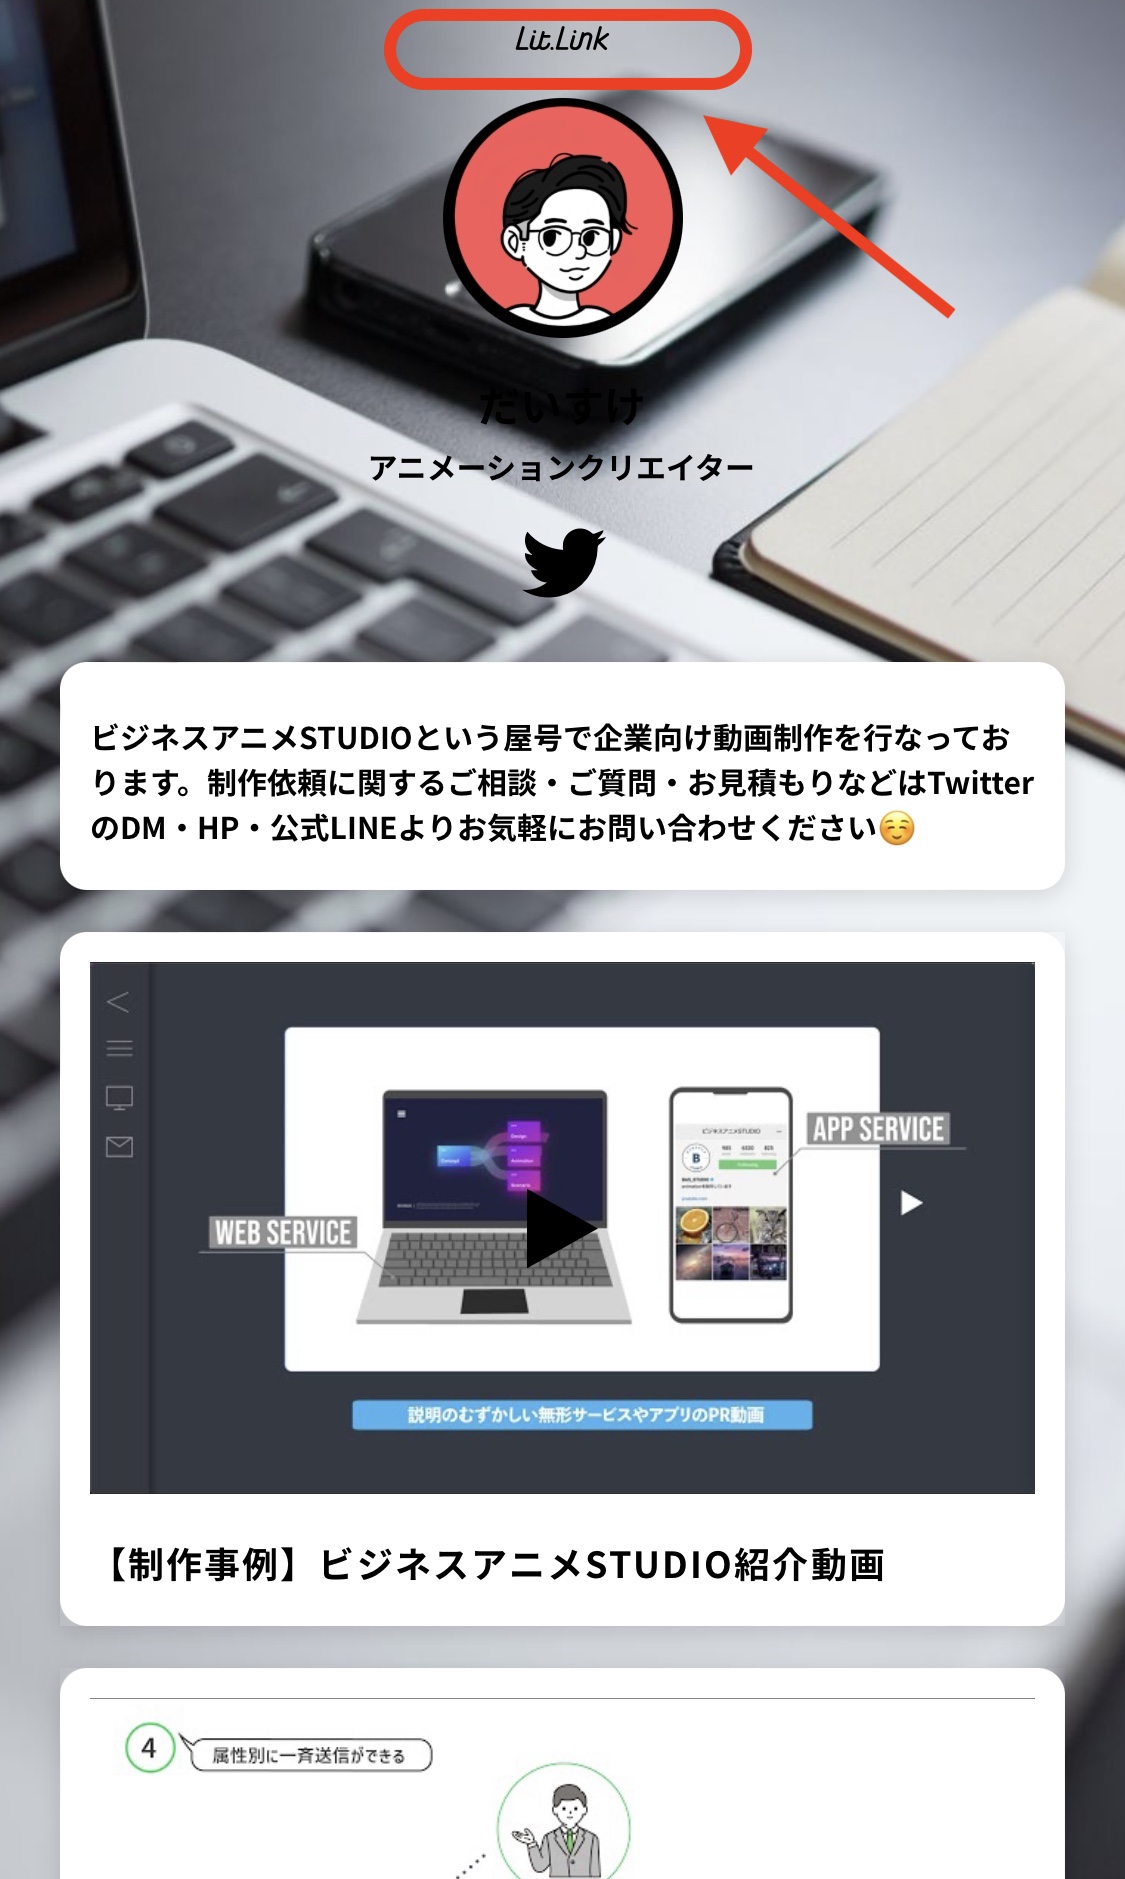
自分のLitLinkページを開き最上部の[LitLink]を押す▶︎編集モードをONにします。
編集画面への遷移(PC)
方法1
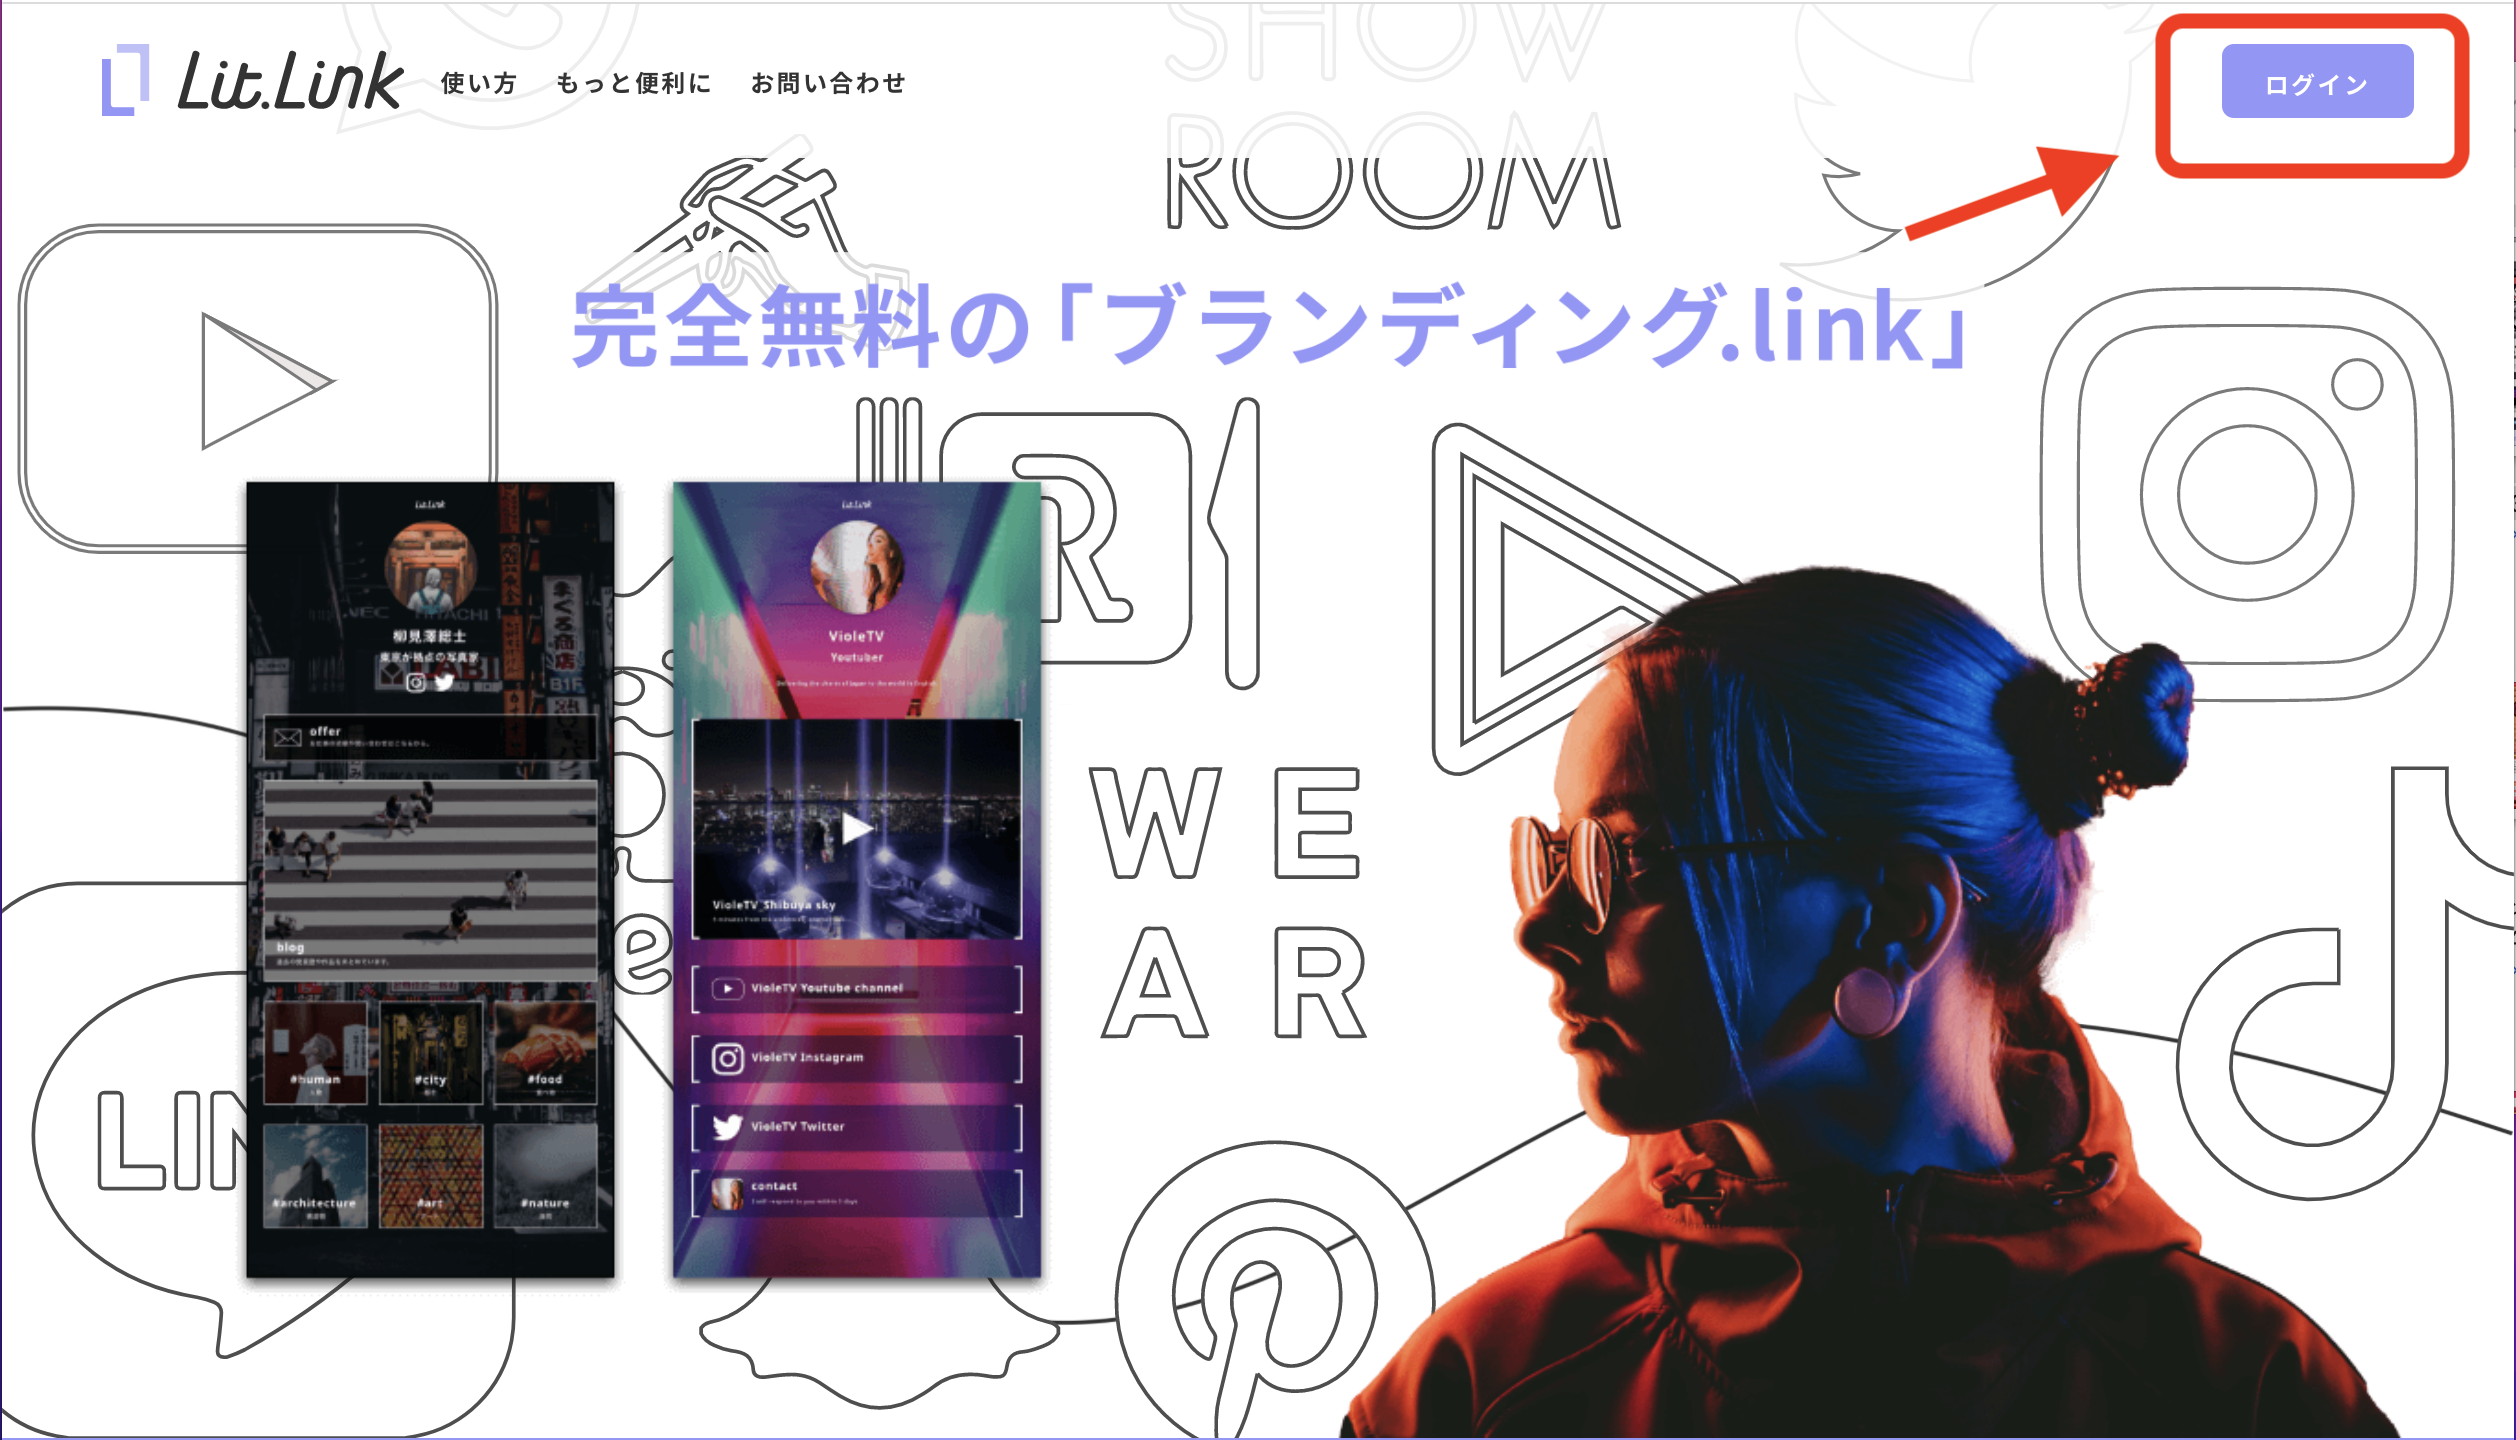
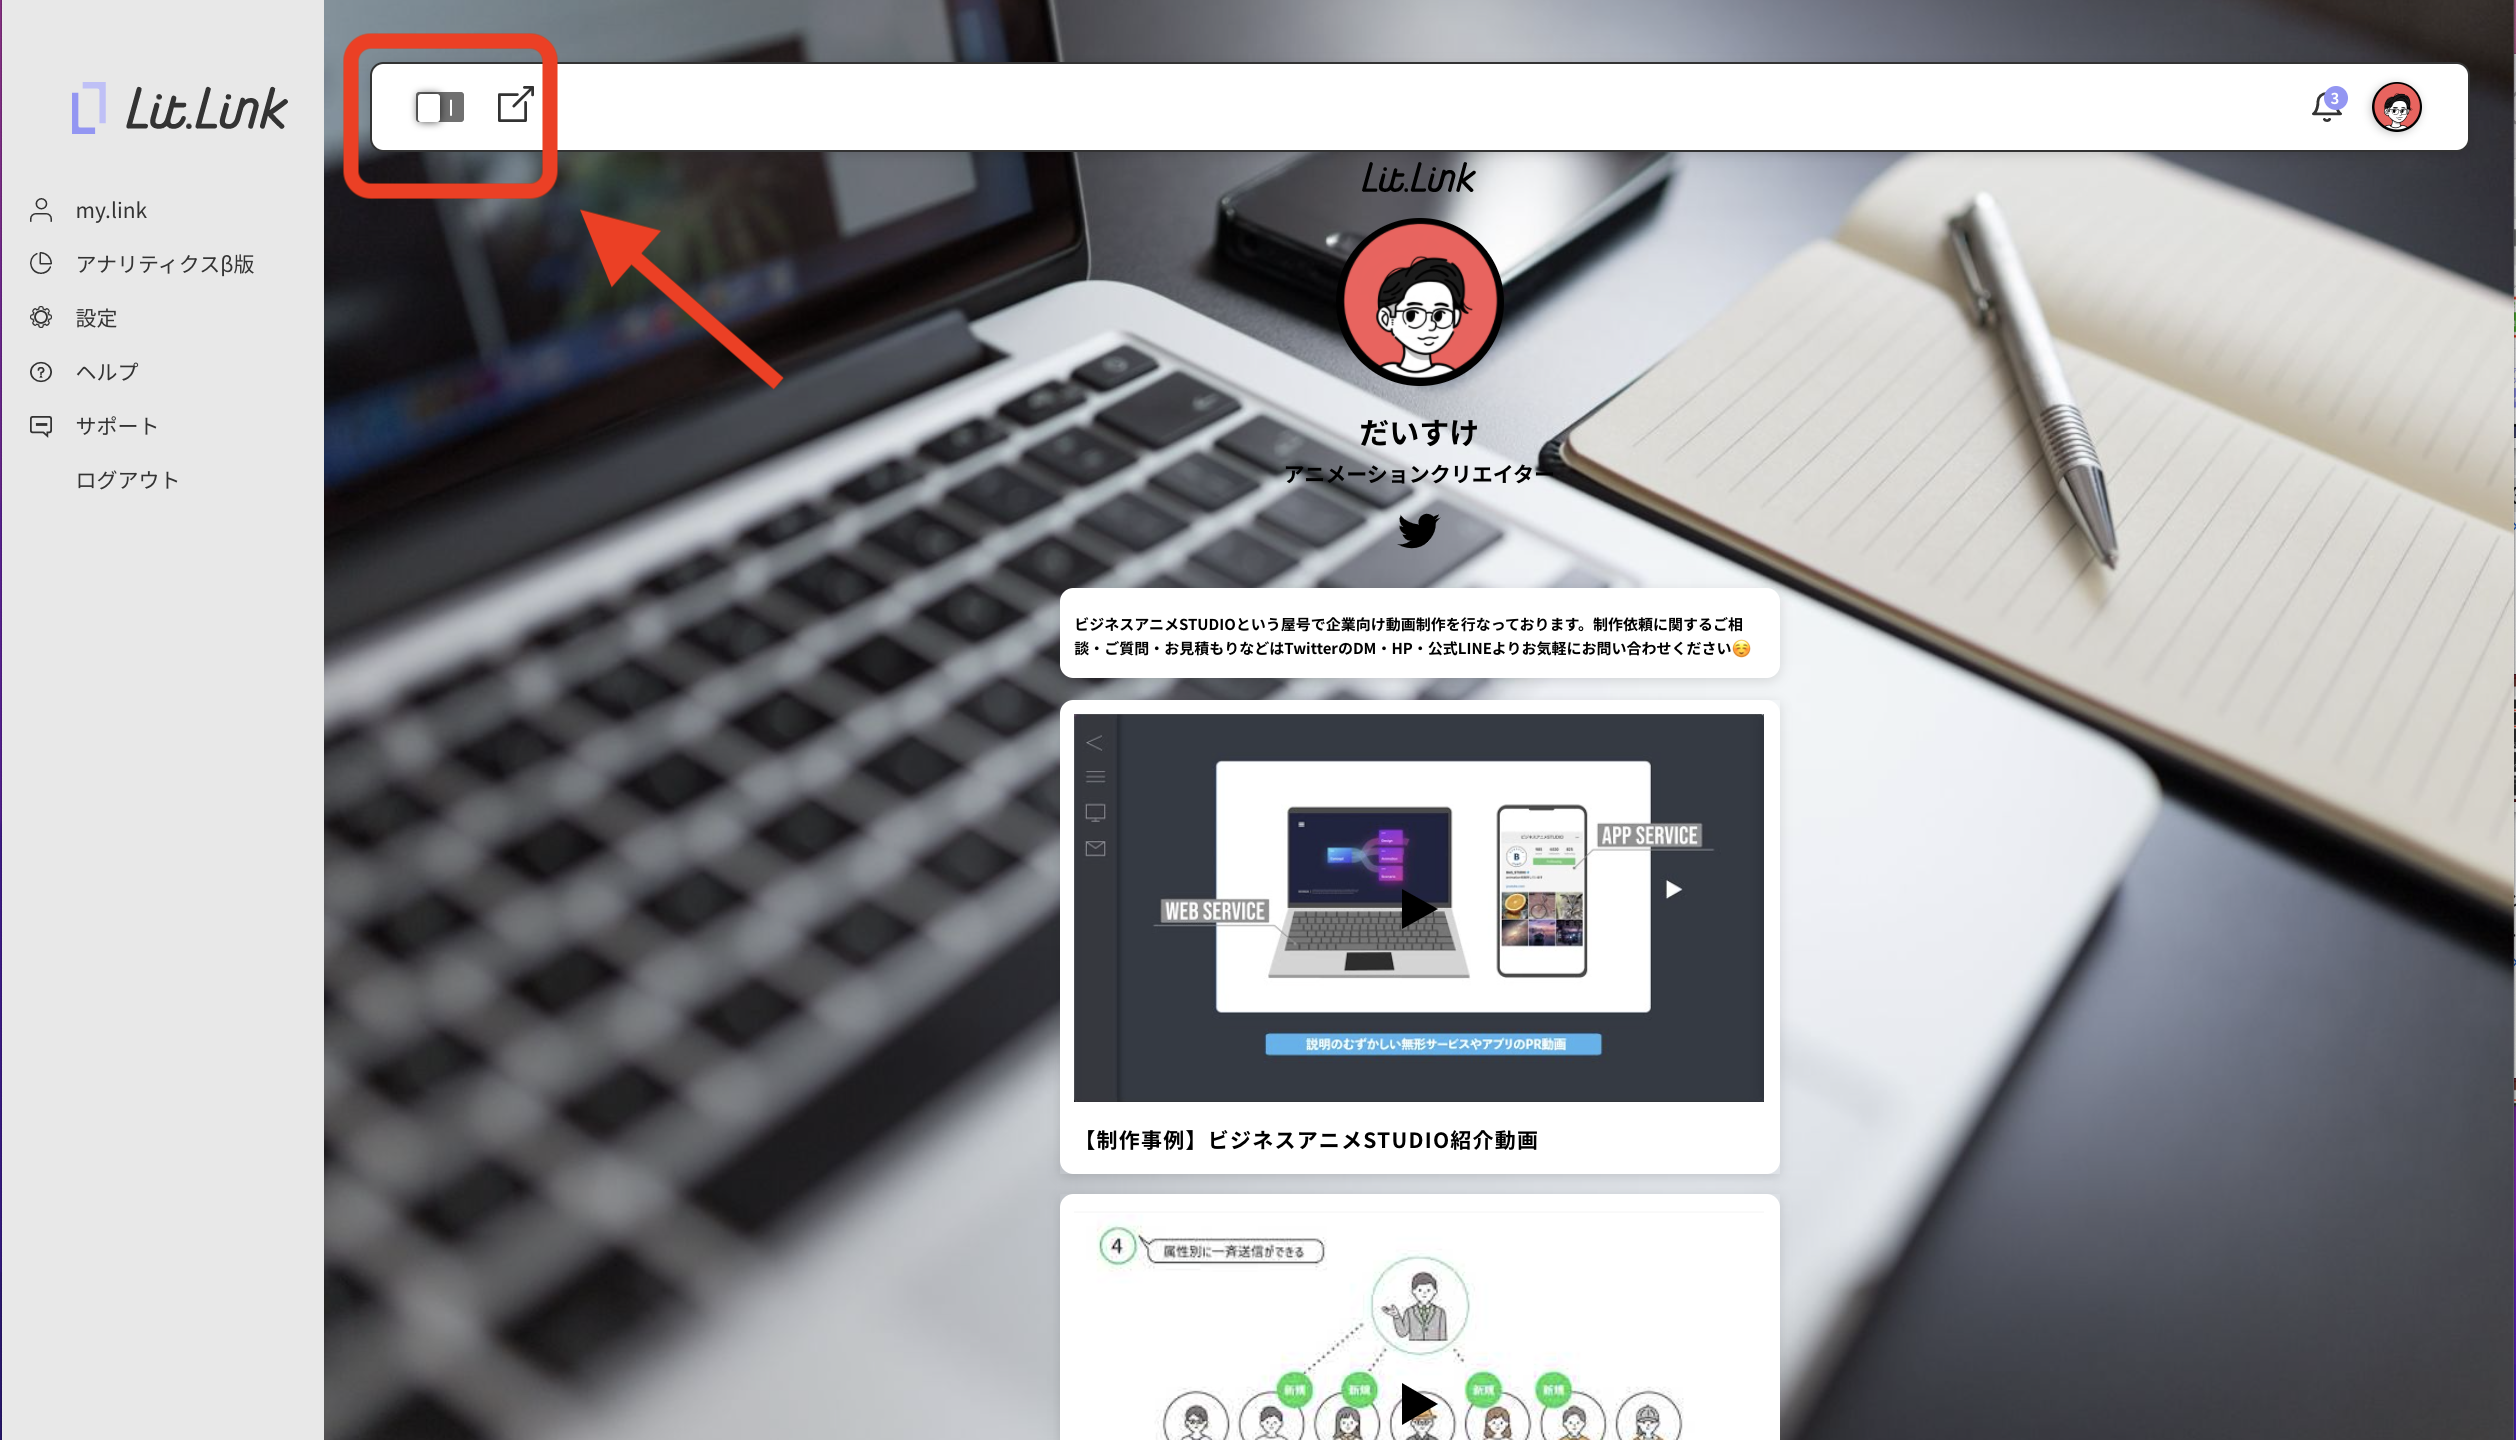
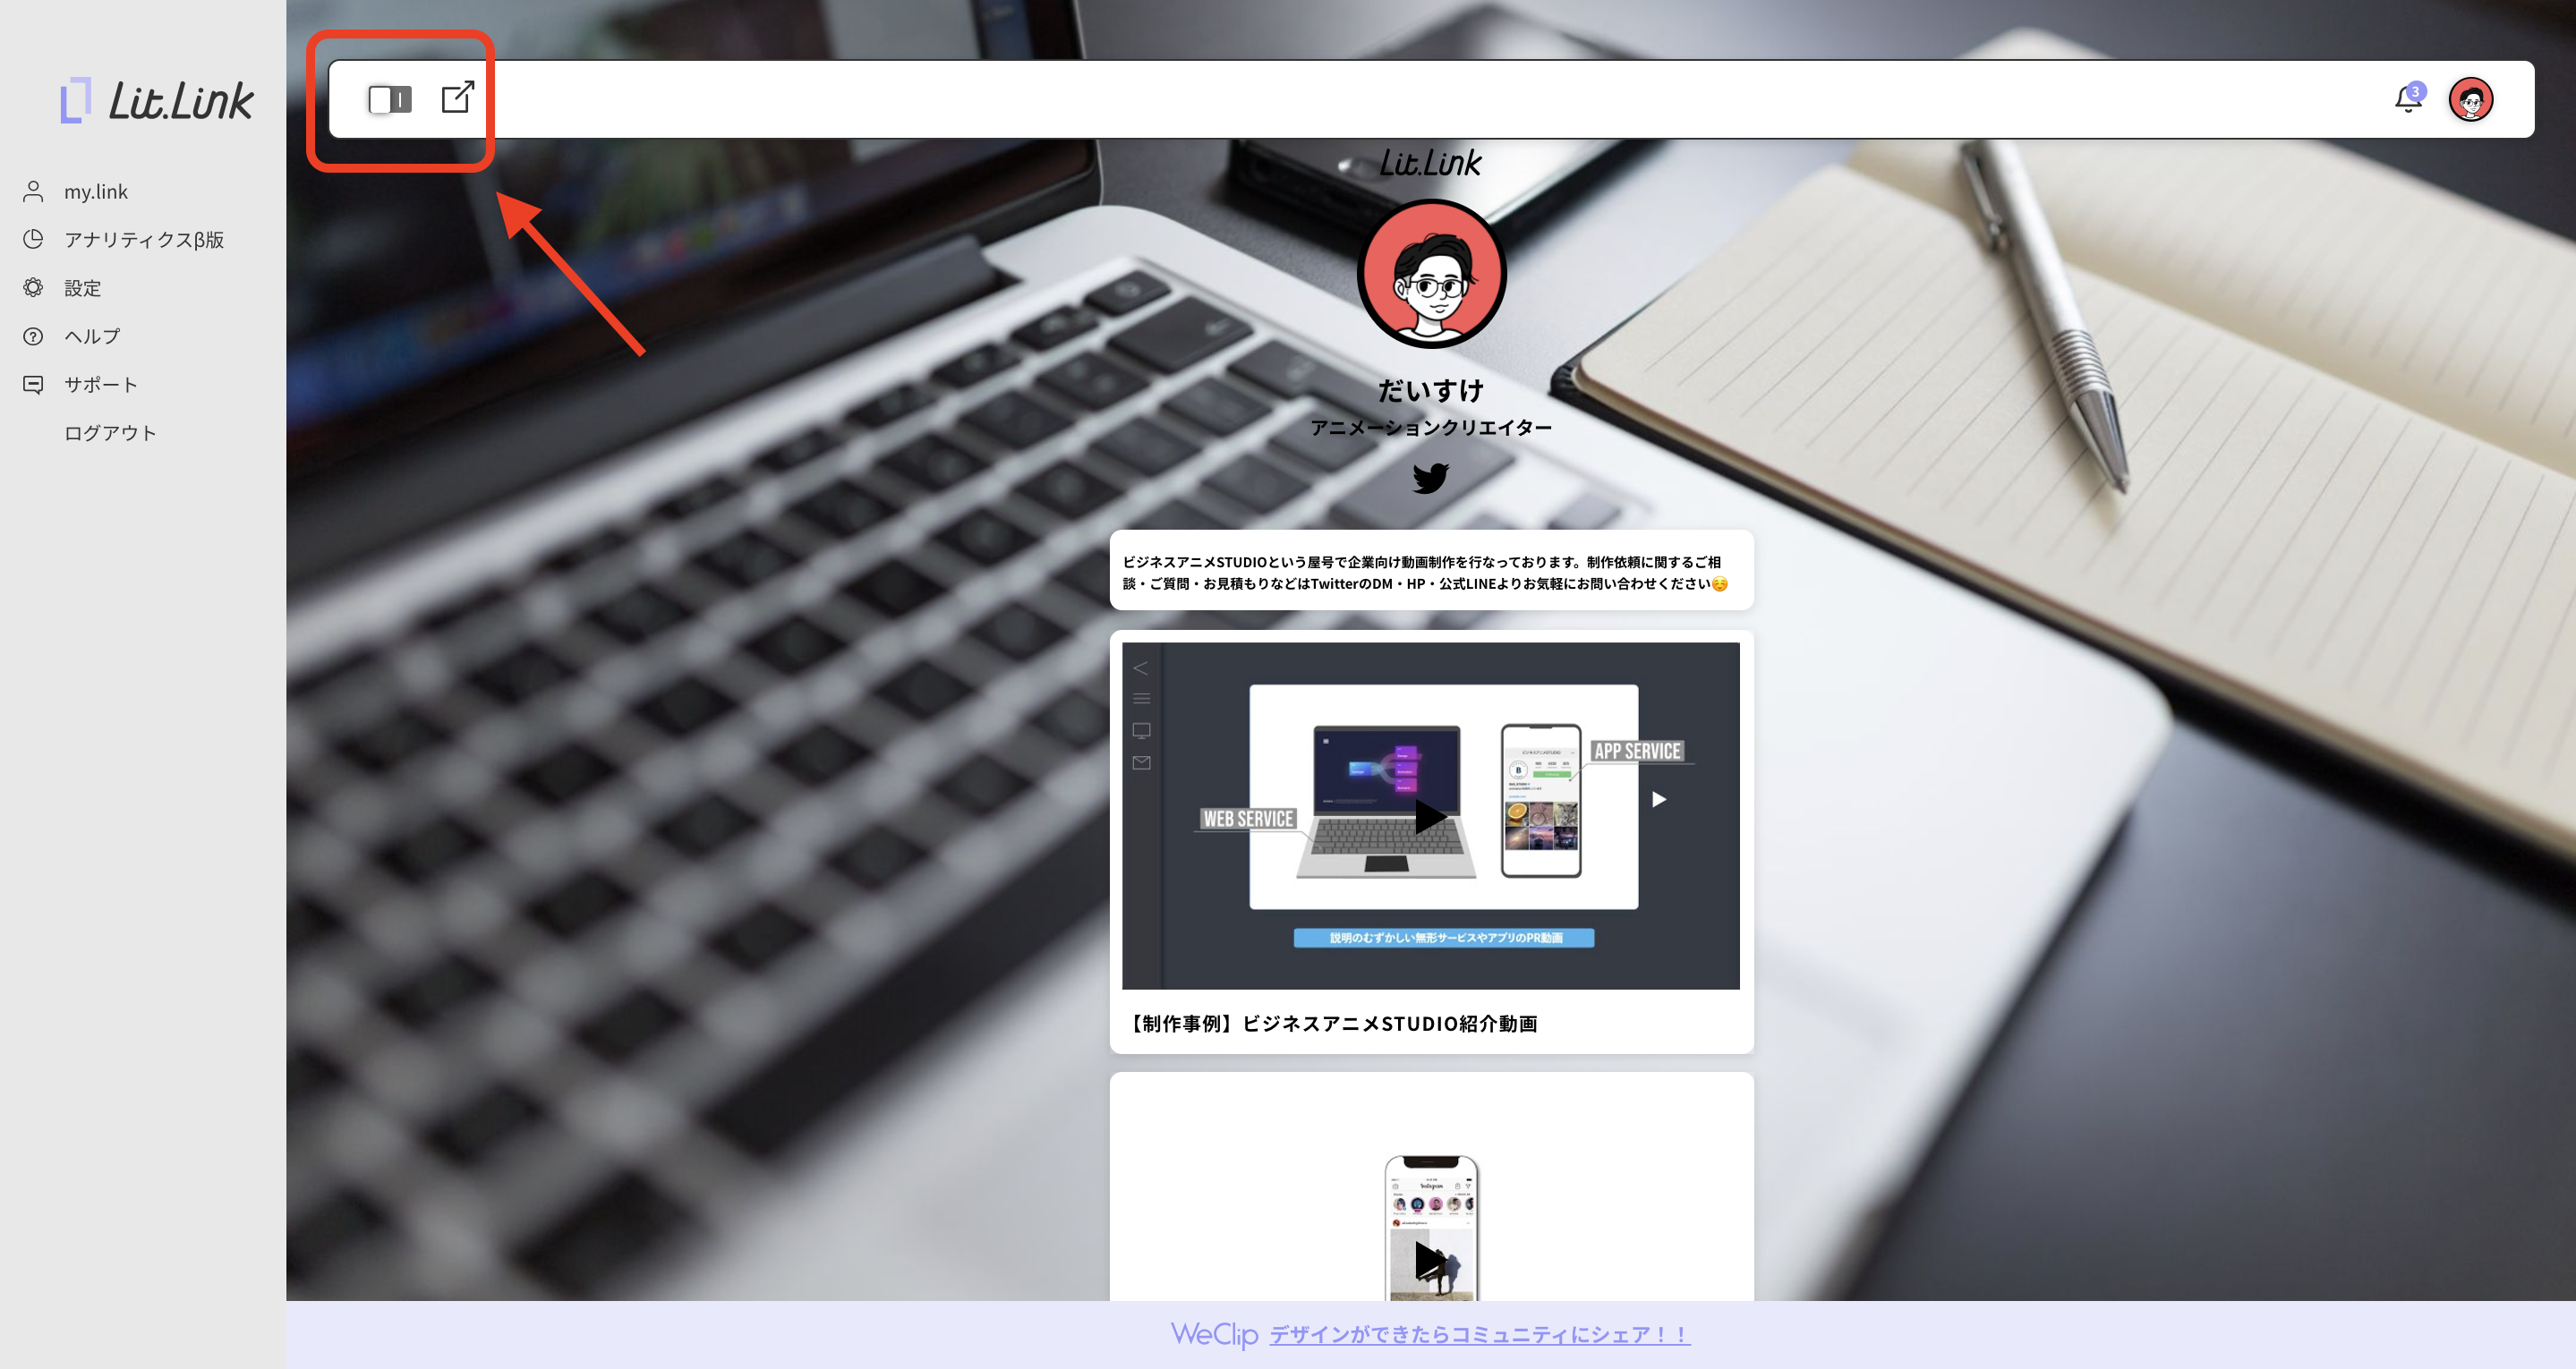
LitLinkのログインページを開き右上のログインを押す▶︎編集モードをONにします。
方法2
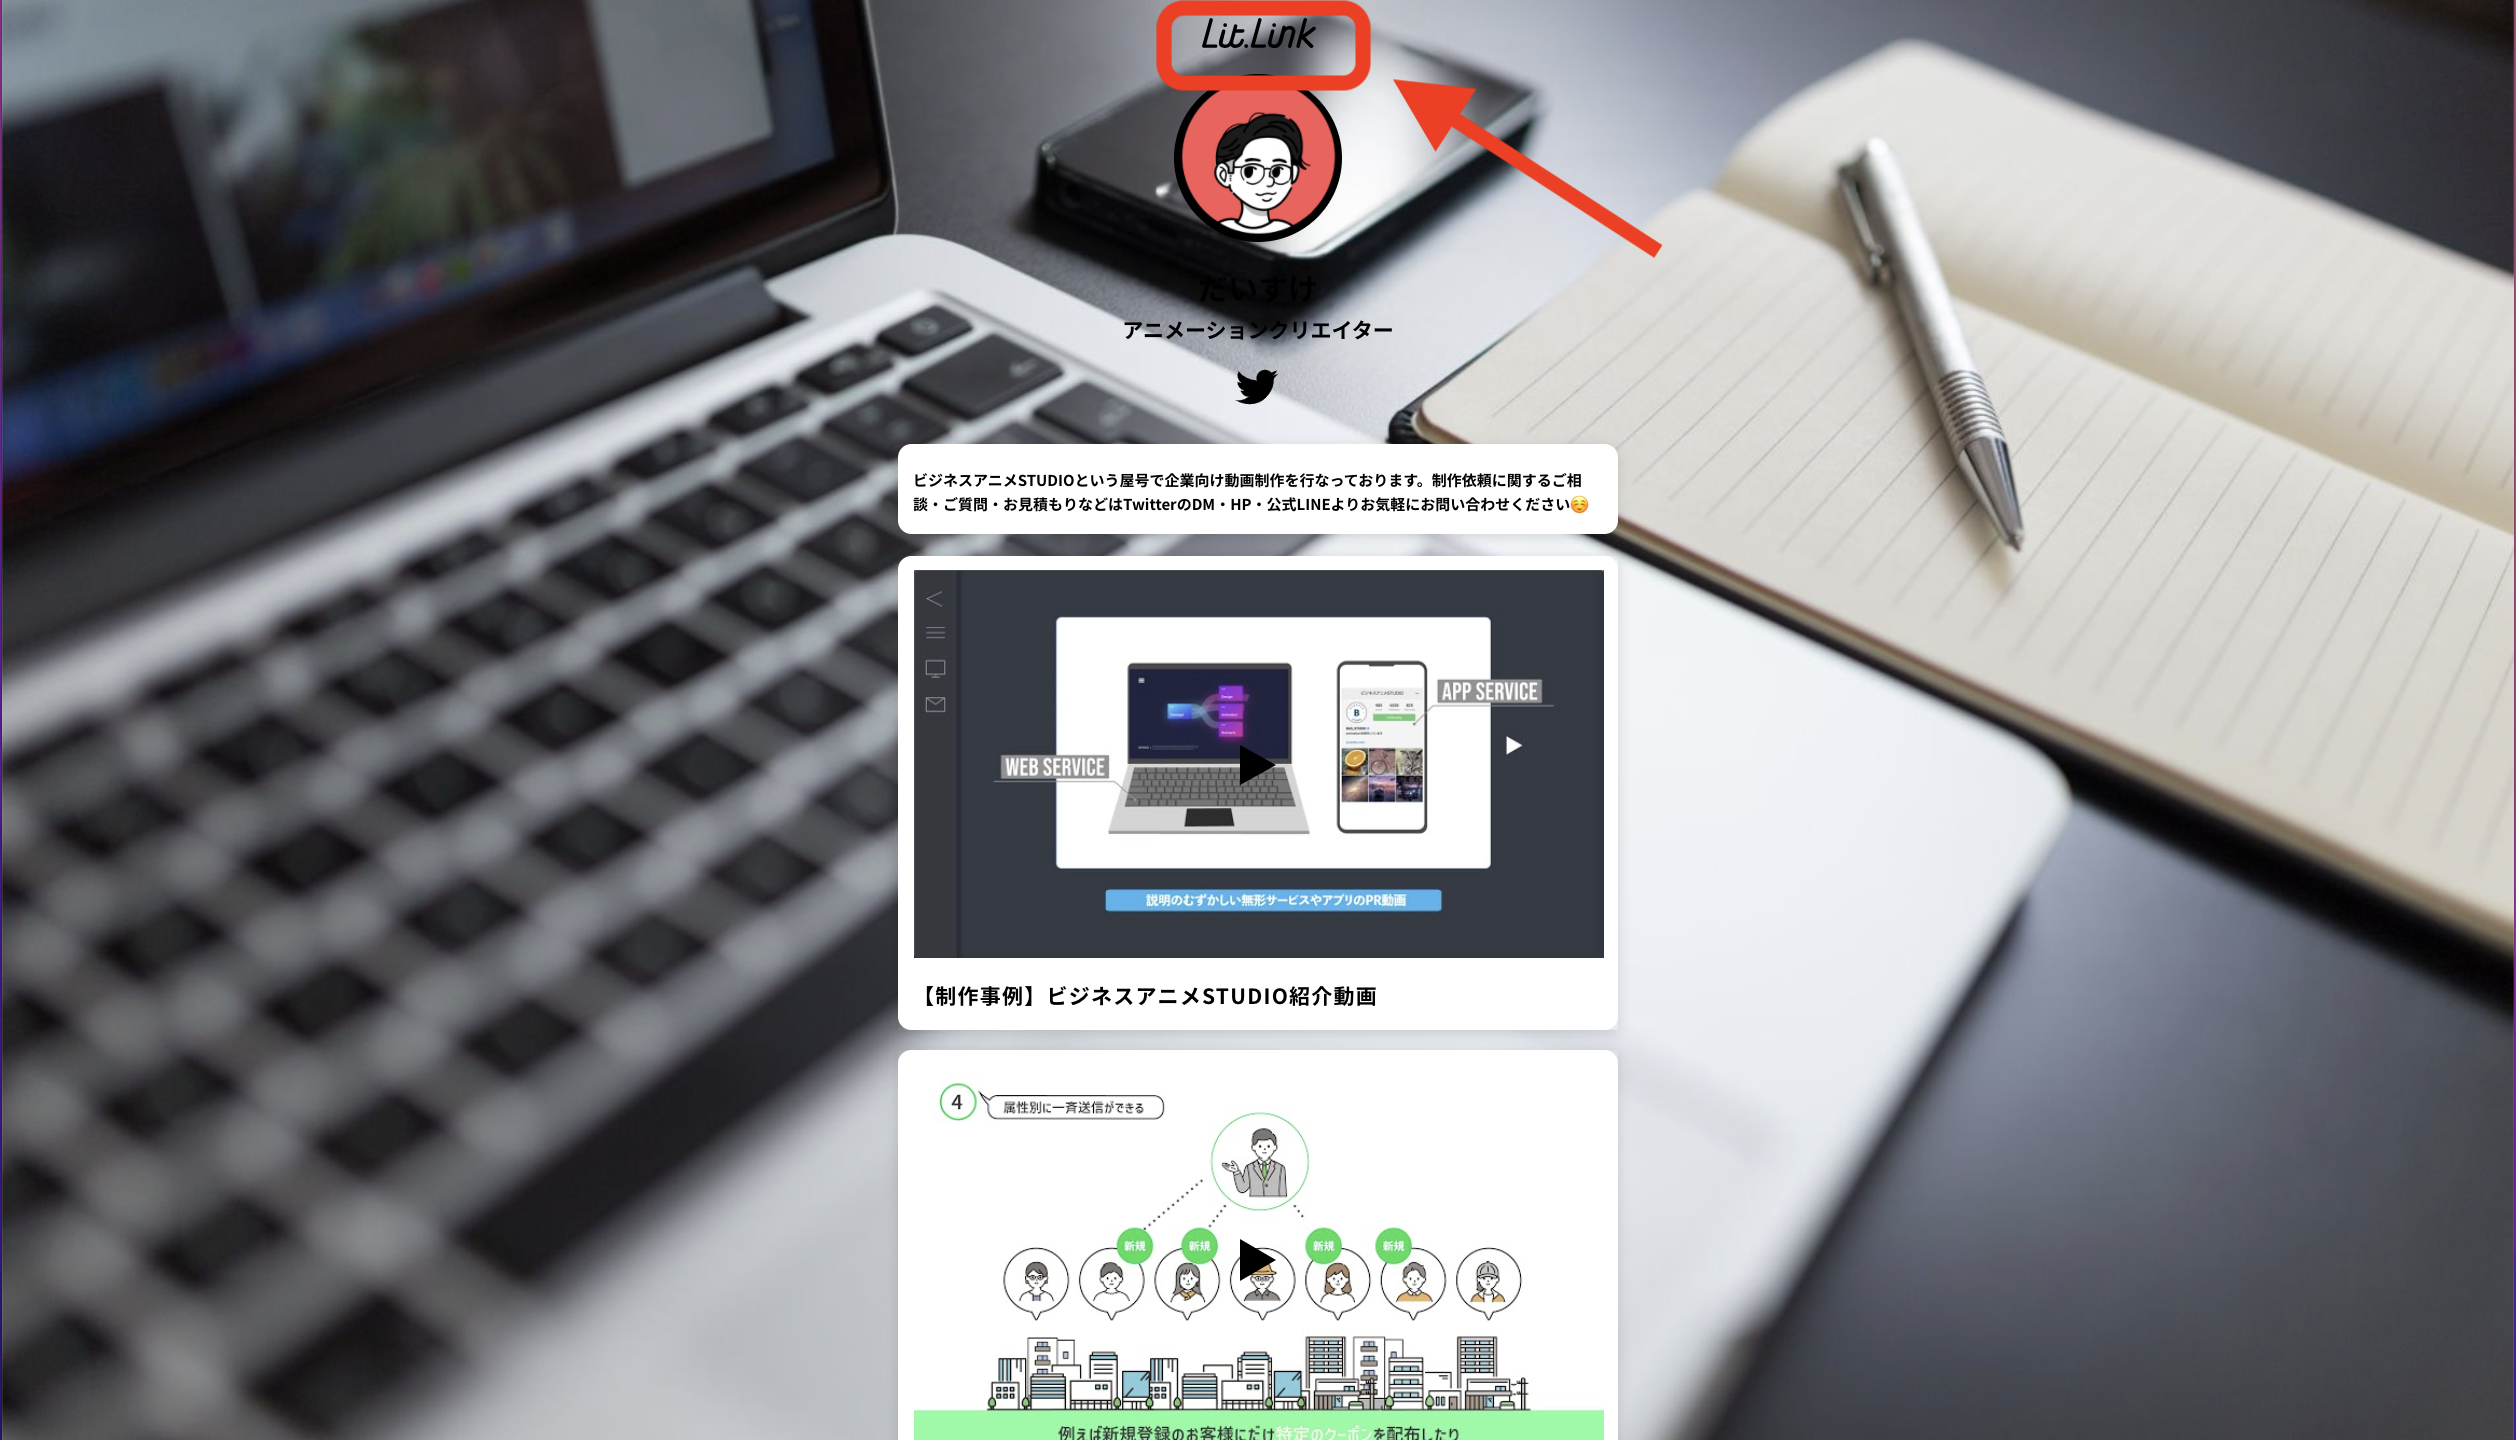
自分のLitLinkページを開き最上部の[LitLink]を押す▶︎編集モードをONにします。
基本操作説明
LitLinkは基本的な操作がシンプルで体感的です。初めに押さえておく基本操作は以下の4つです。
- 編集モード切り替え
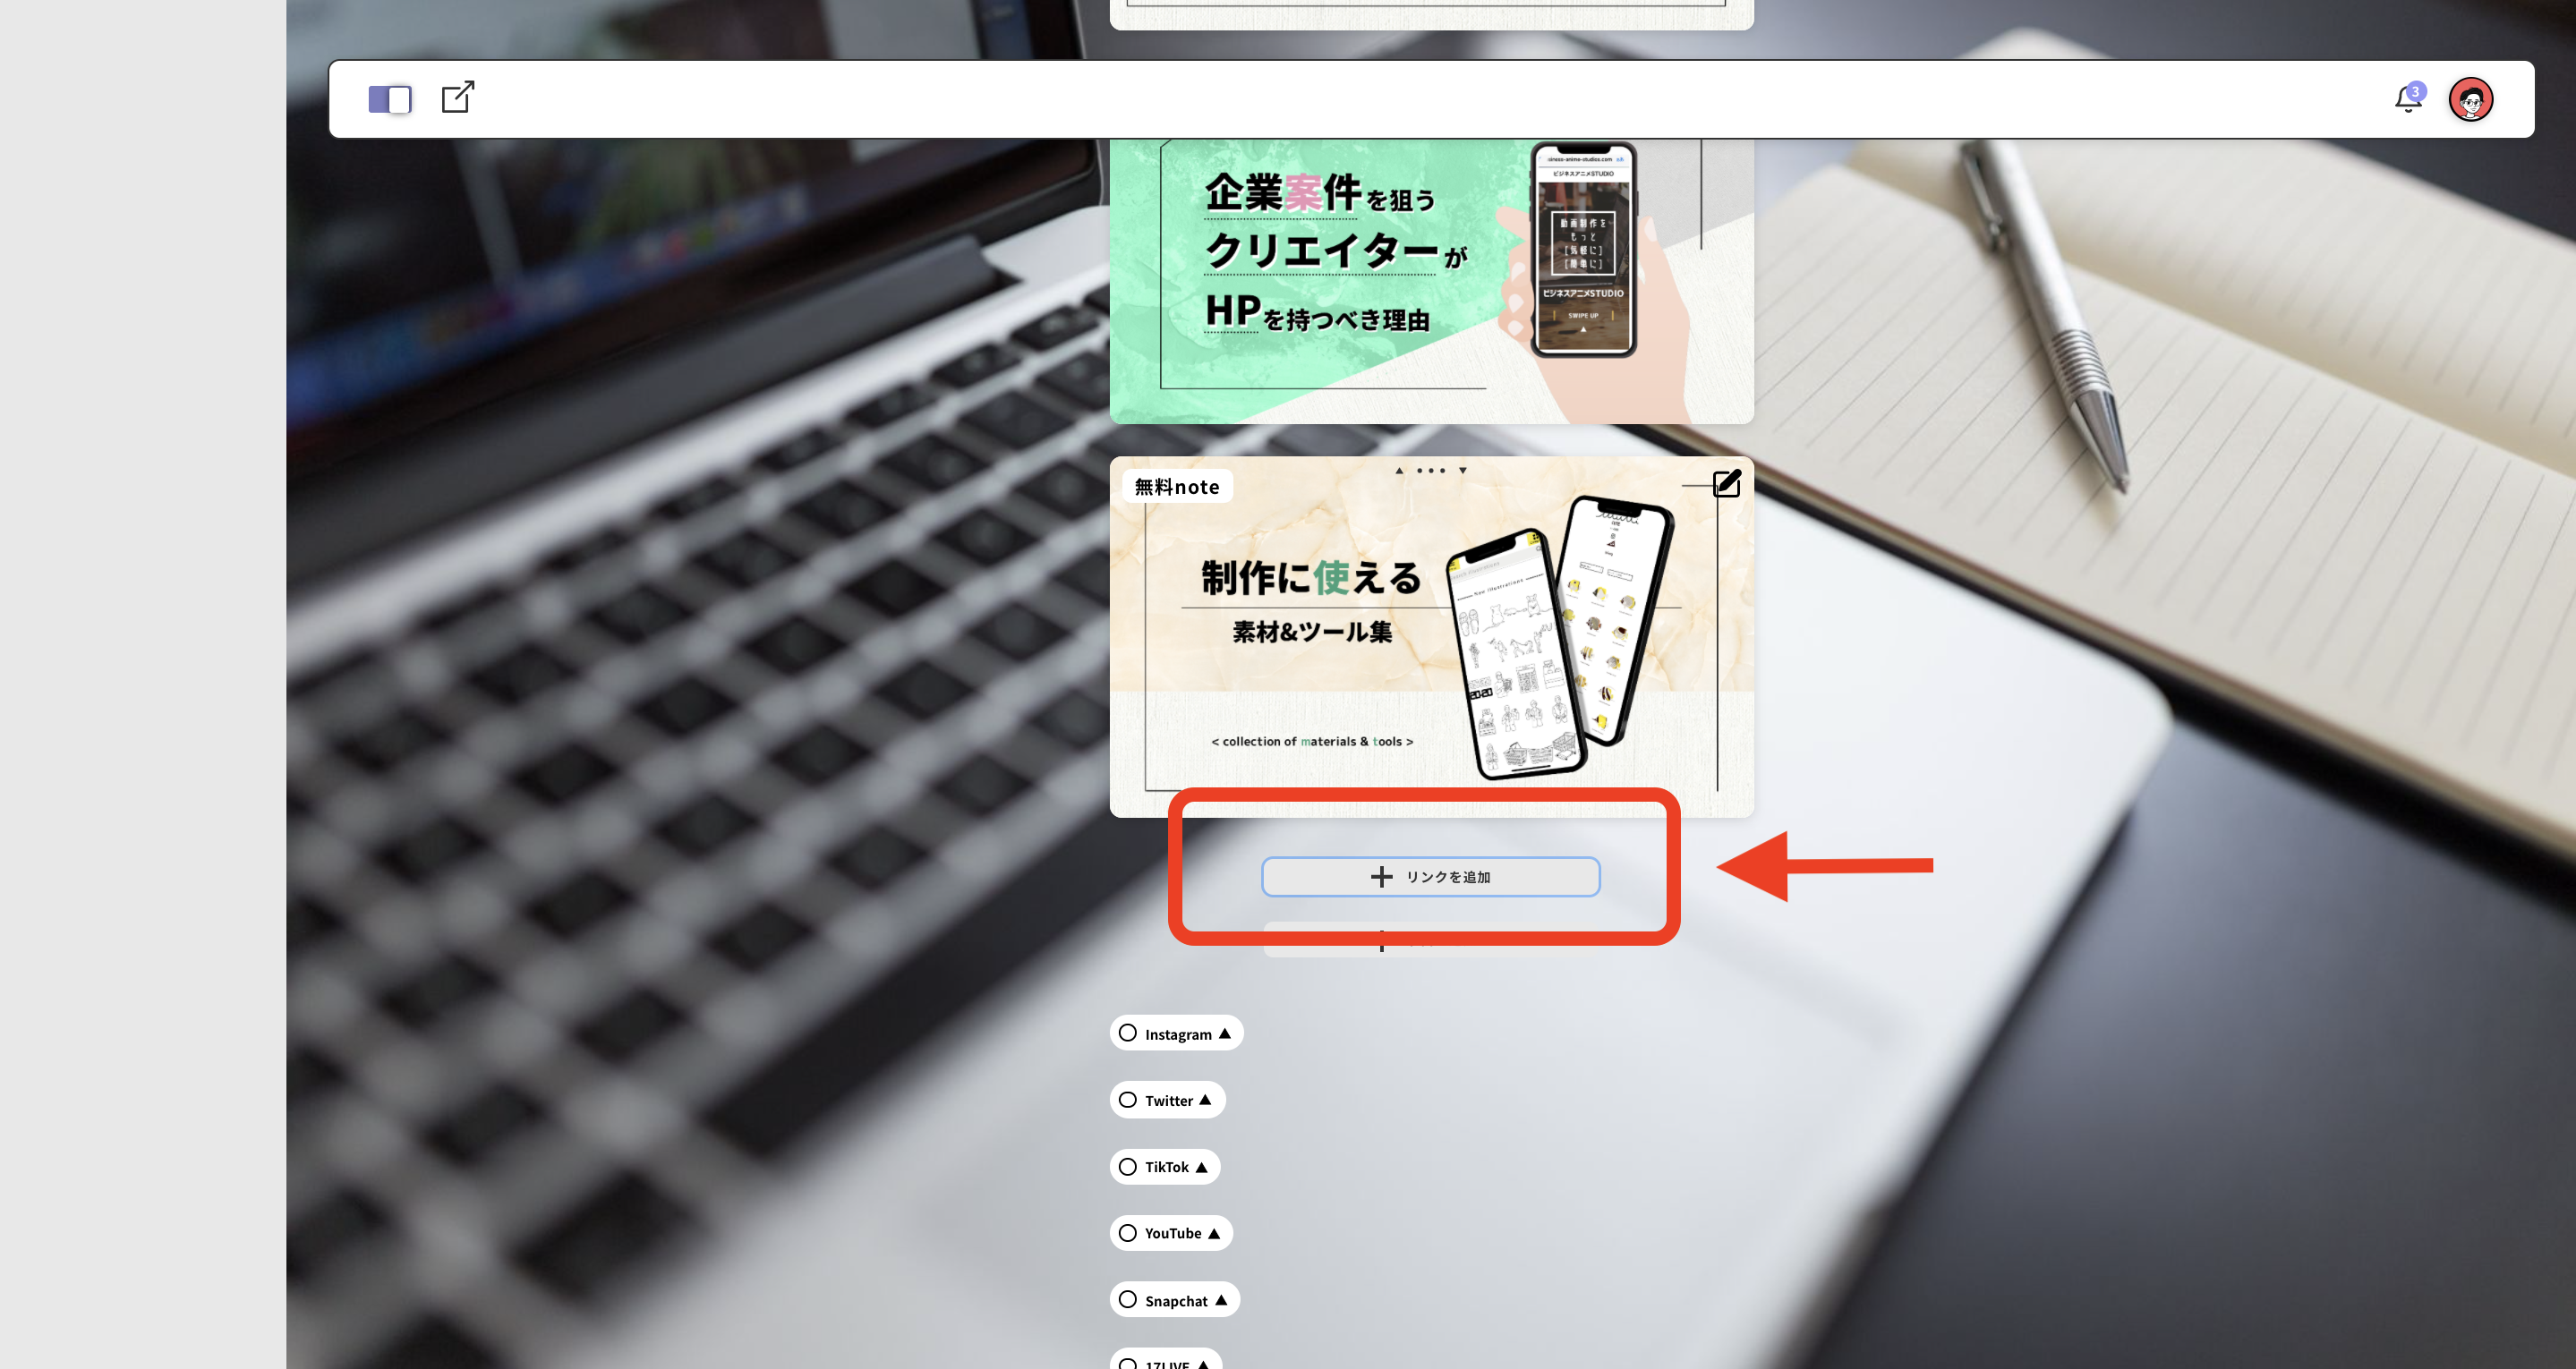
- リンクの追加
- 各種編集
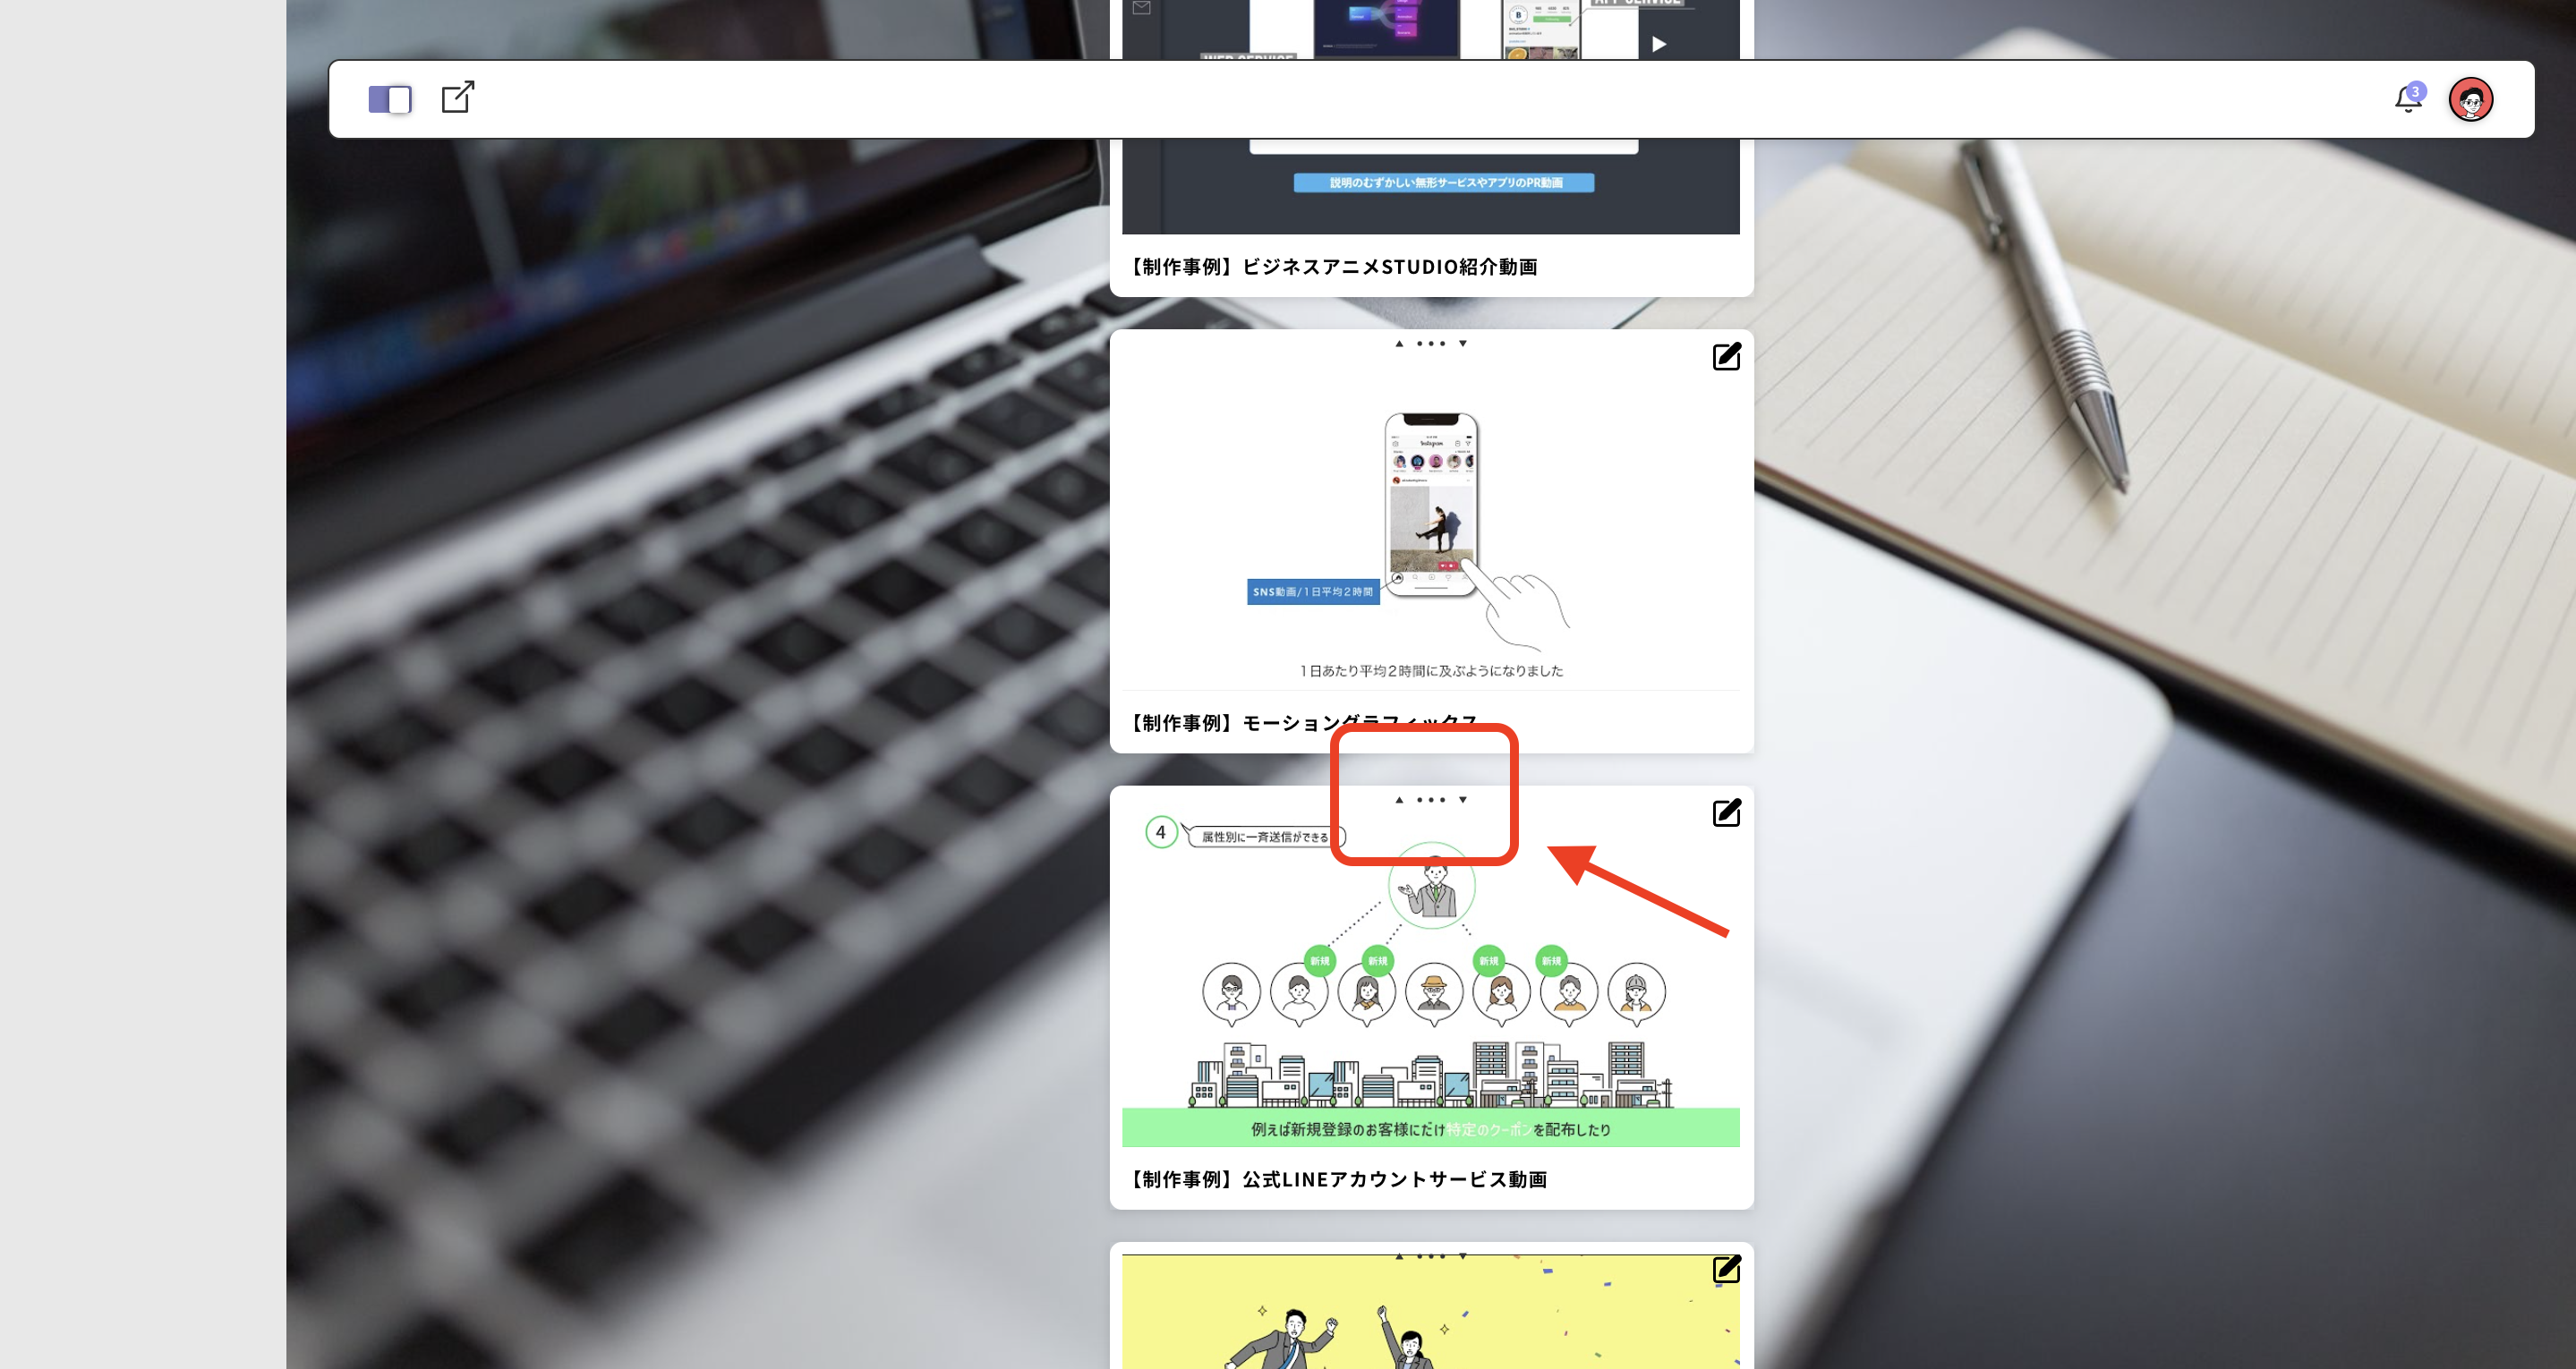
- 並べ替え
運営者順番に説明していきます。
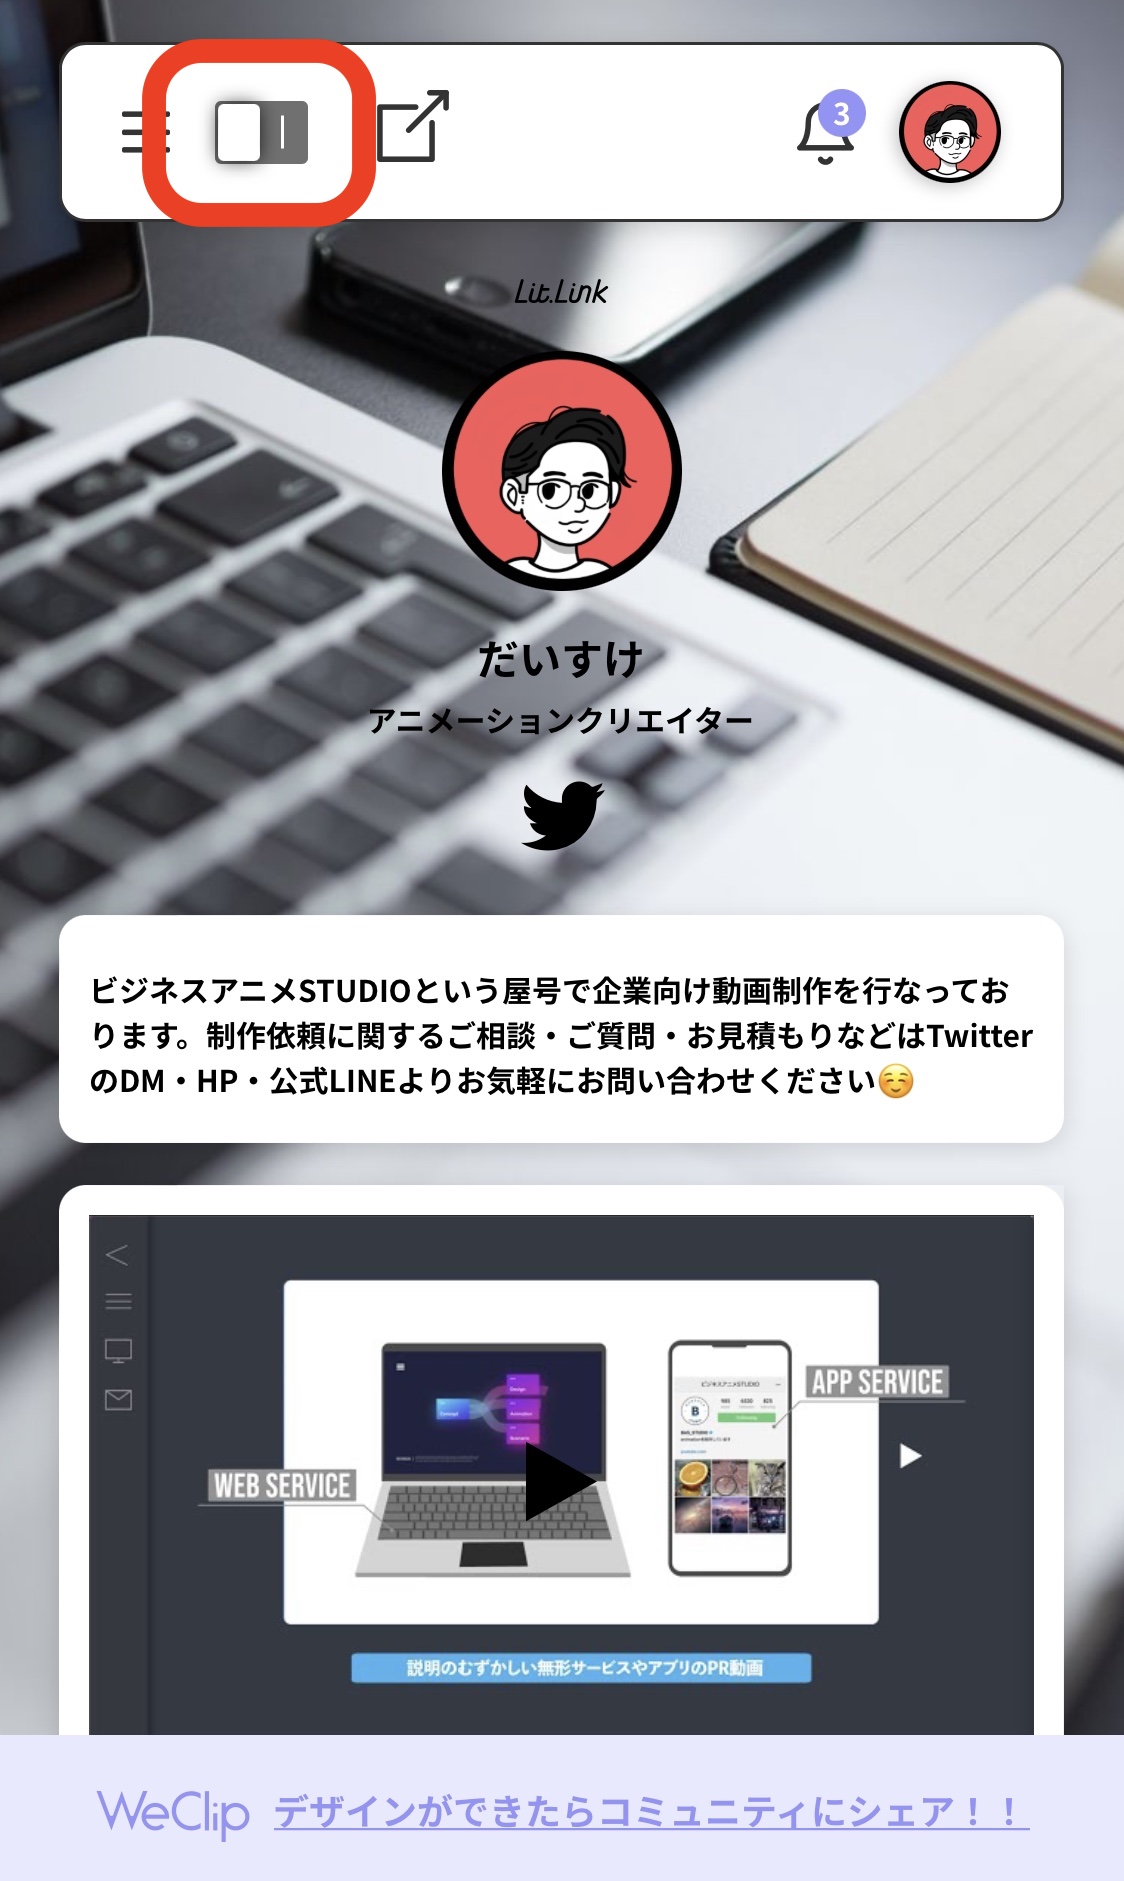
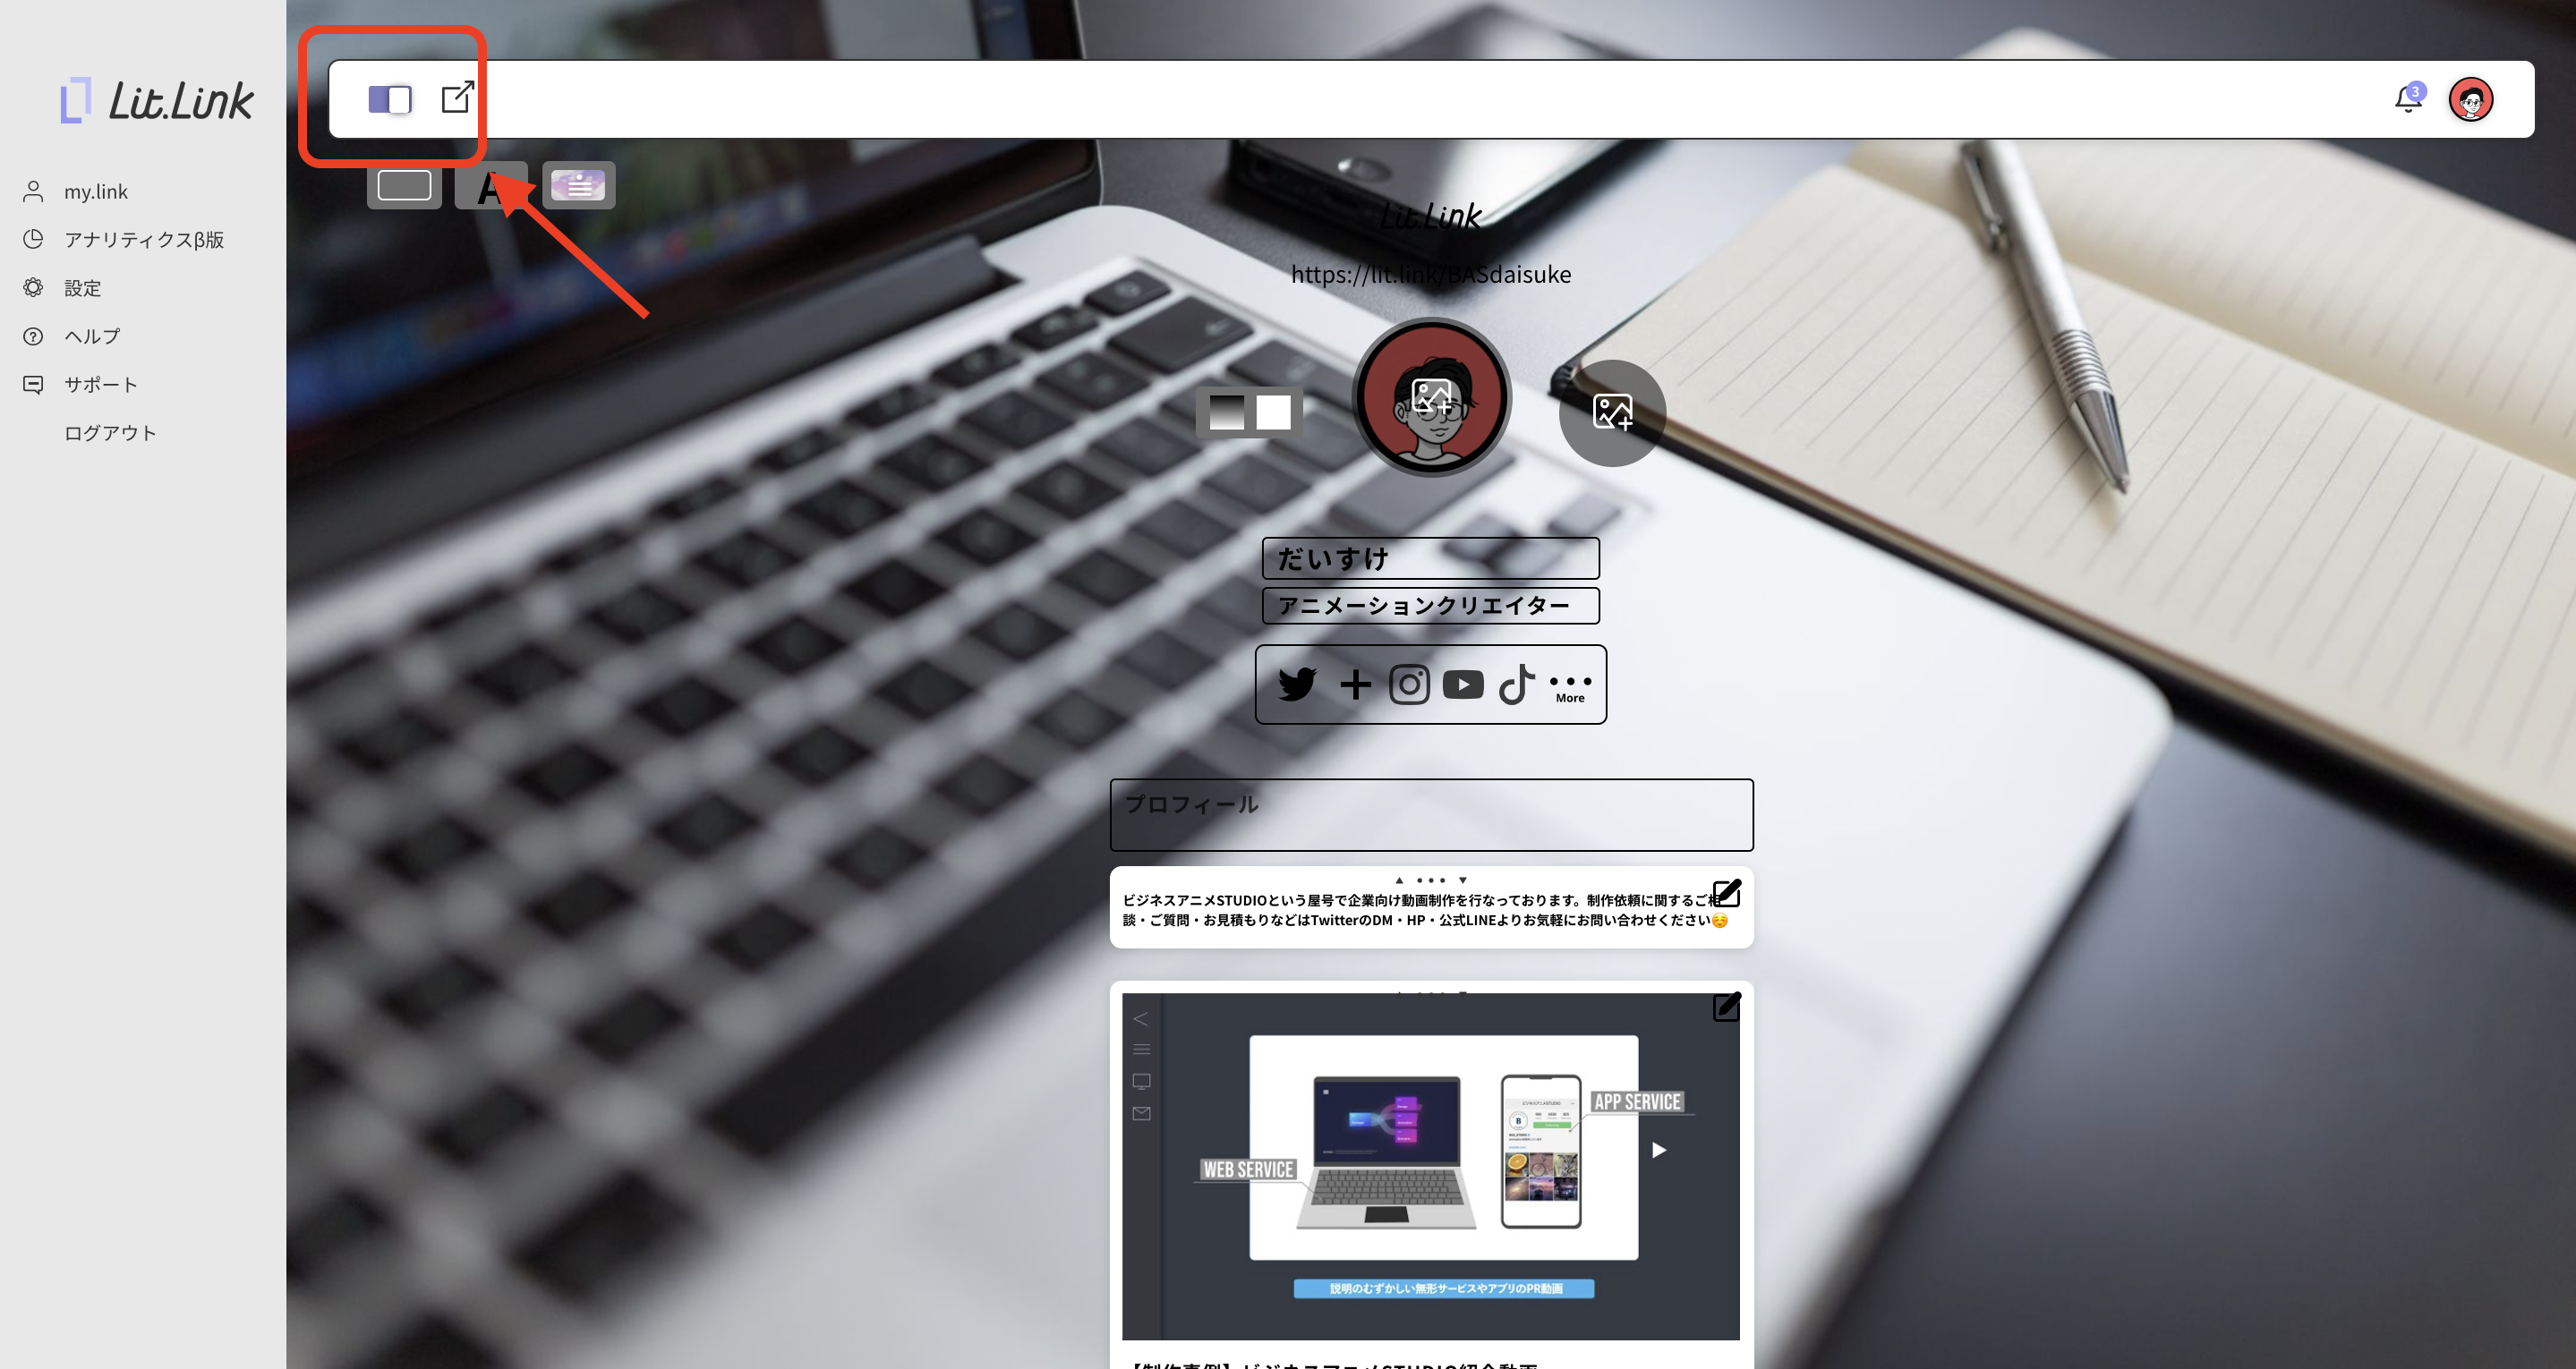
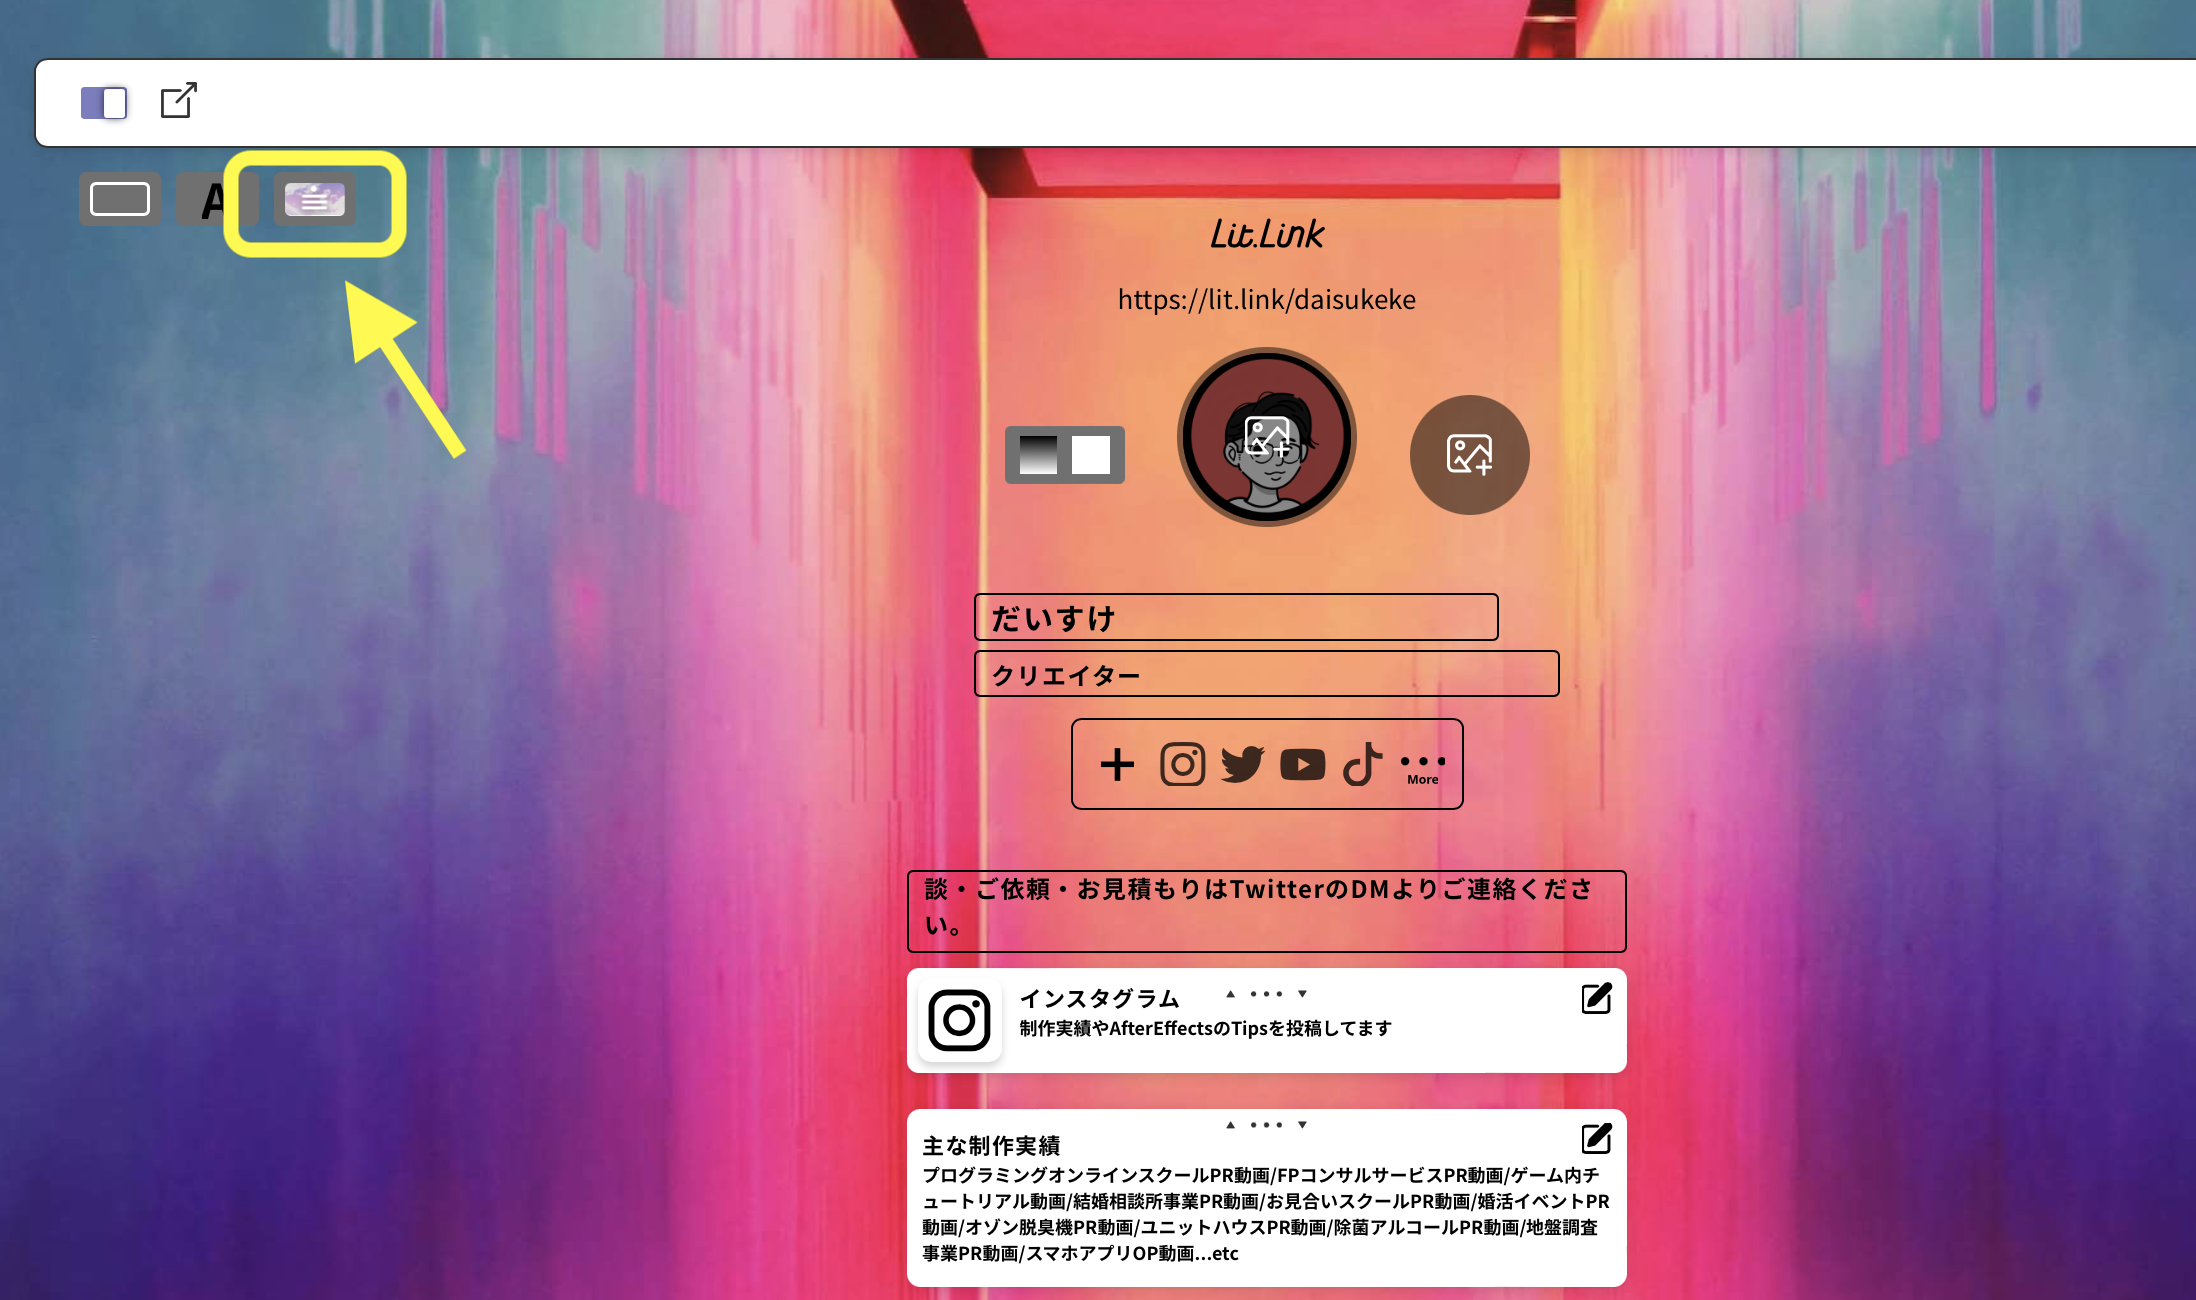
①編集モード切り替え
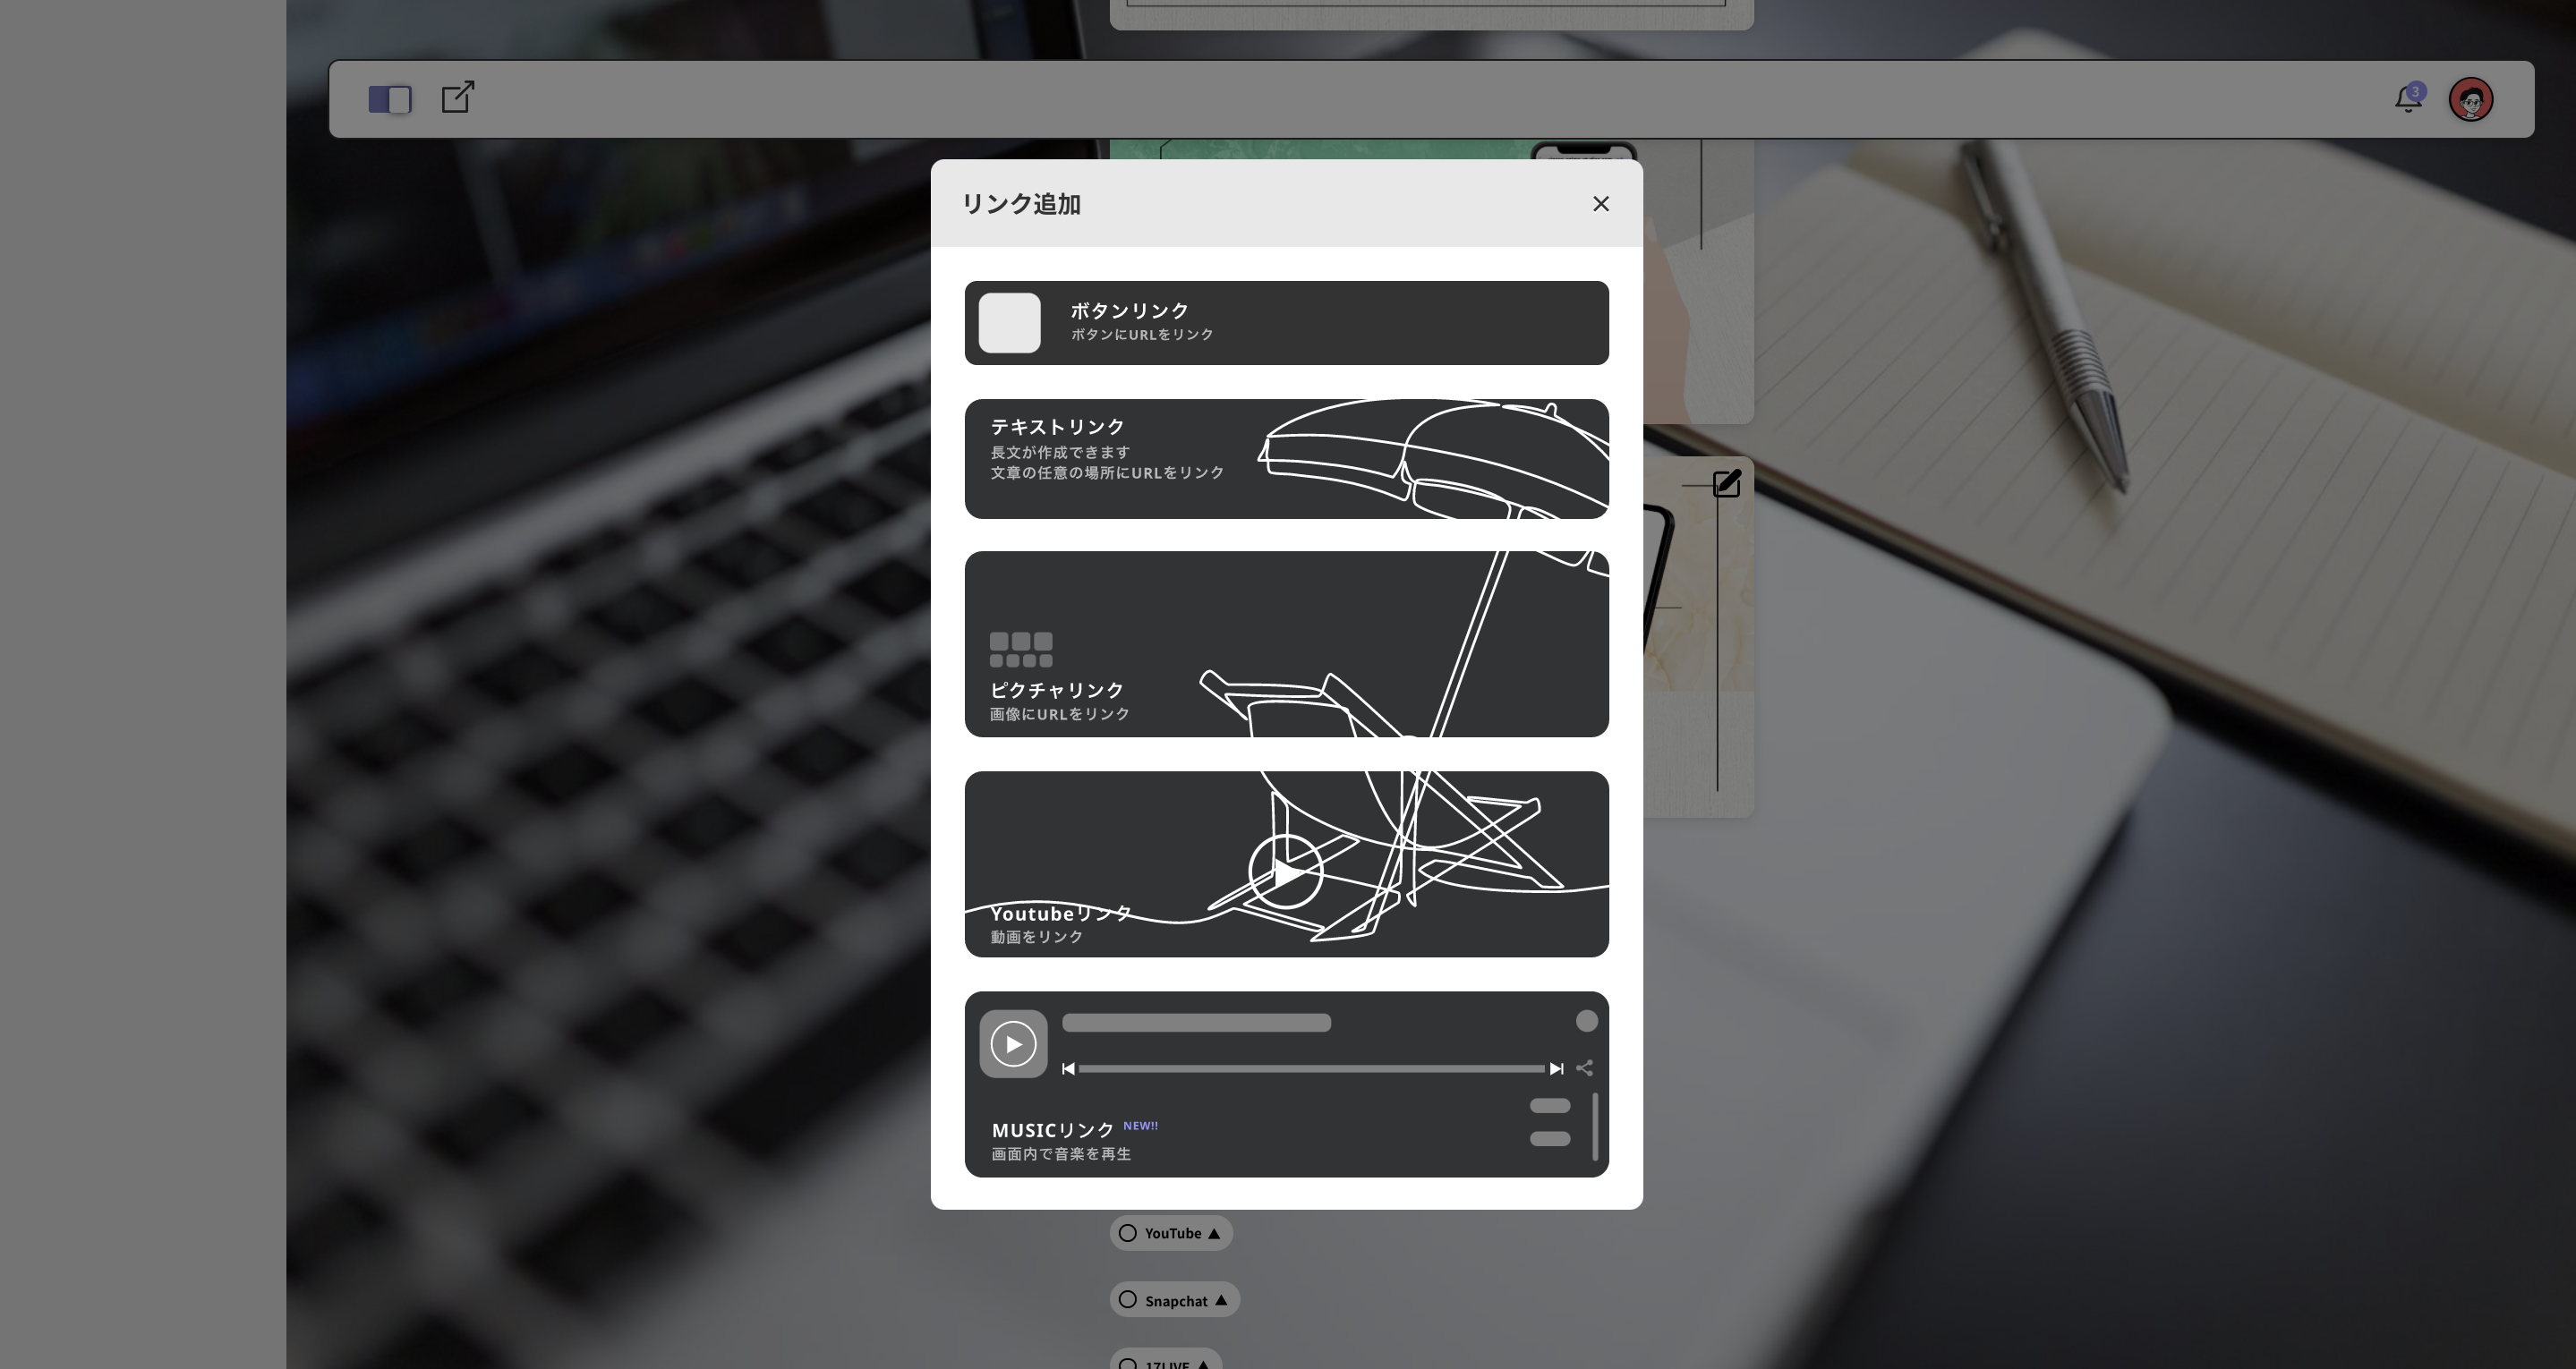
②リンクの追加
③各種編集
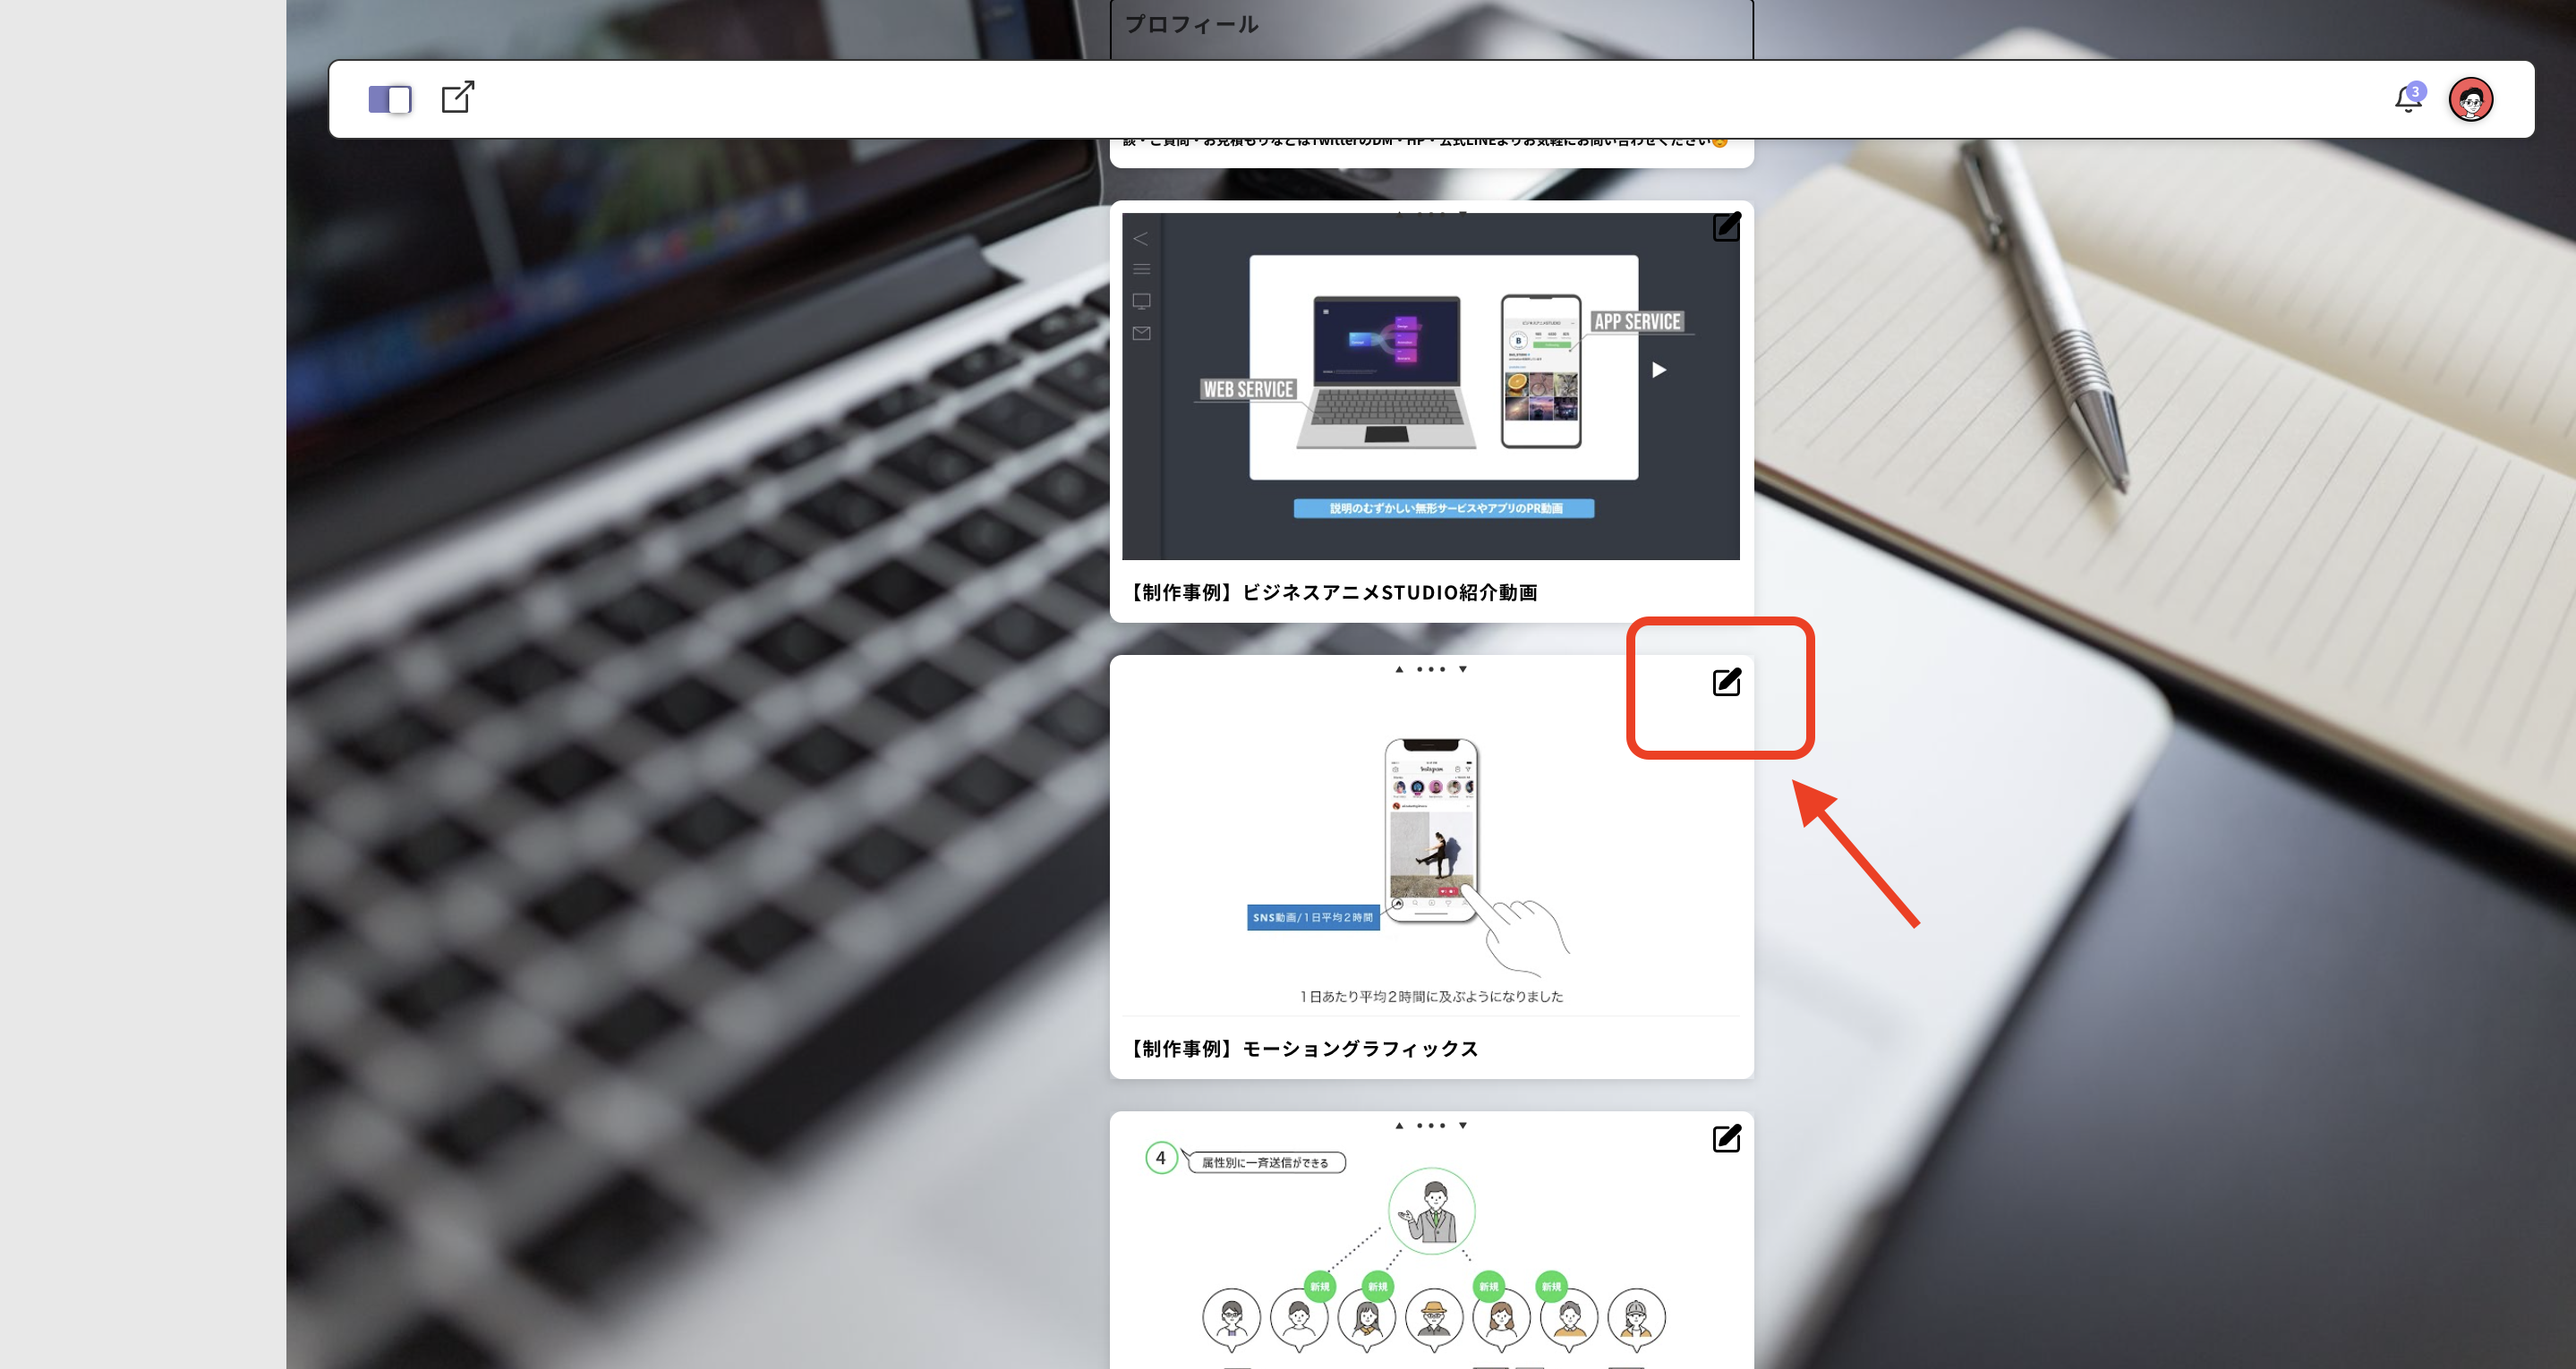
④並べ替え
 運営者
運営者このような感じで操作が体感的なのでページ作成がサクサク進みストレス0です。私は初見から1時間程度でイメージ通りのページを作ることができました。
カスタム各種説明
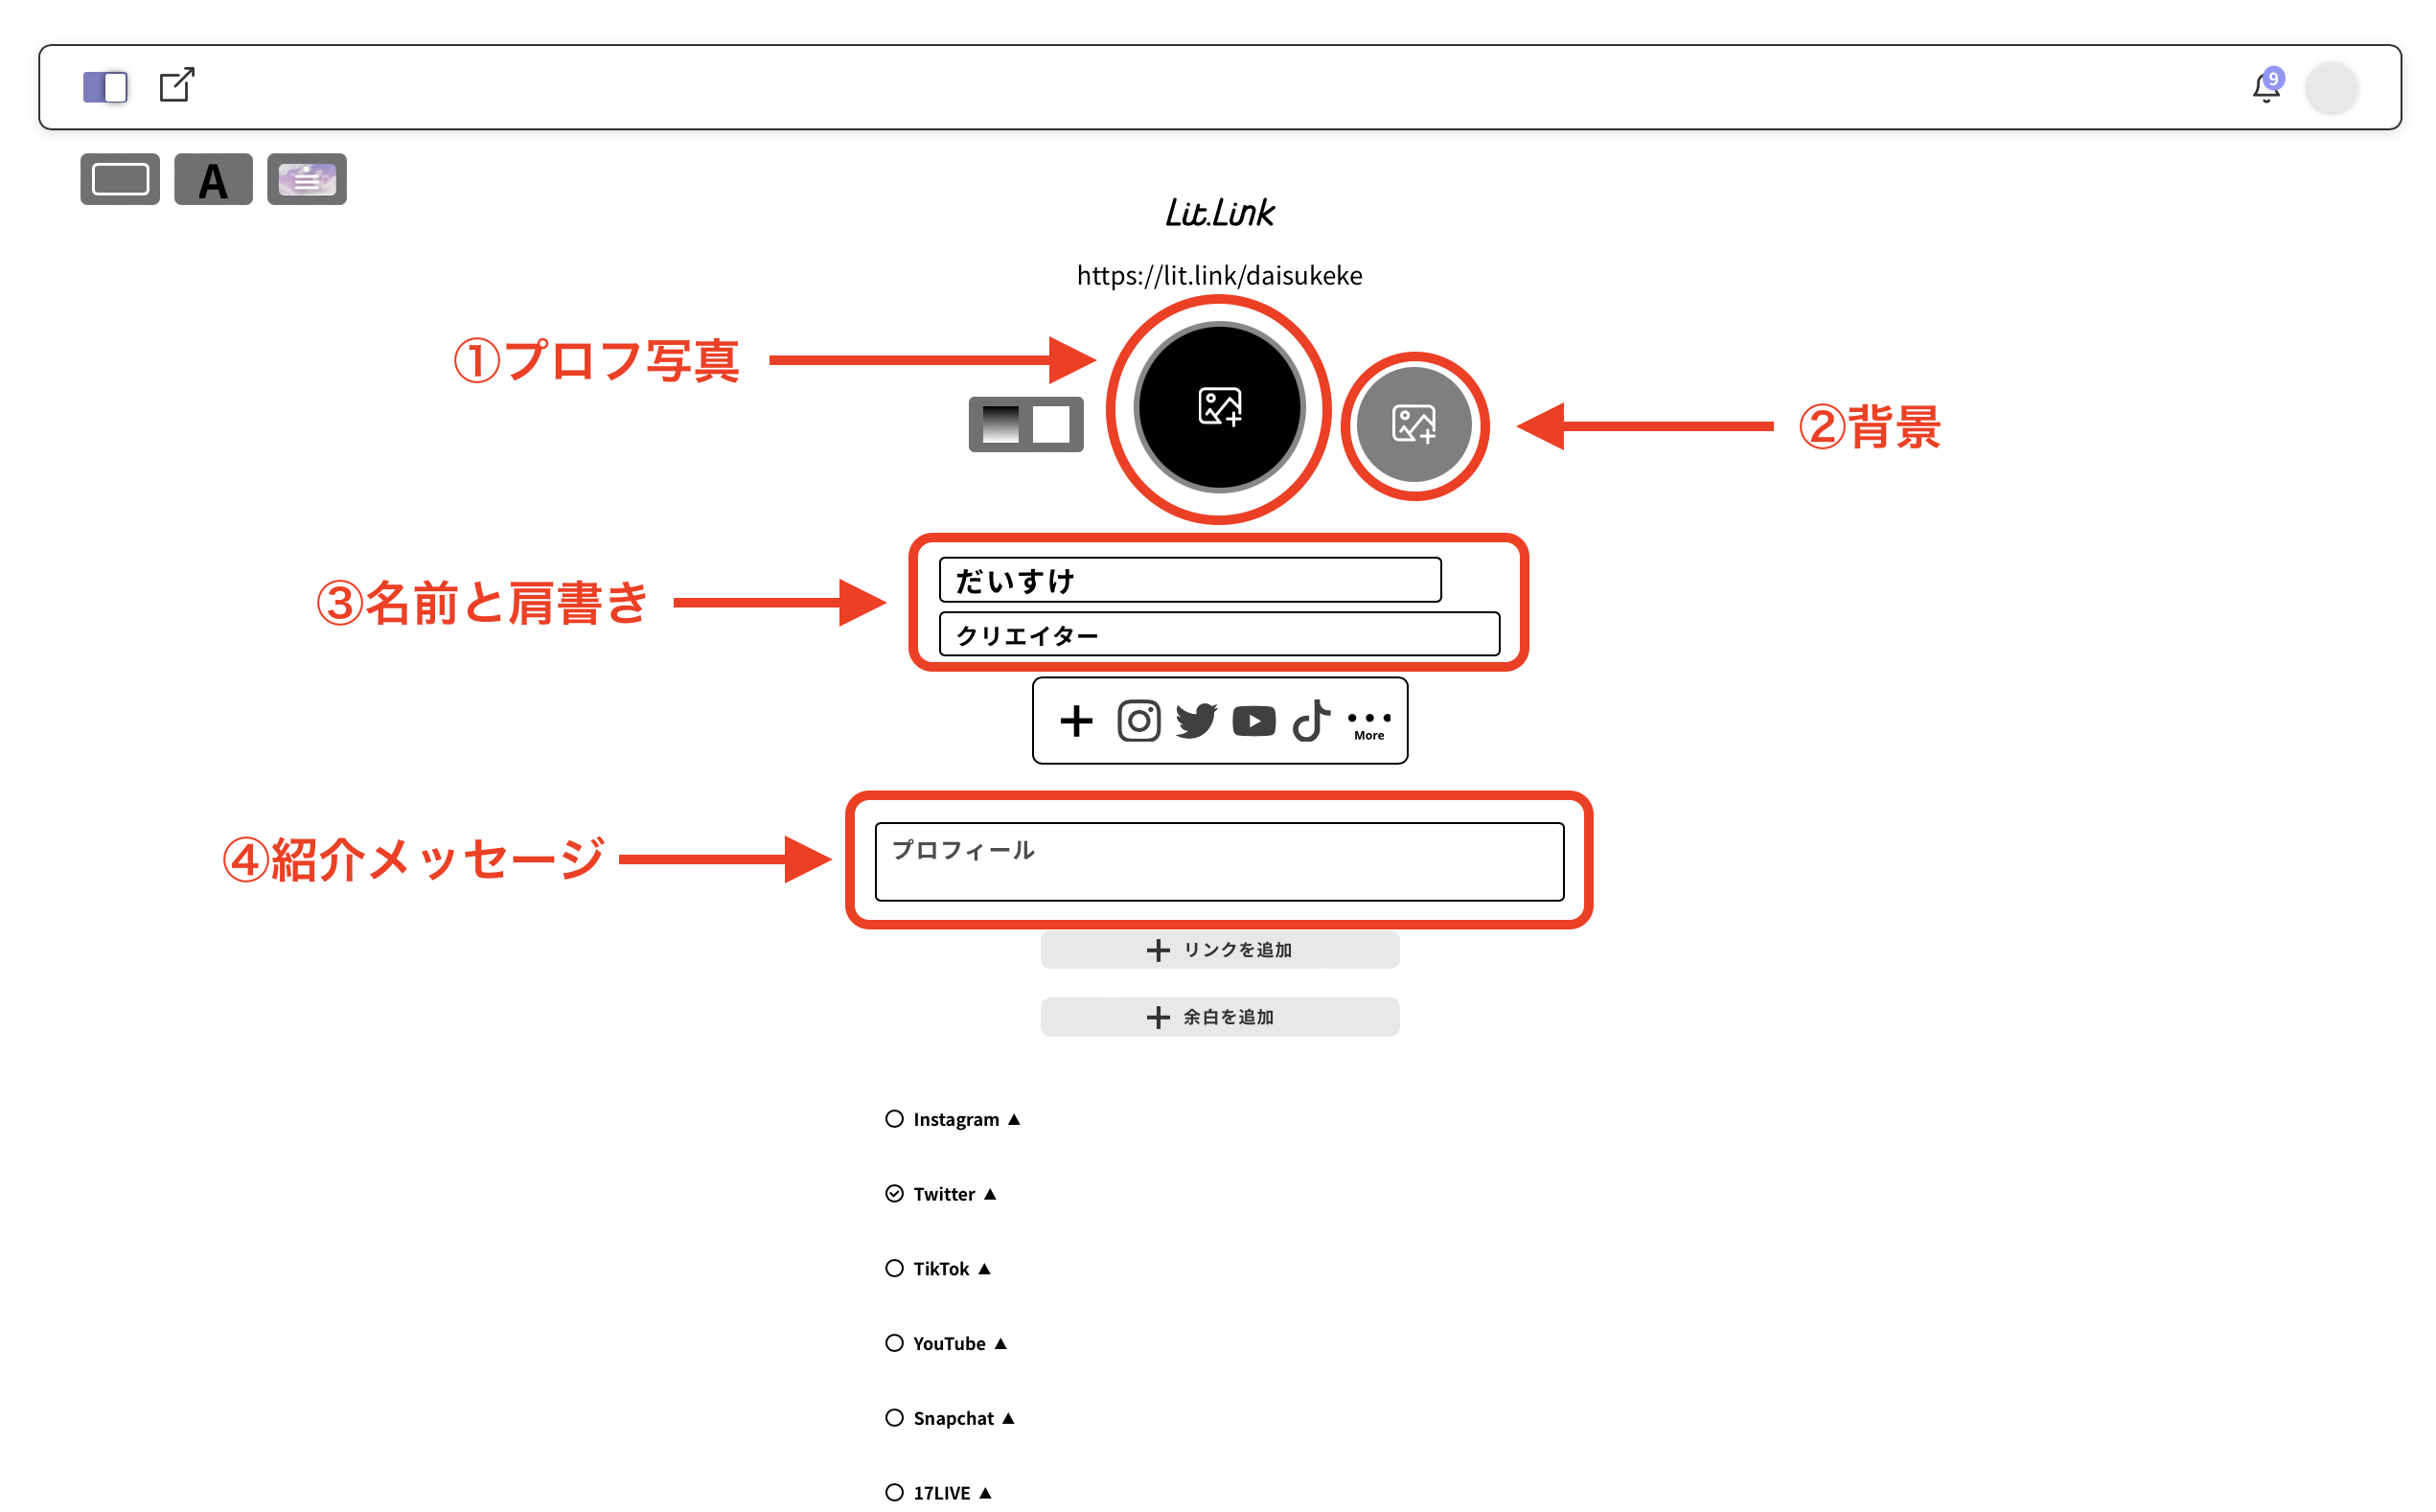
①プロフィール
 運営者
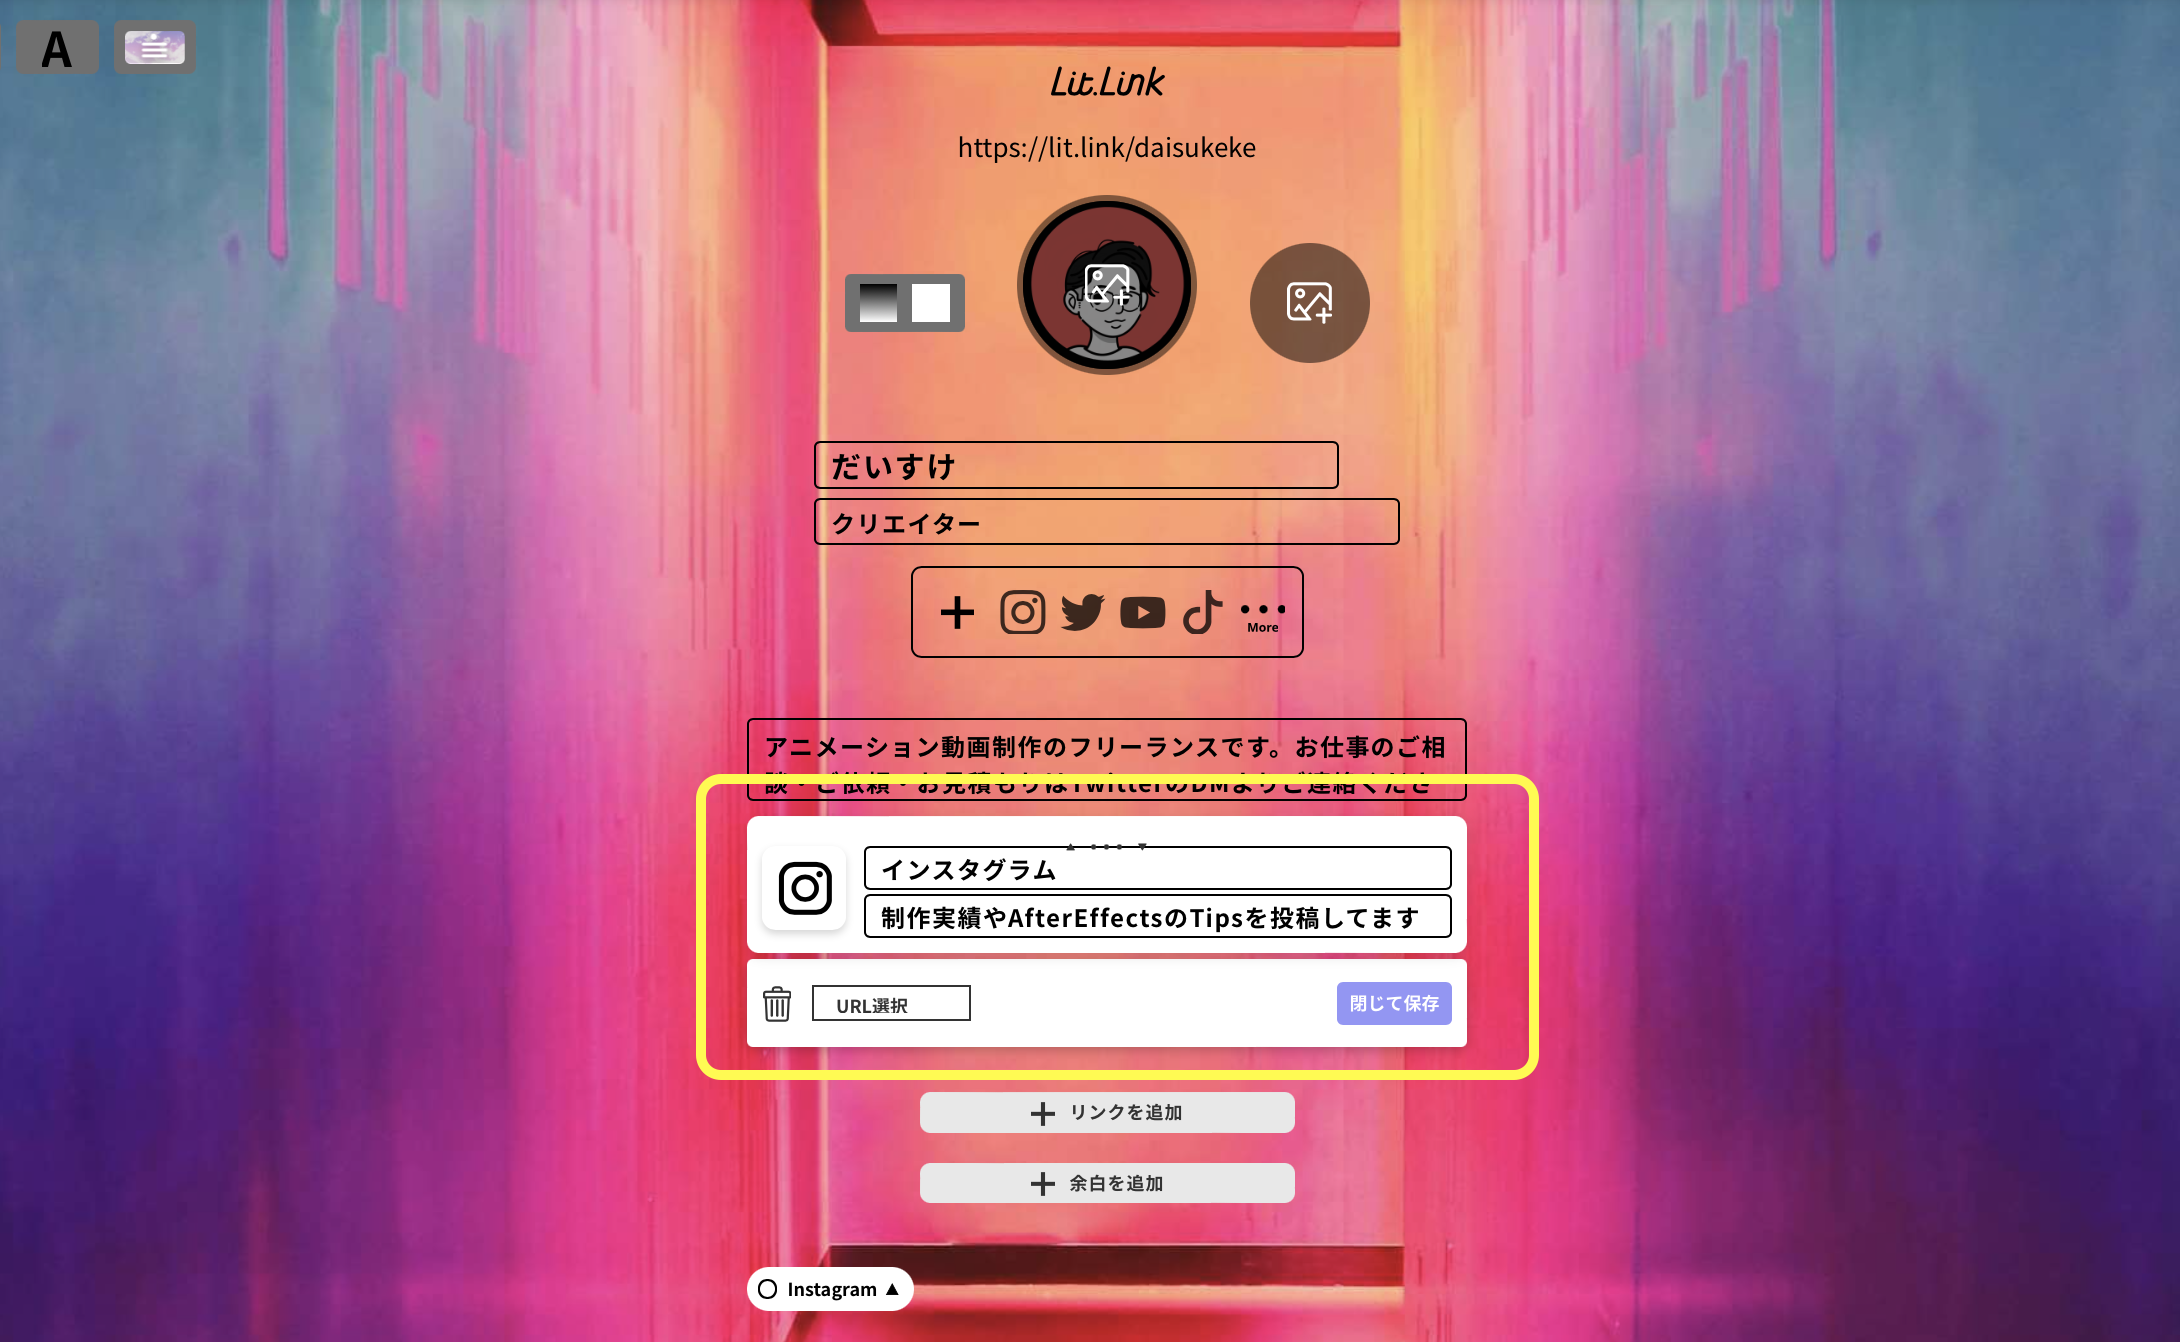
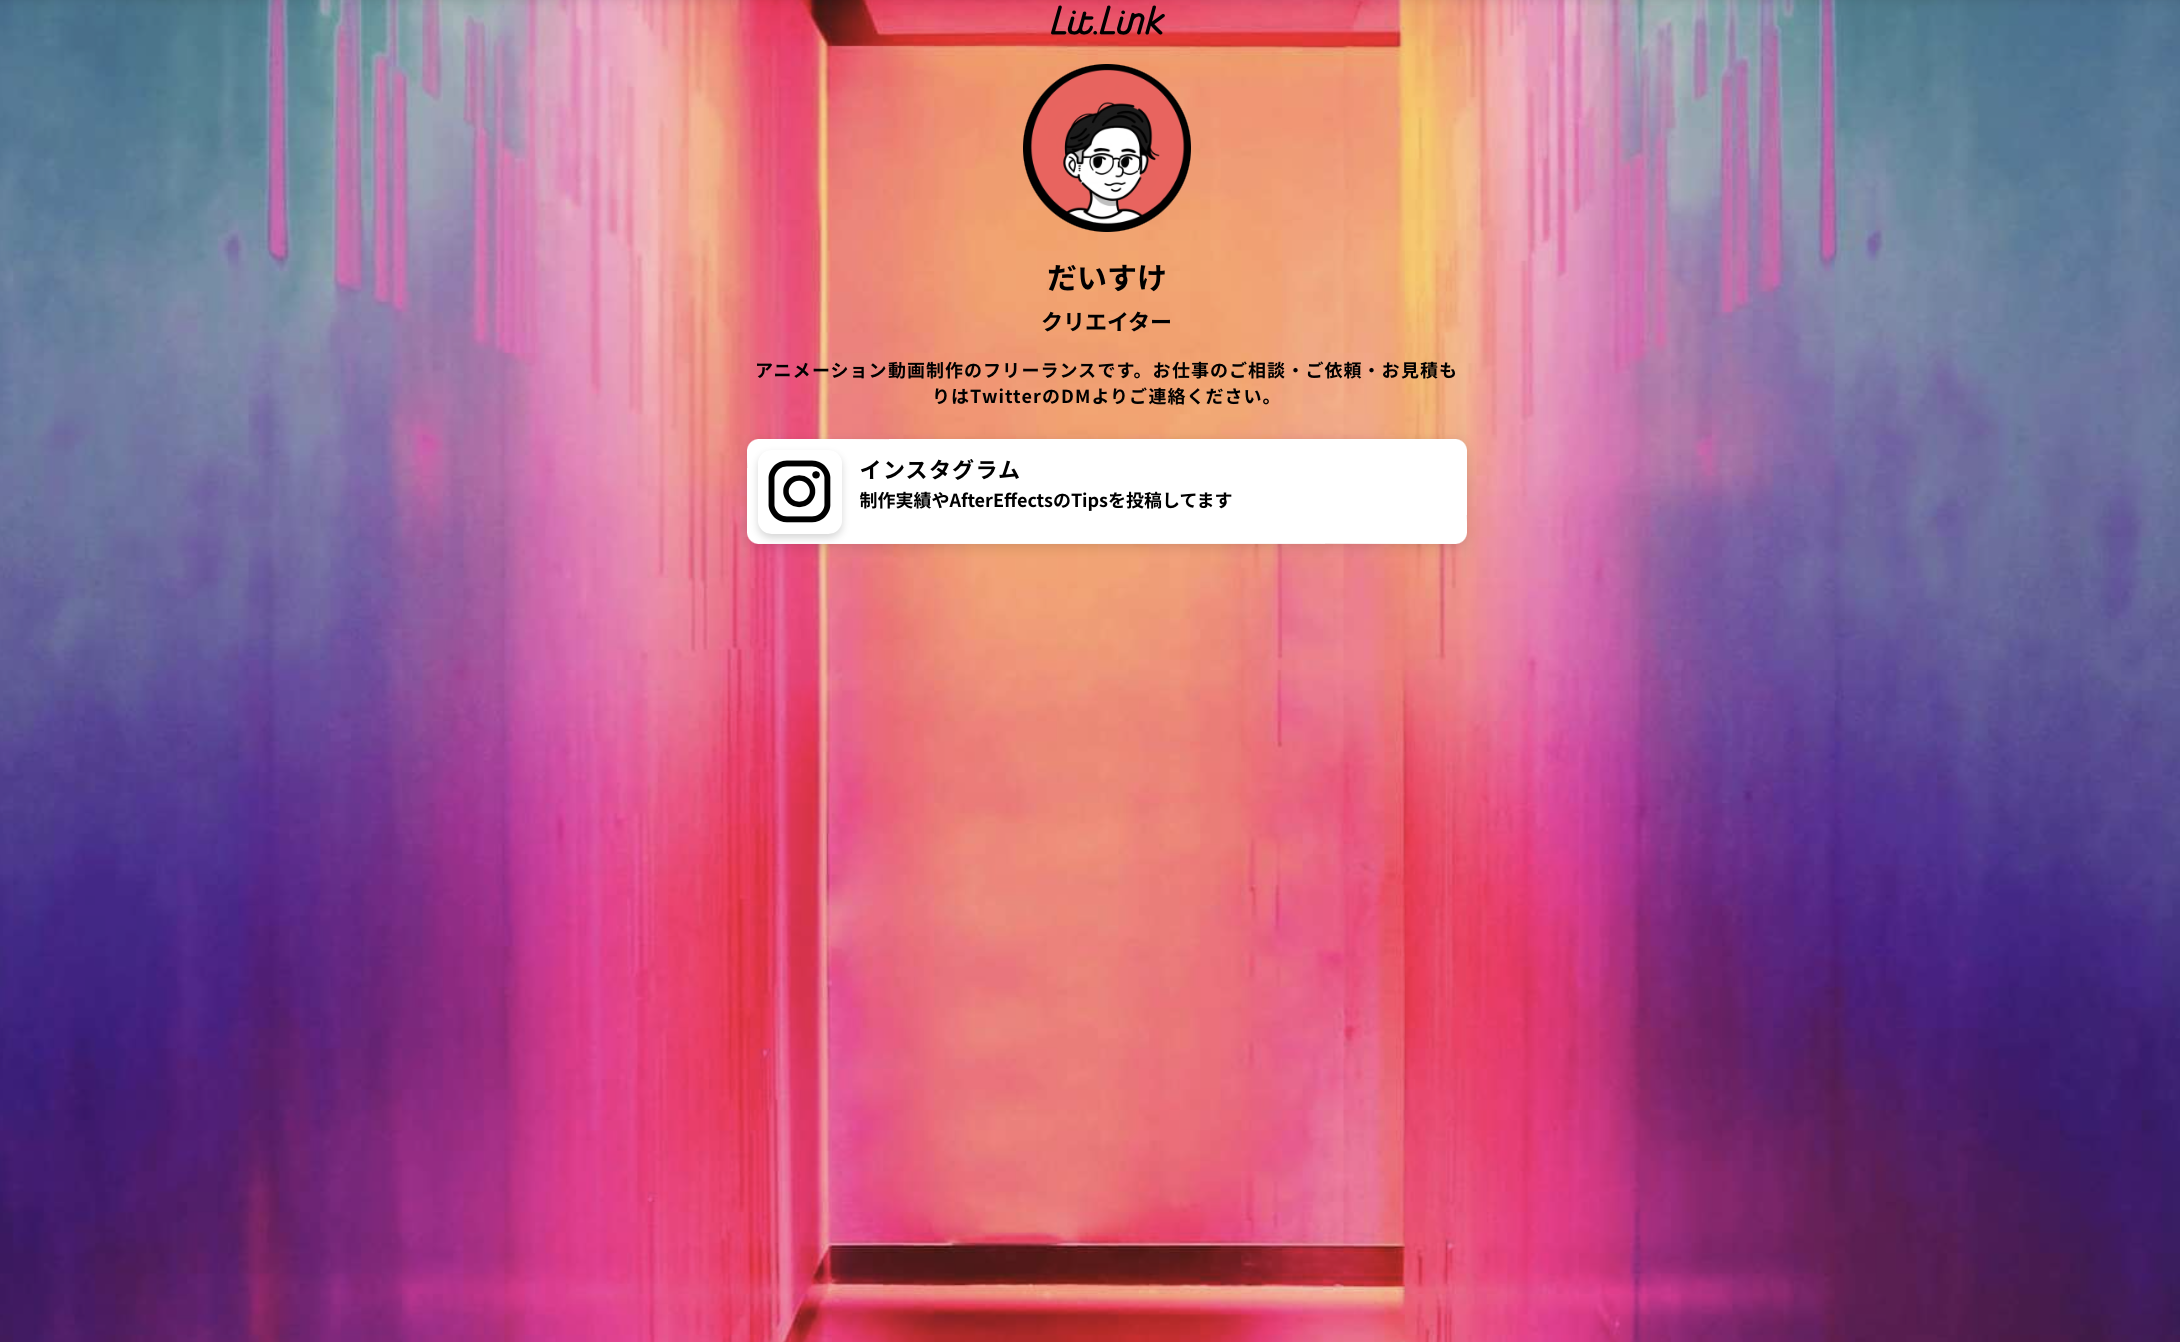
運営者例として紹介メッセージ欄にお仕事依頼の連絡方法を記載しています。背景はこの場合テンプレから選んでいますが自分で用意した画像を使うことも可能です。
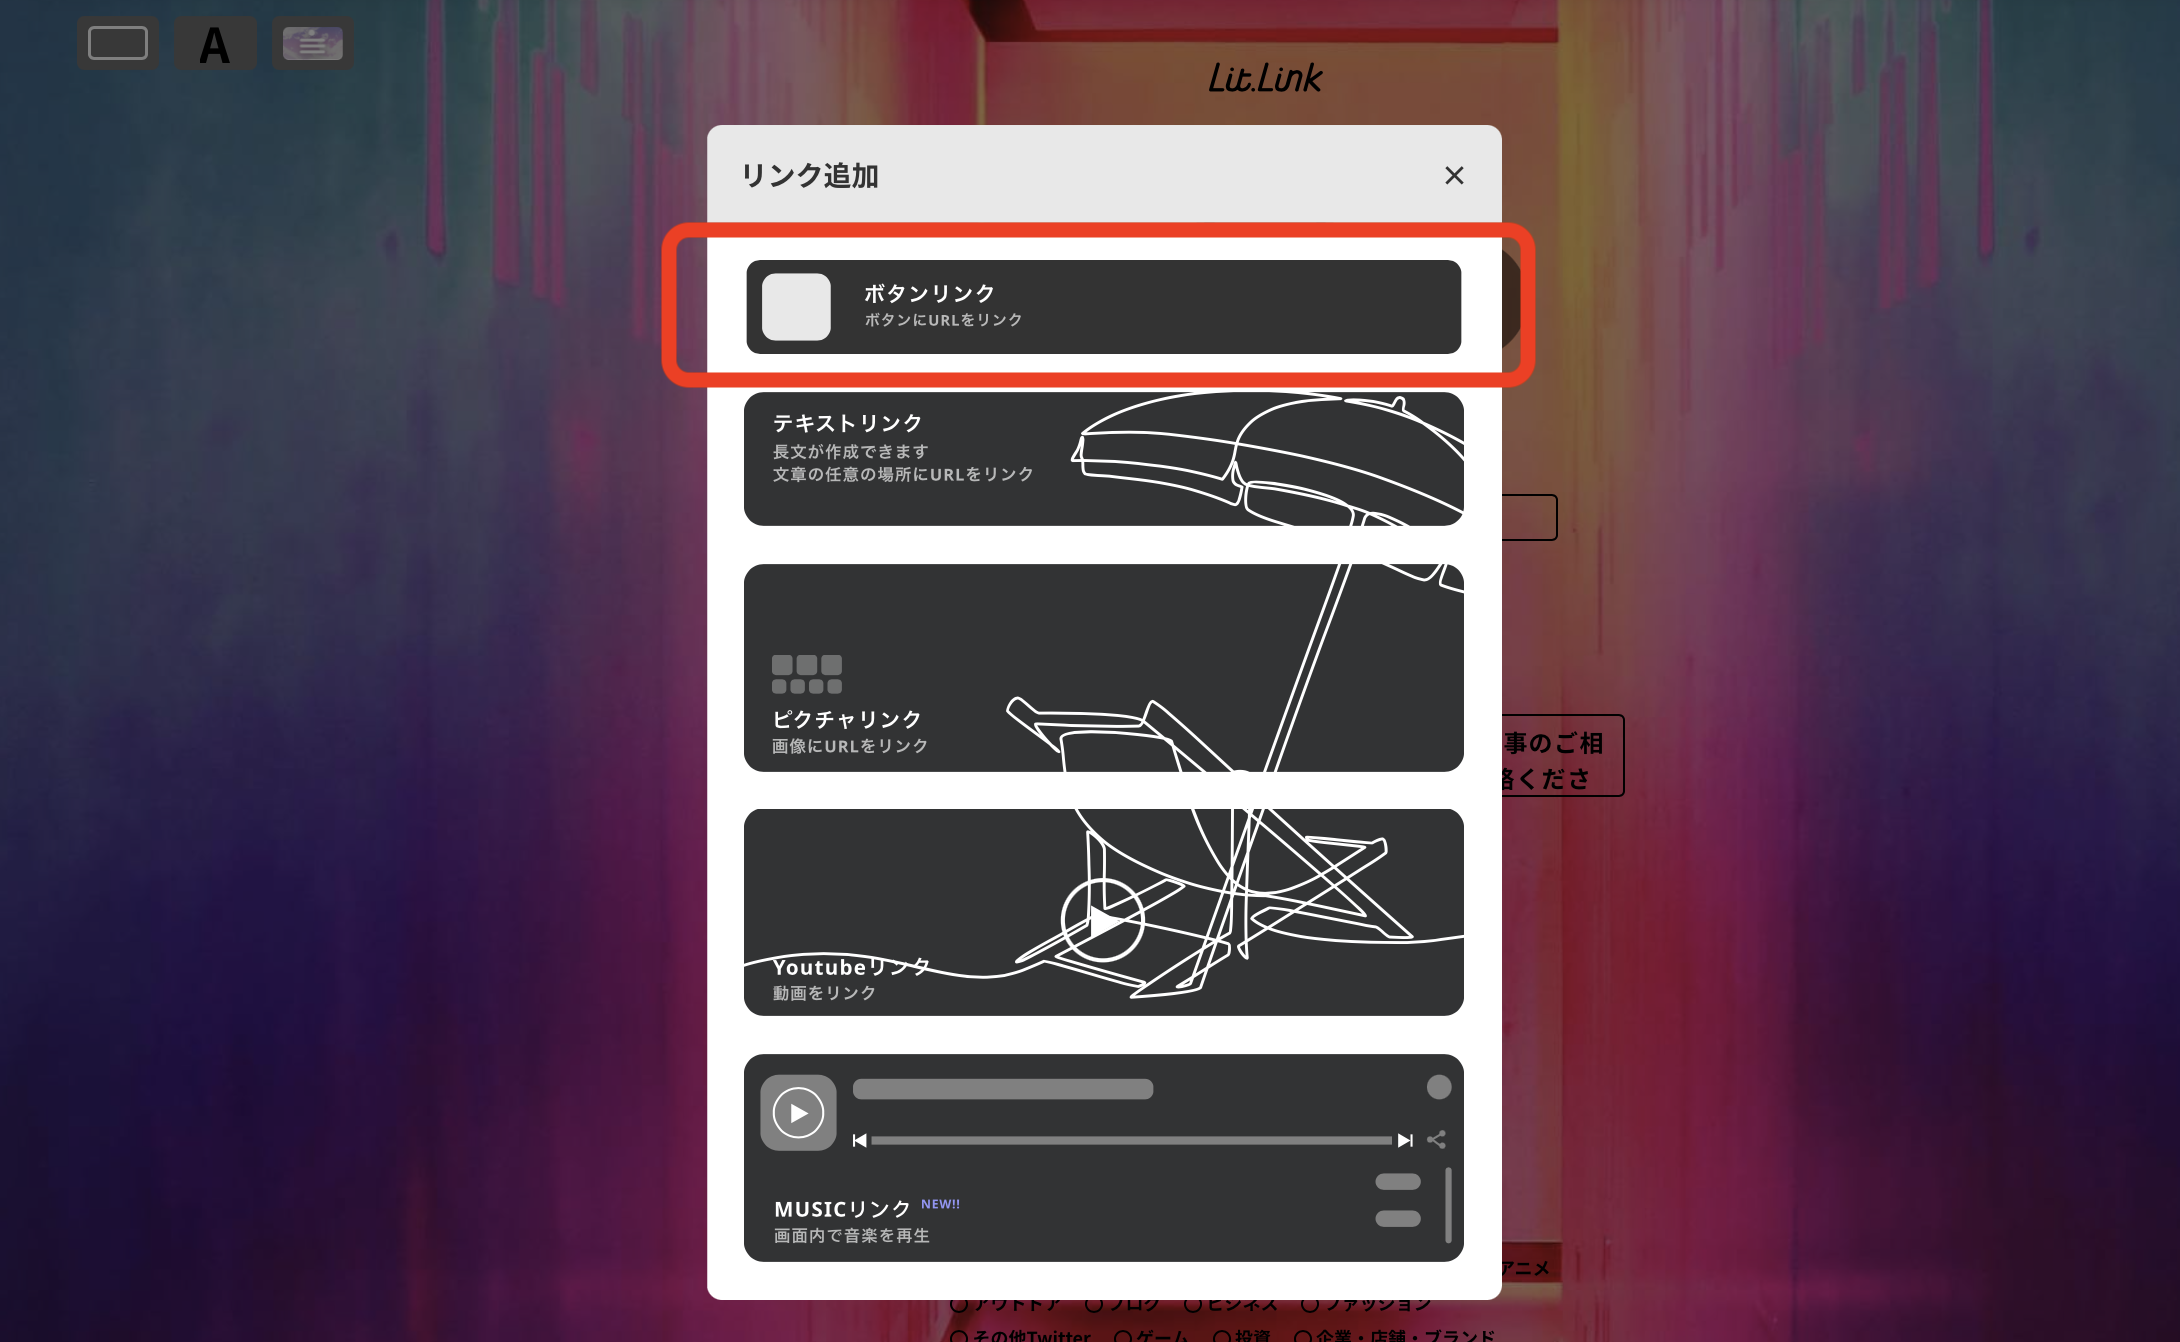
②ボタンリンク
 運営者
運営者ボタンアイコンとテキストで構成されるリンクです。

 運営者
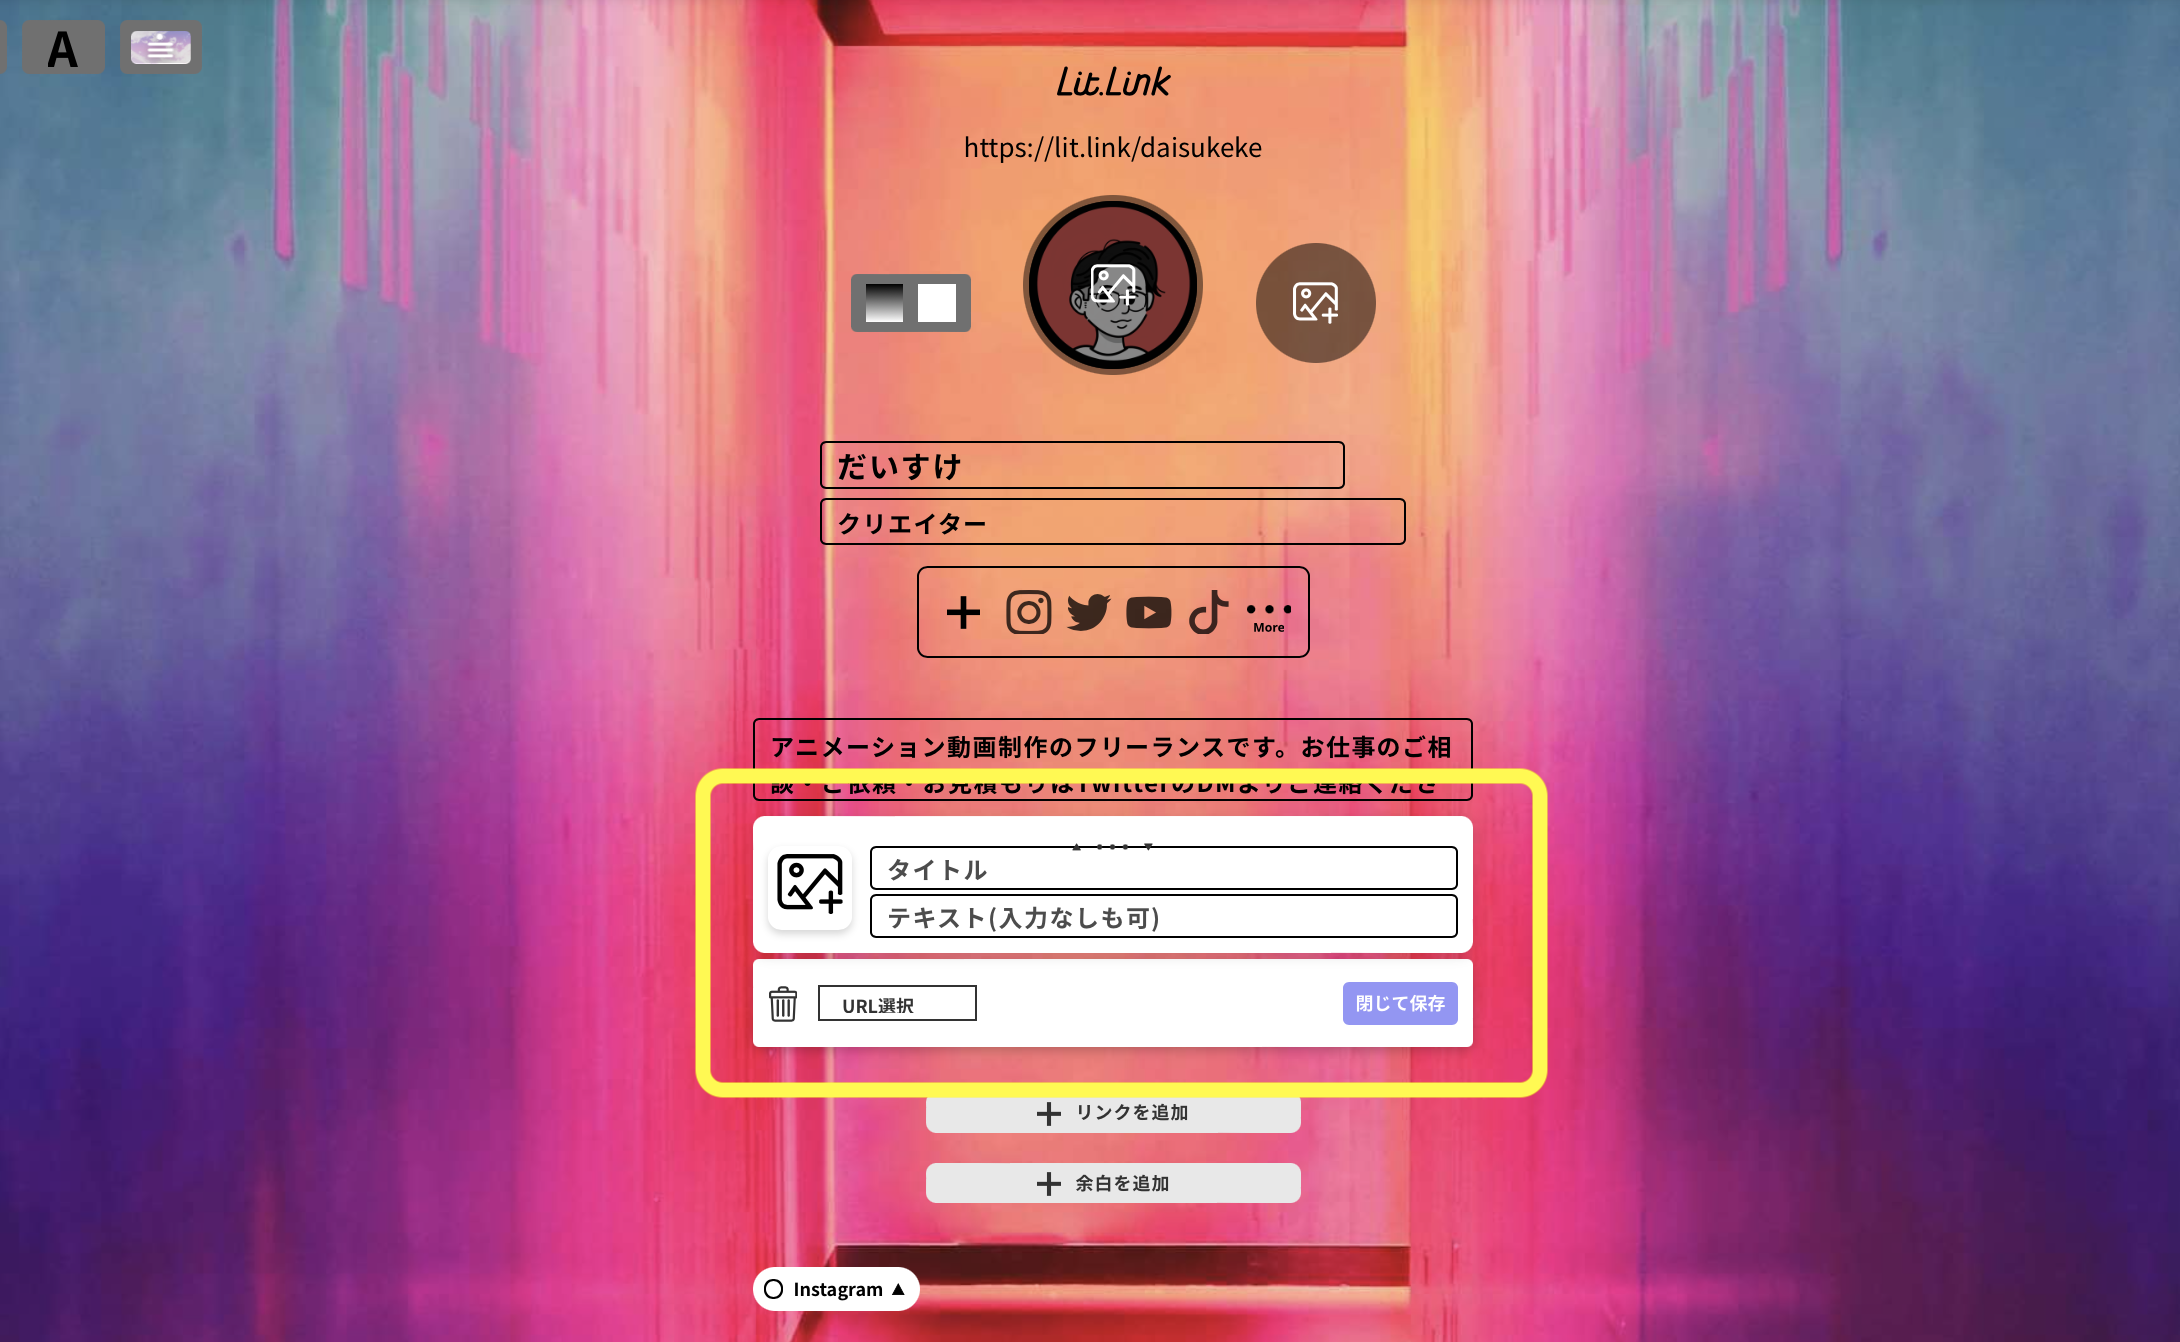
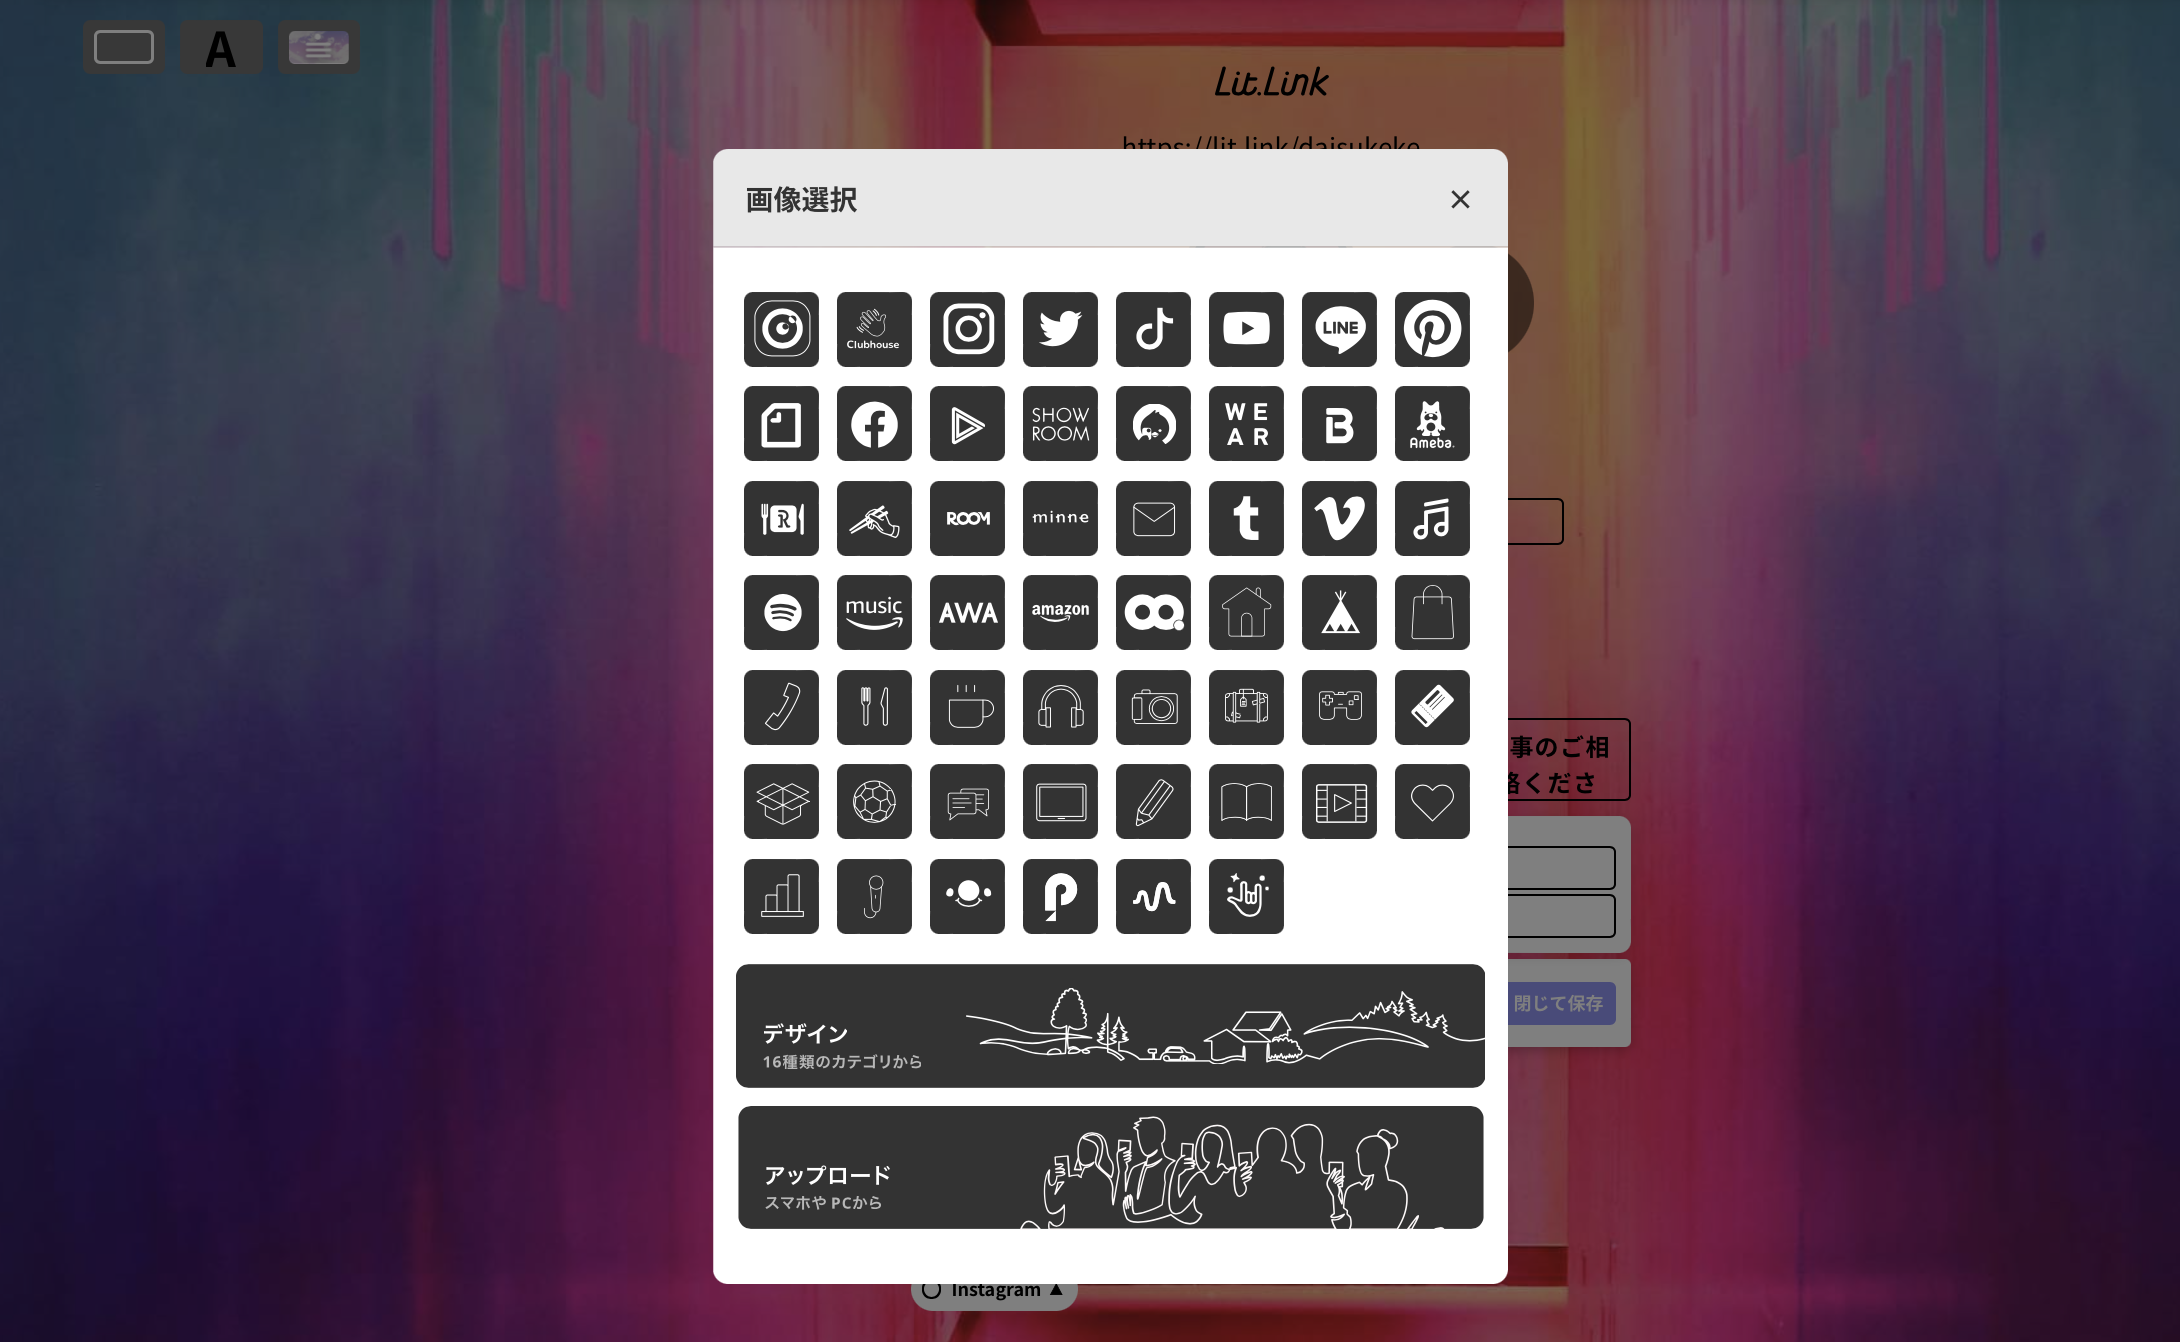
運営者キャプチャーマークを押すとテンプレのアイコン&デザイン、もしくは用意した画像を挿入できます。
 運営者
運営者URL選択から忘れずにリンクを貼り、最後に閉じて保存を押します。各項目を記入すると右のように反映し、クリックすると挿入したURL先に飛ぶようになります。
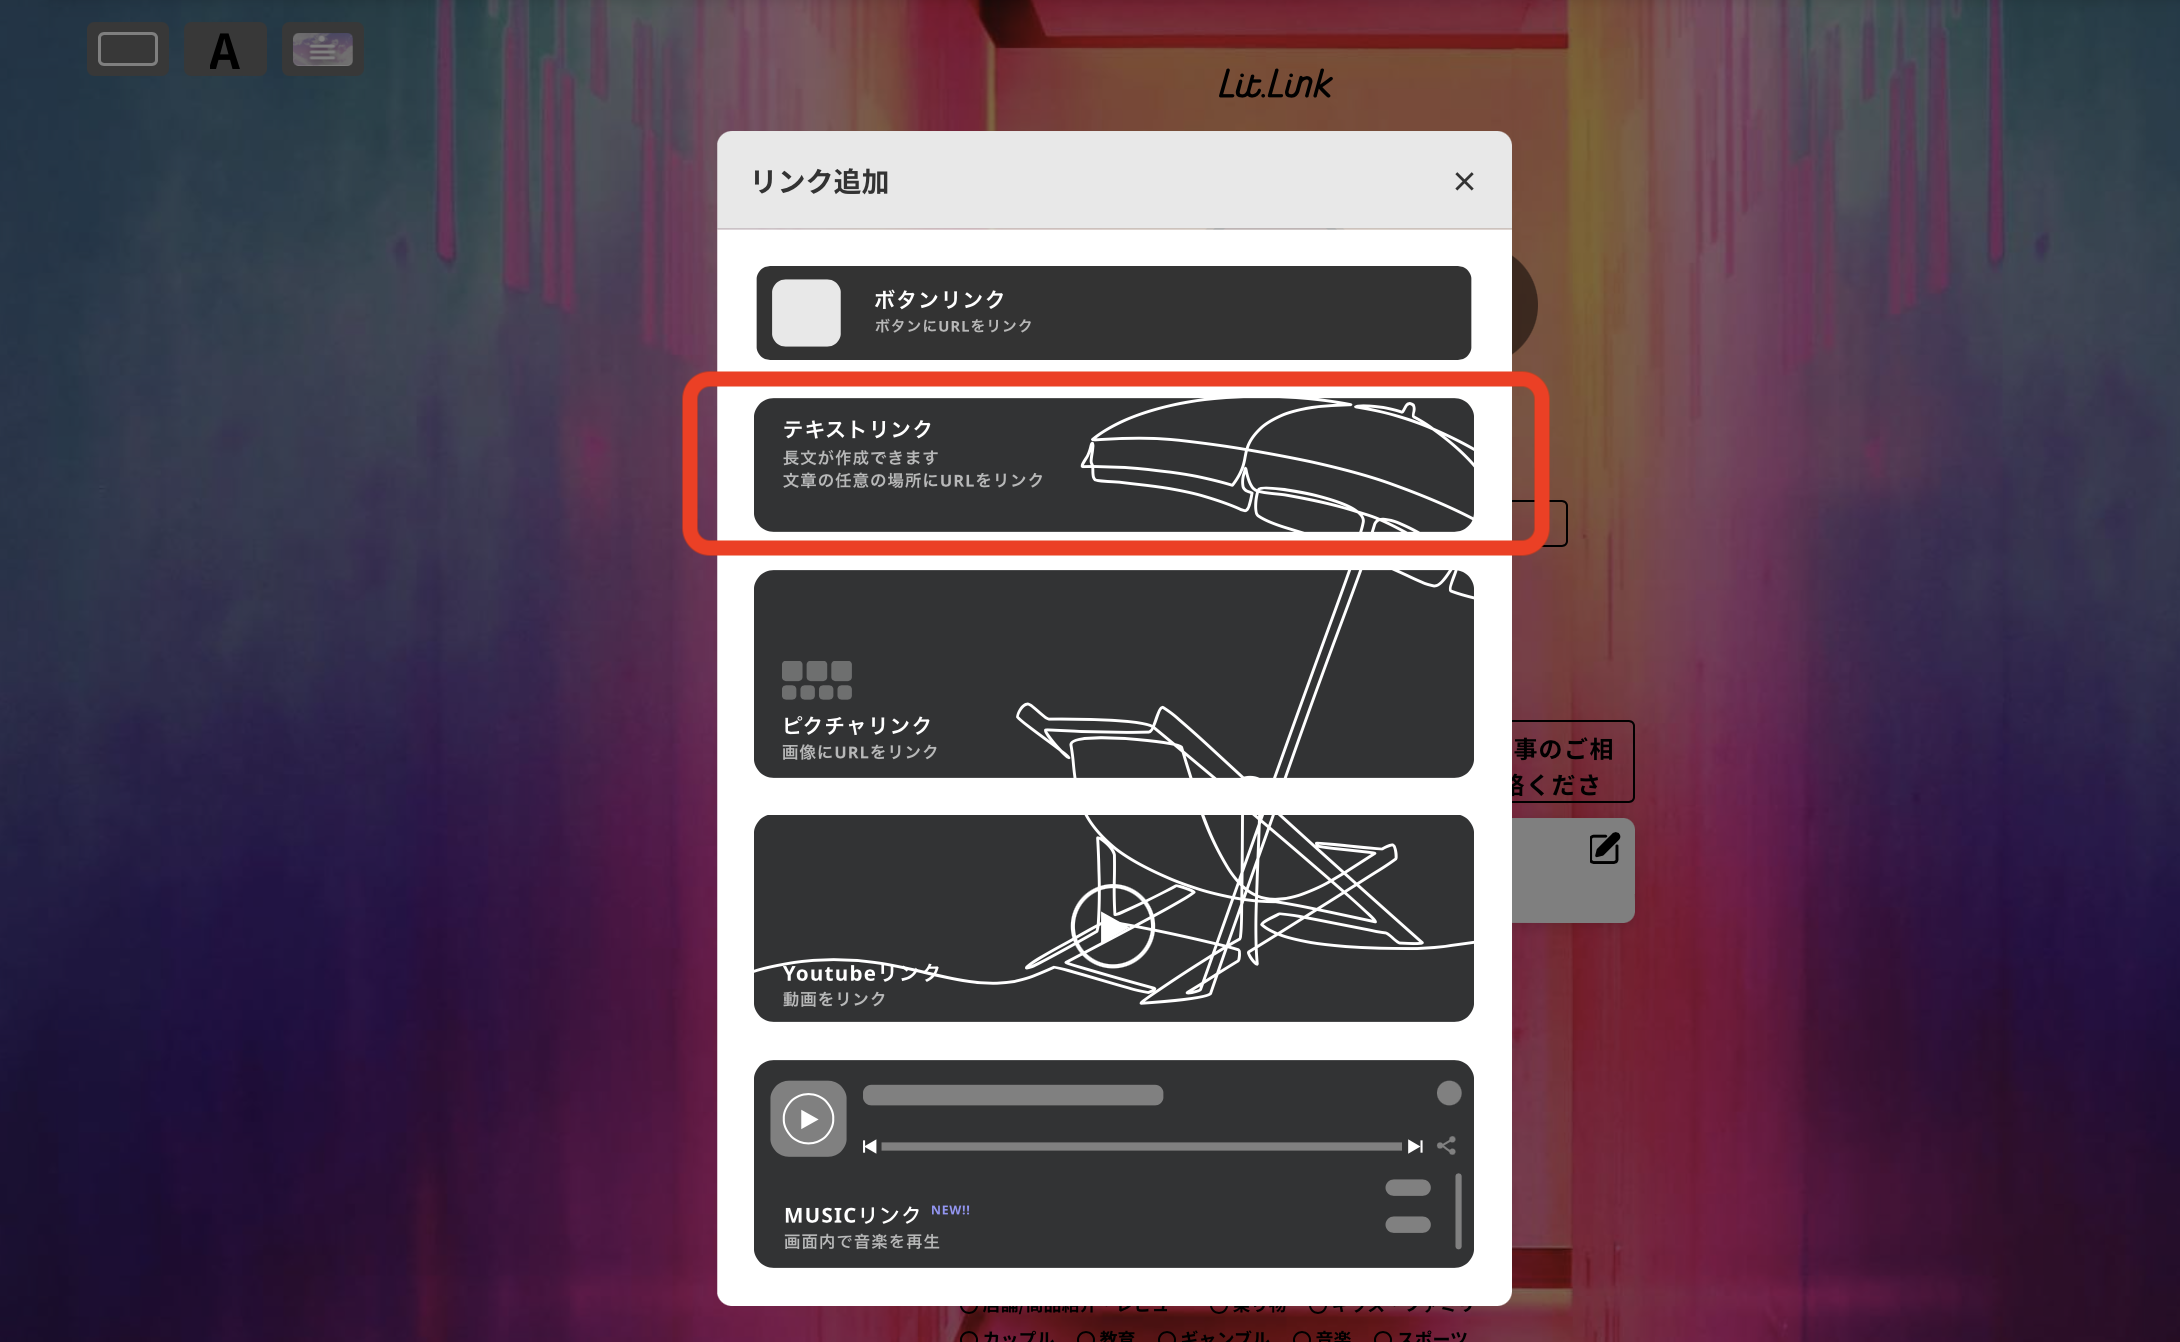
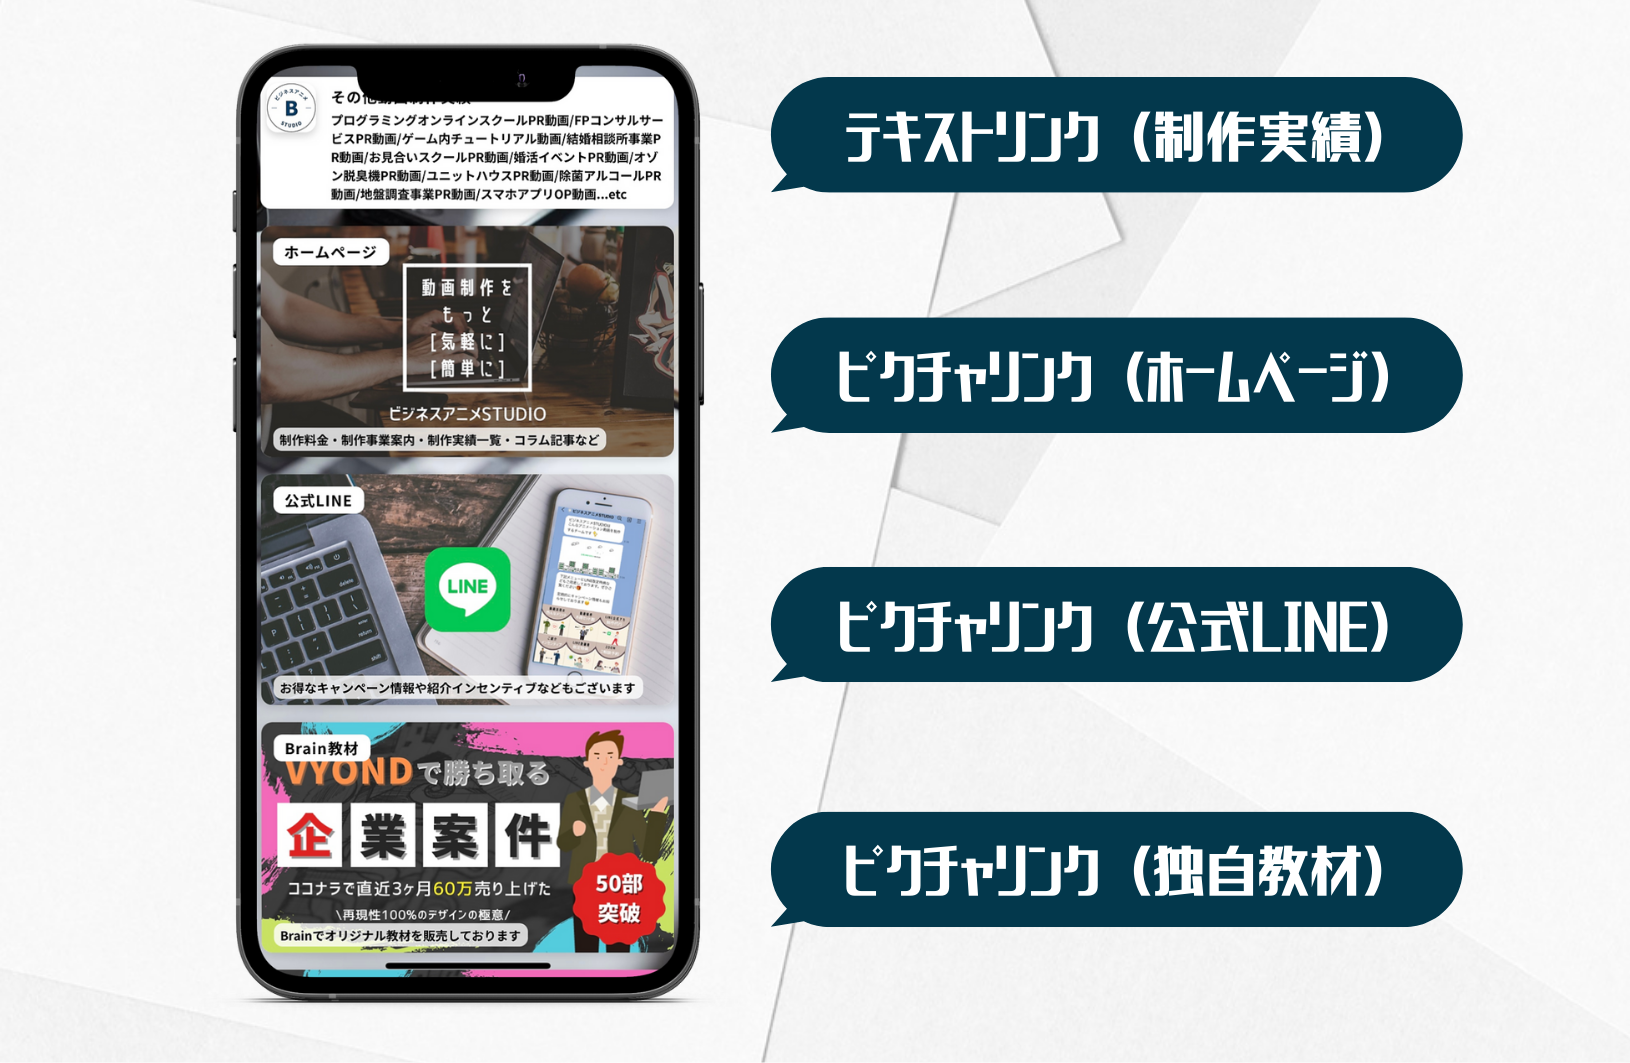
③テキストリンク
 運営者
運営者テキストのみで構成される枠です。

 運営者
運営者テキストリンクは[URL選択]を押してもリンクを挿入する部分は出てきません。最後に閉じて保存を押します。各項目を記入すると右のように反映します。
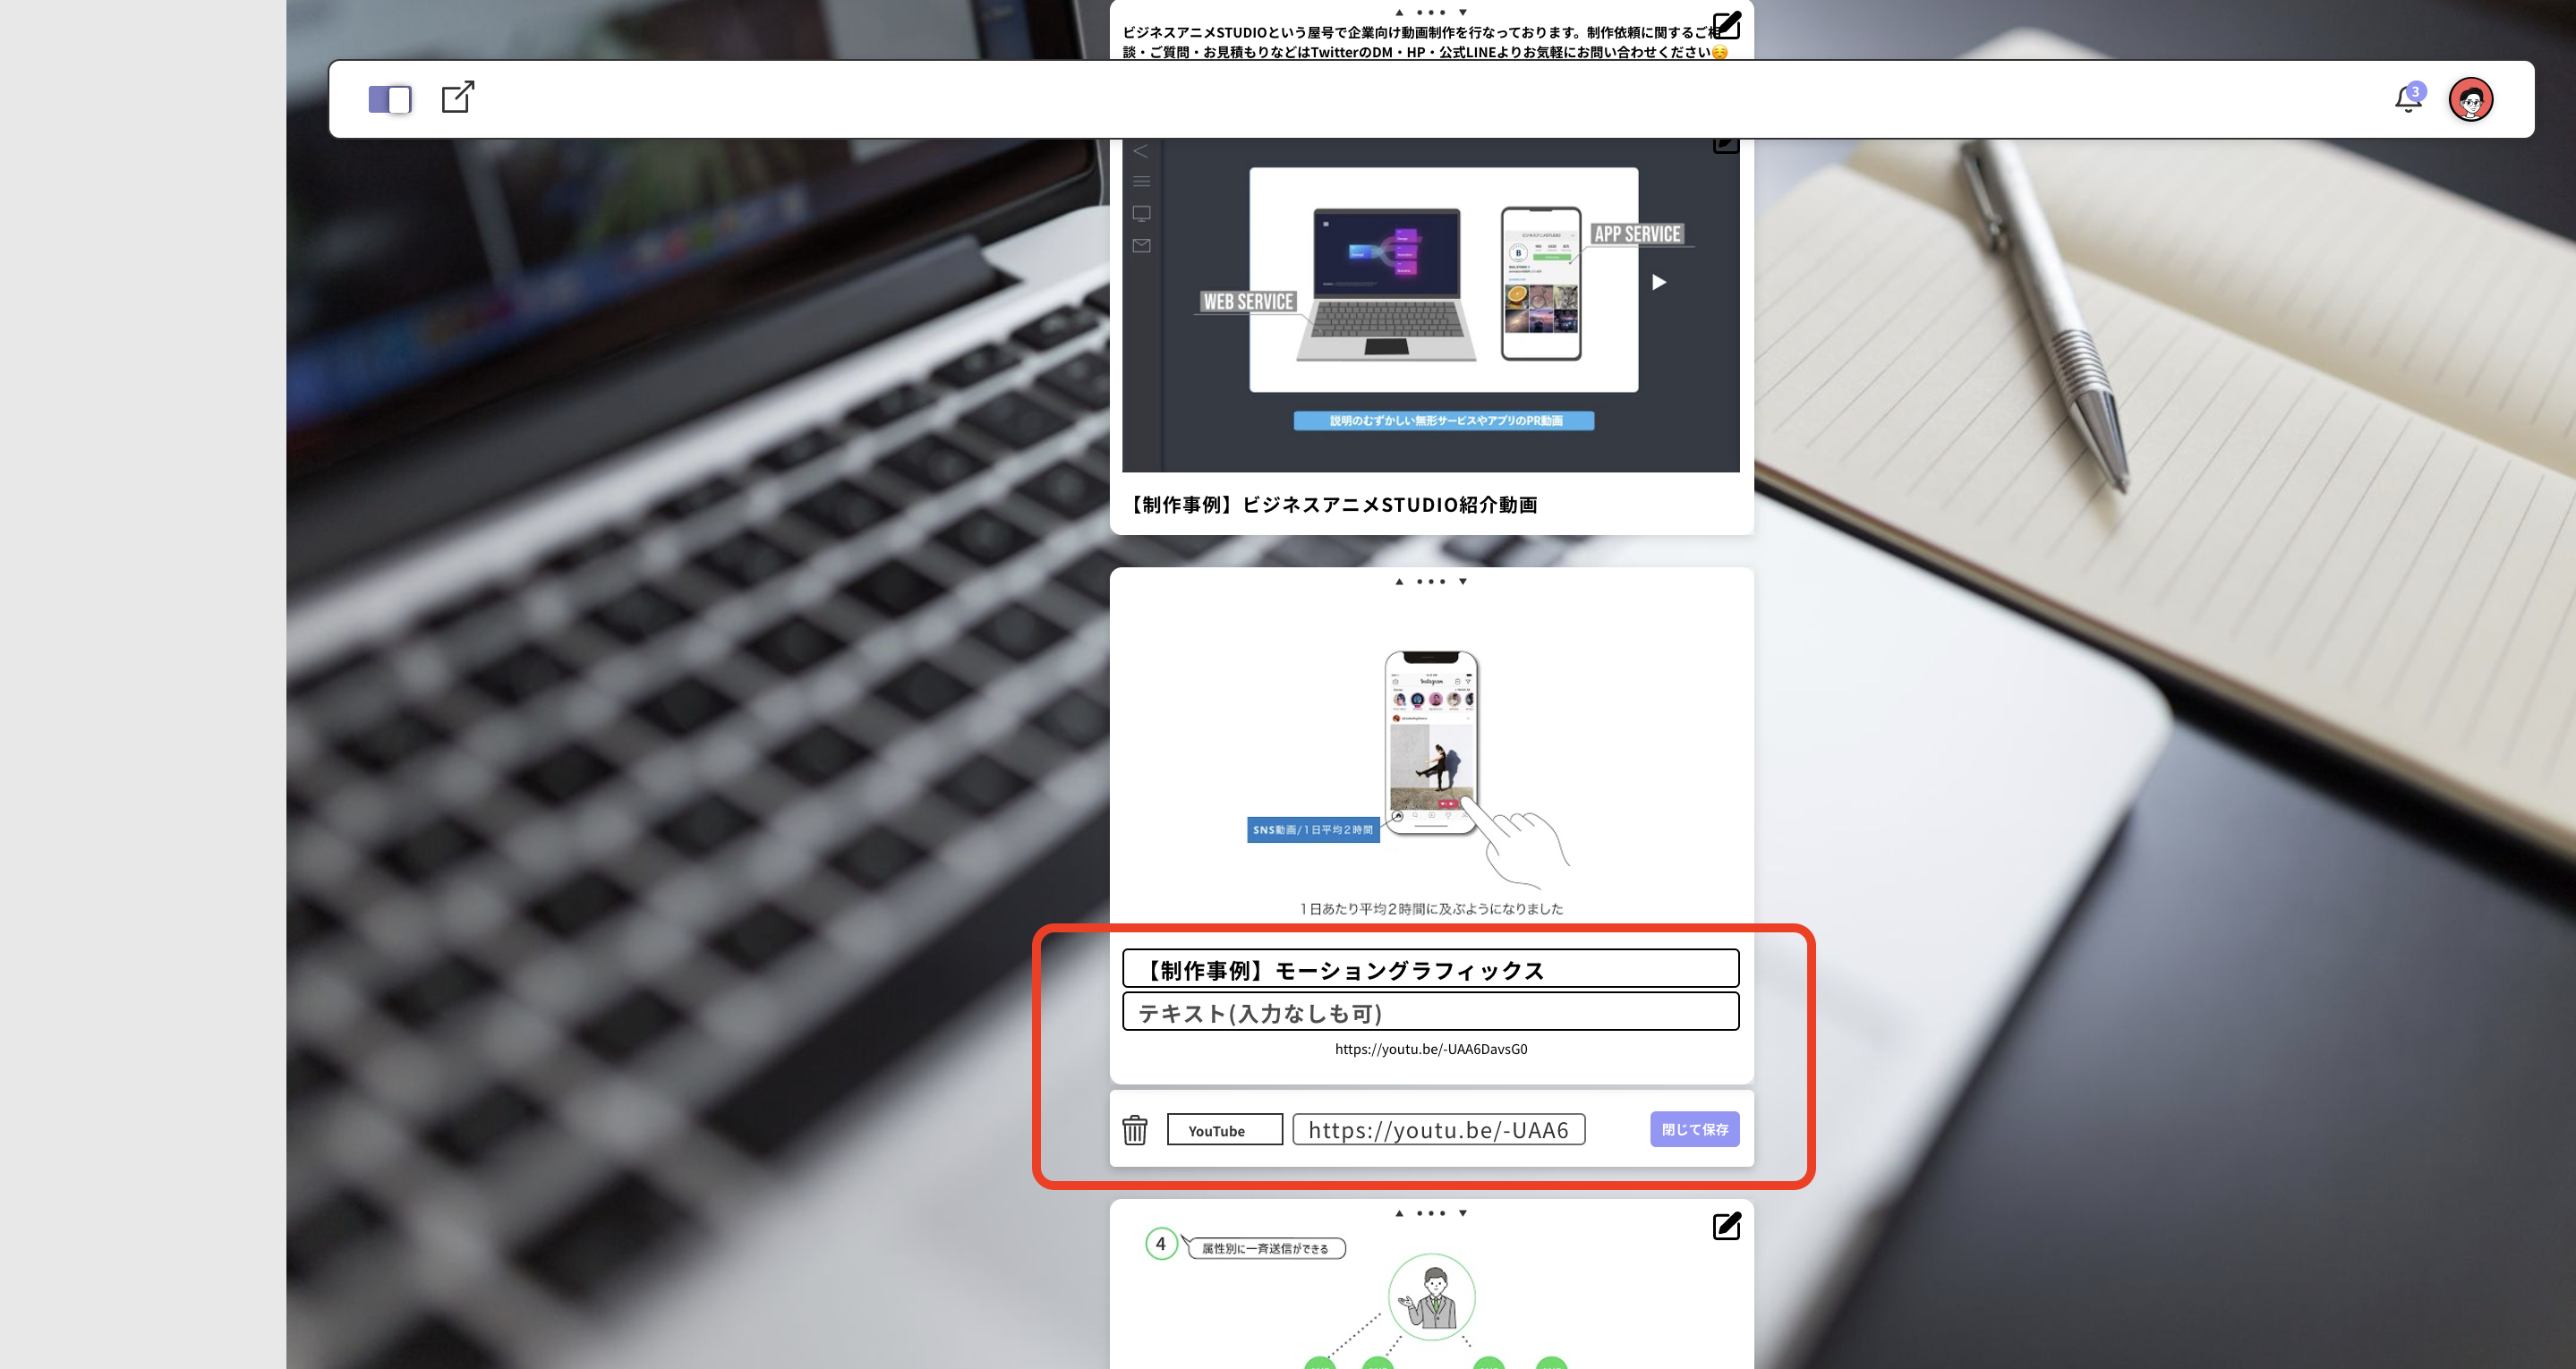
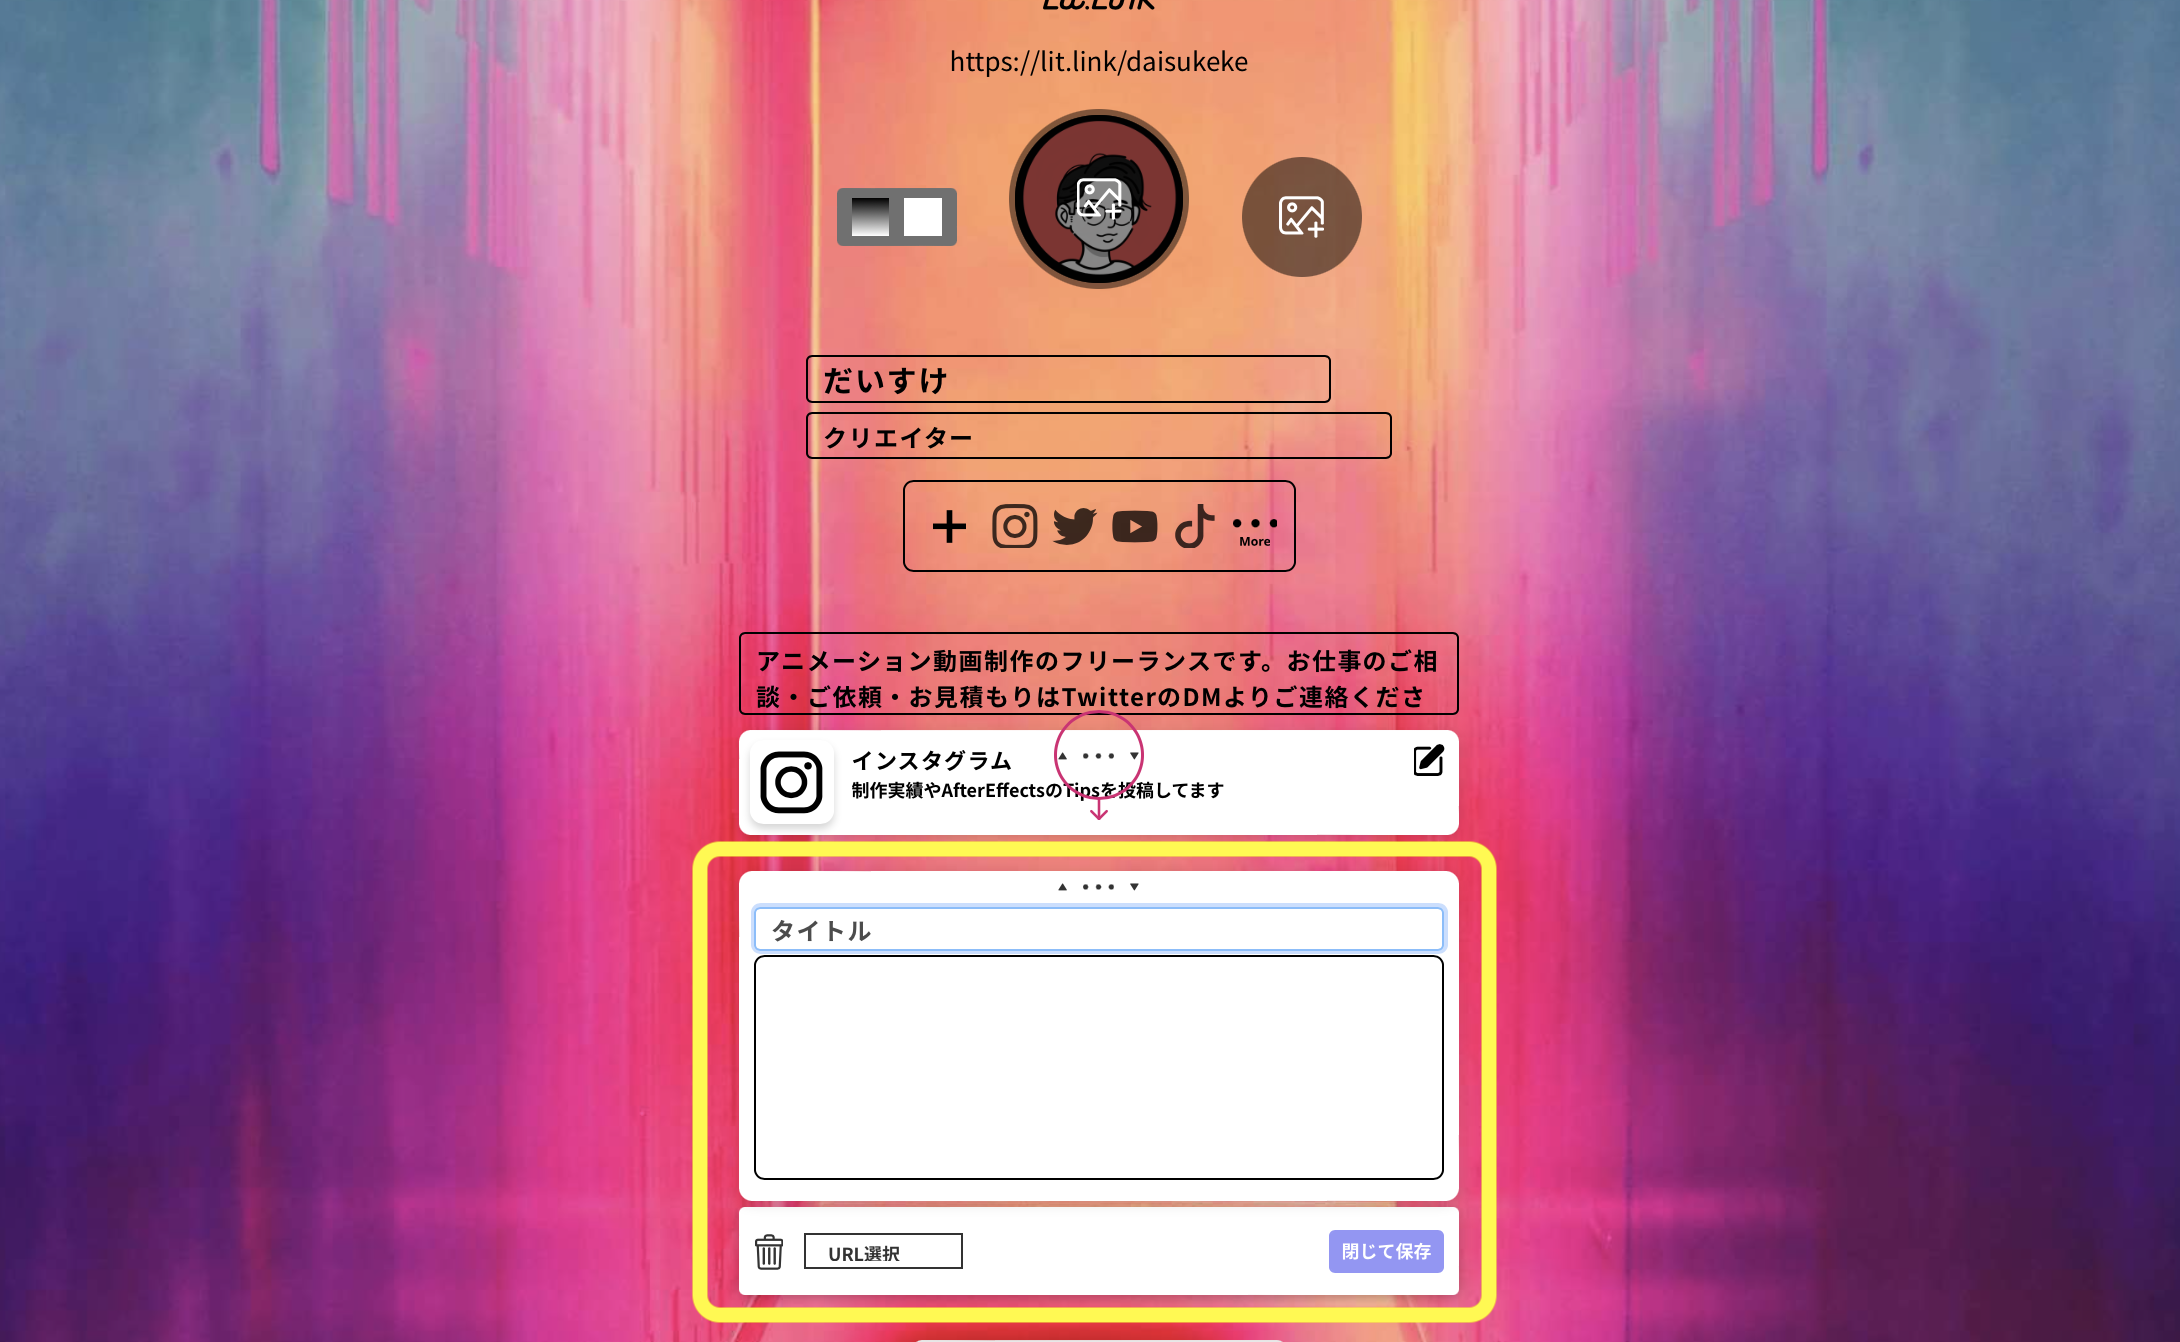
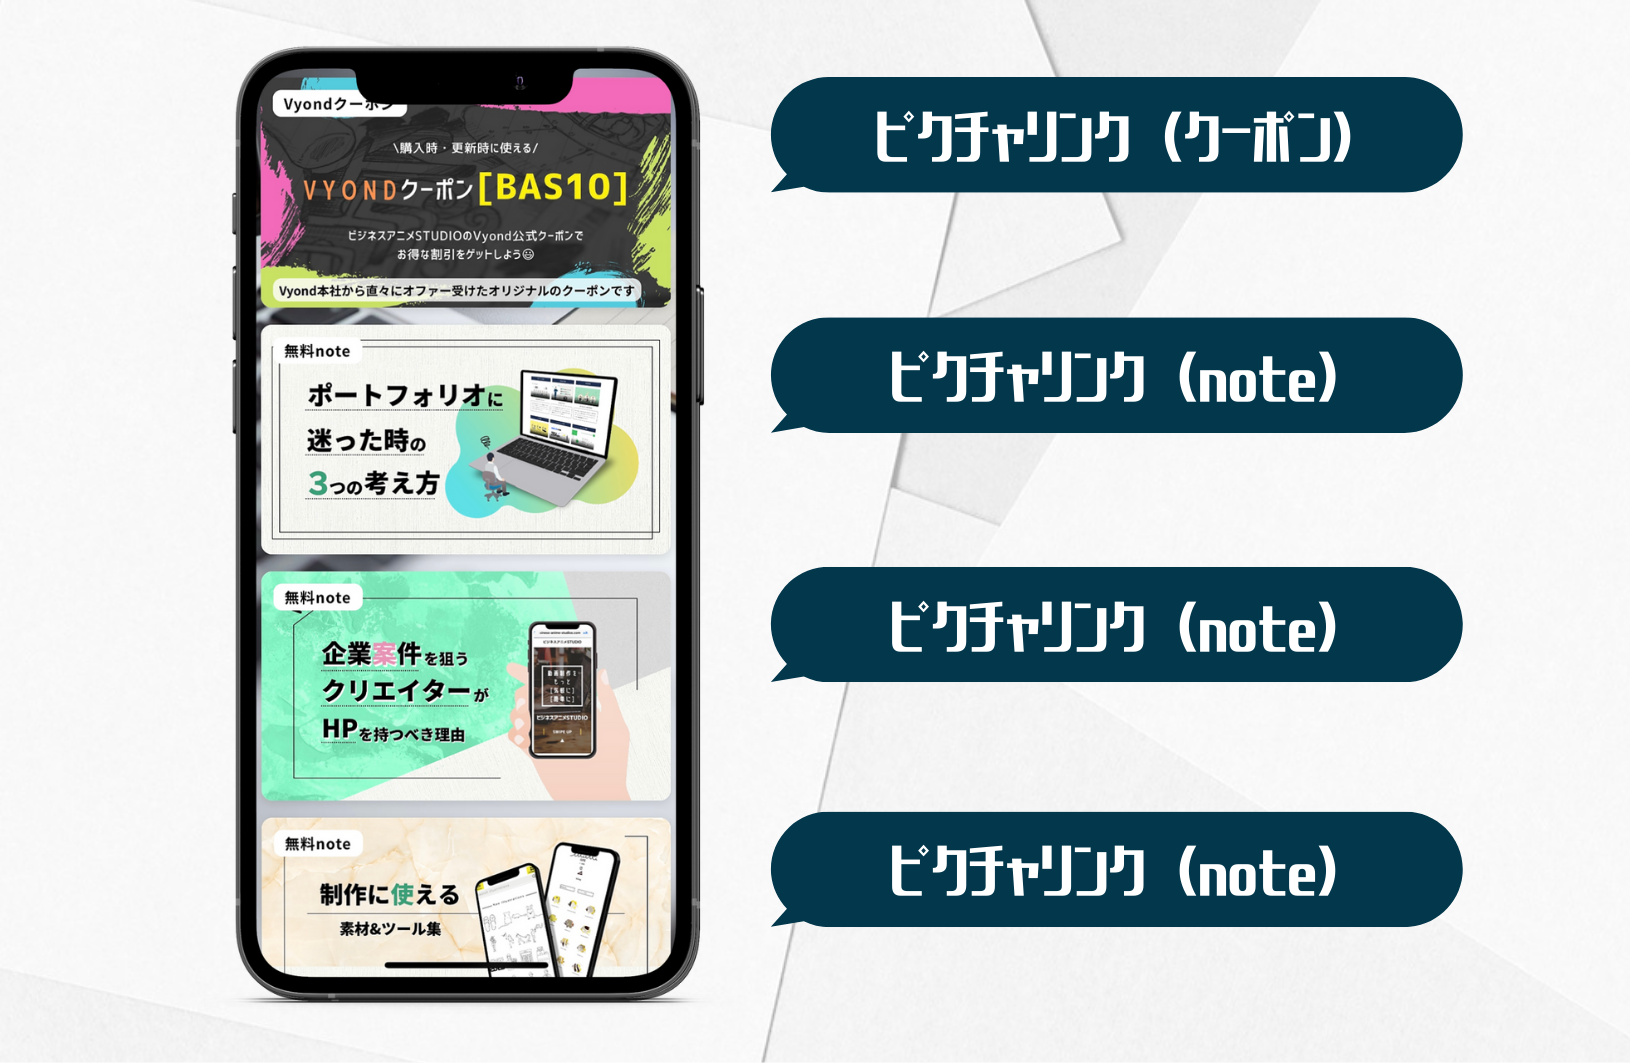
④ピクチャリンク
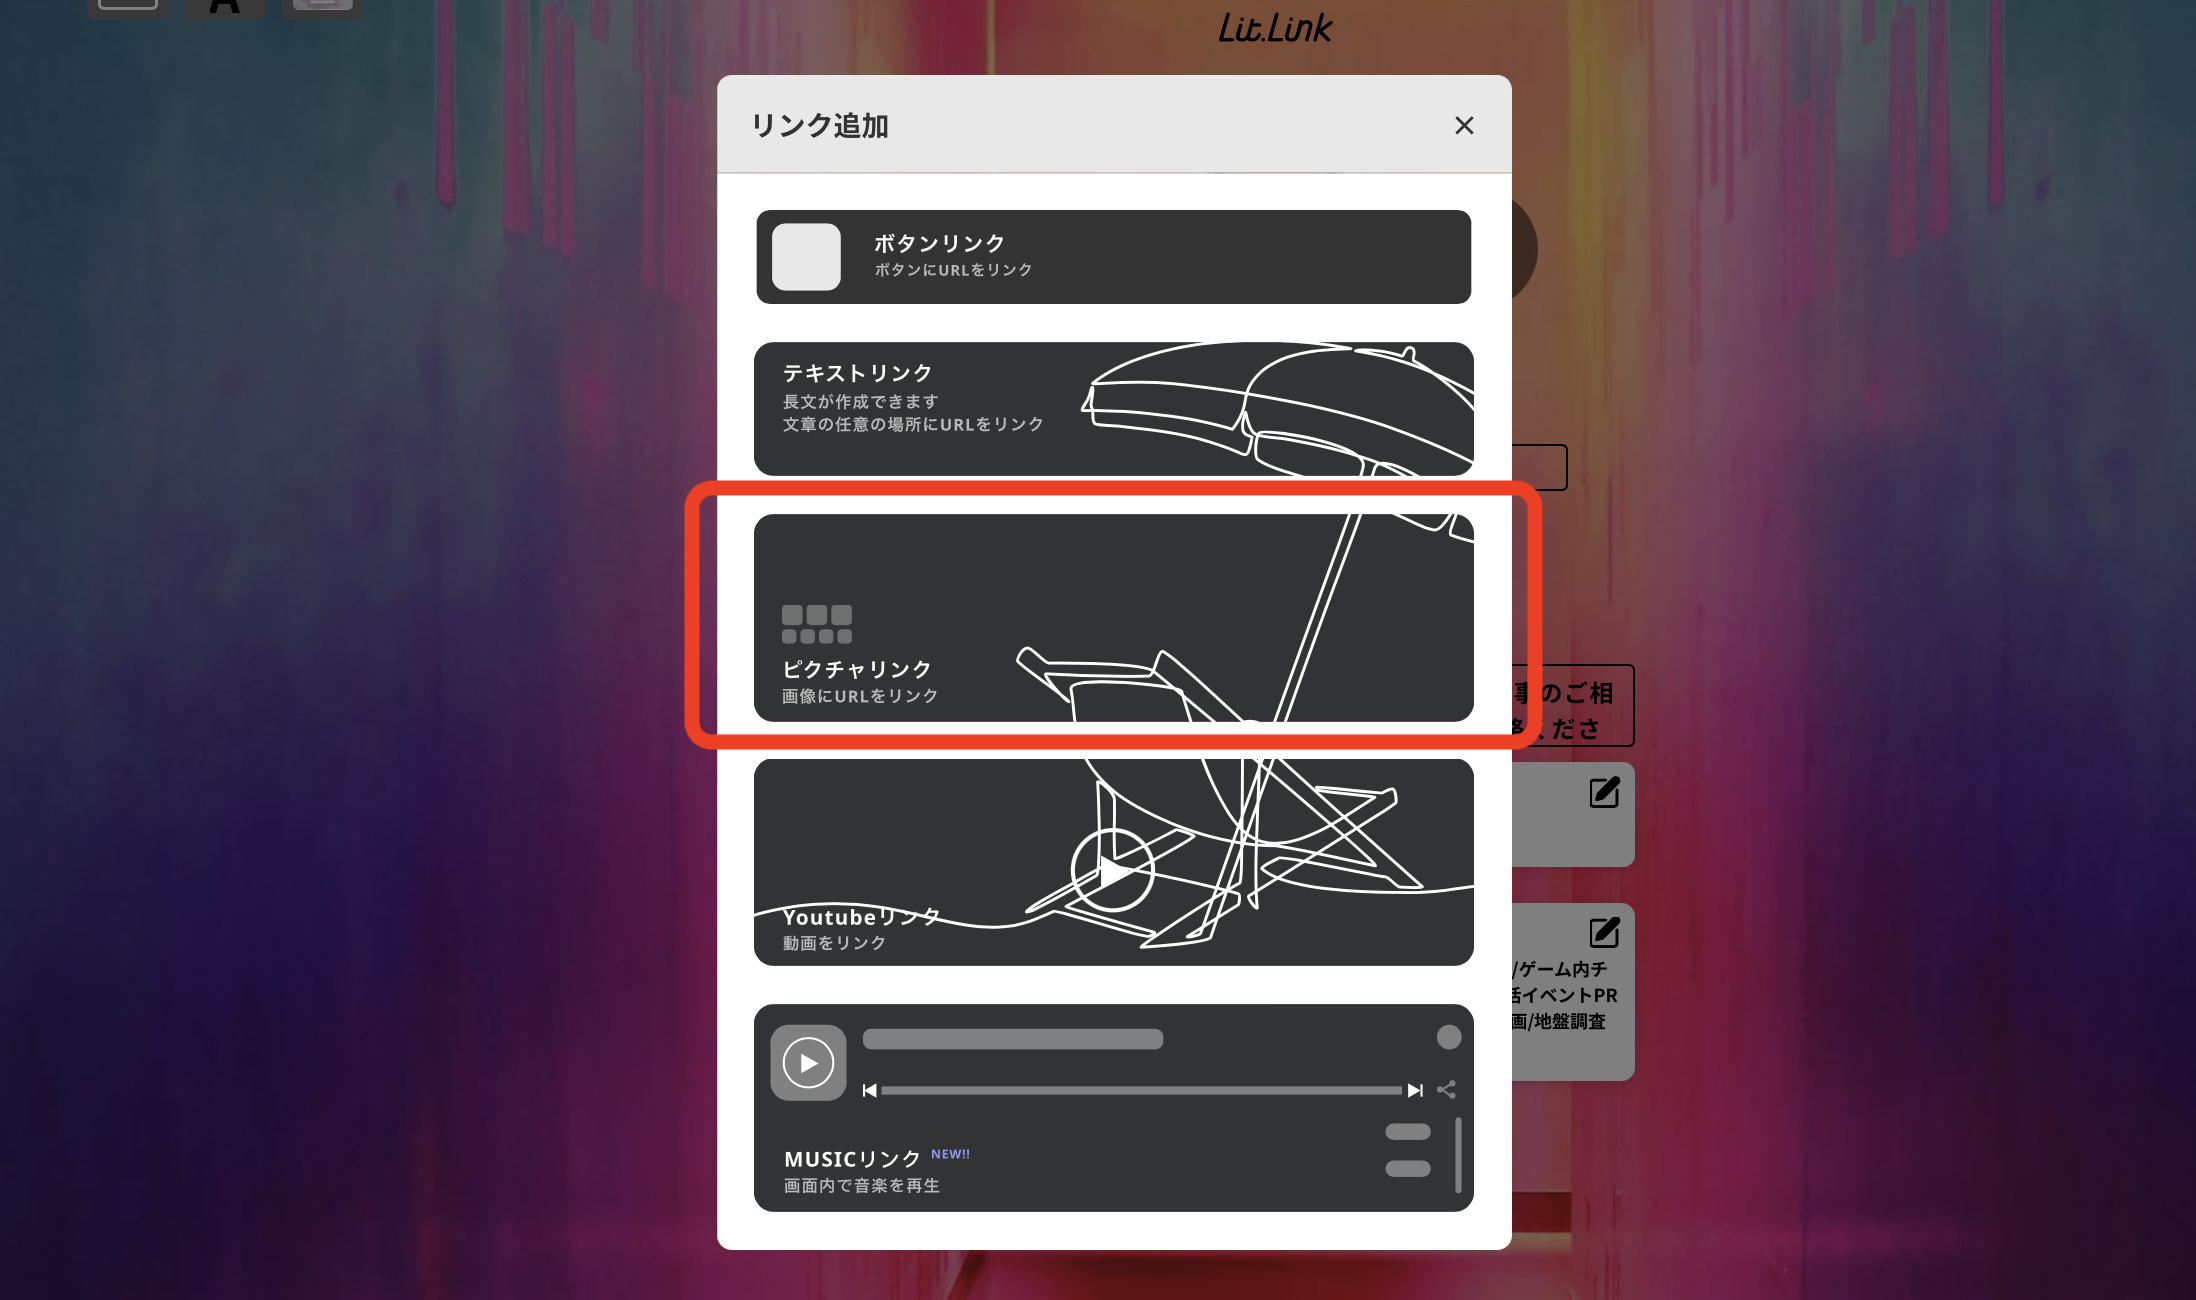
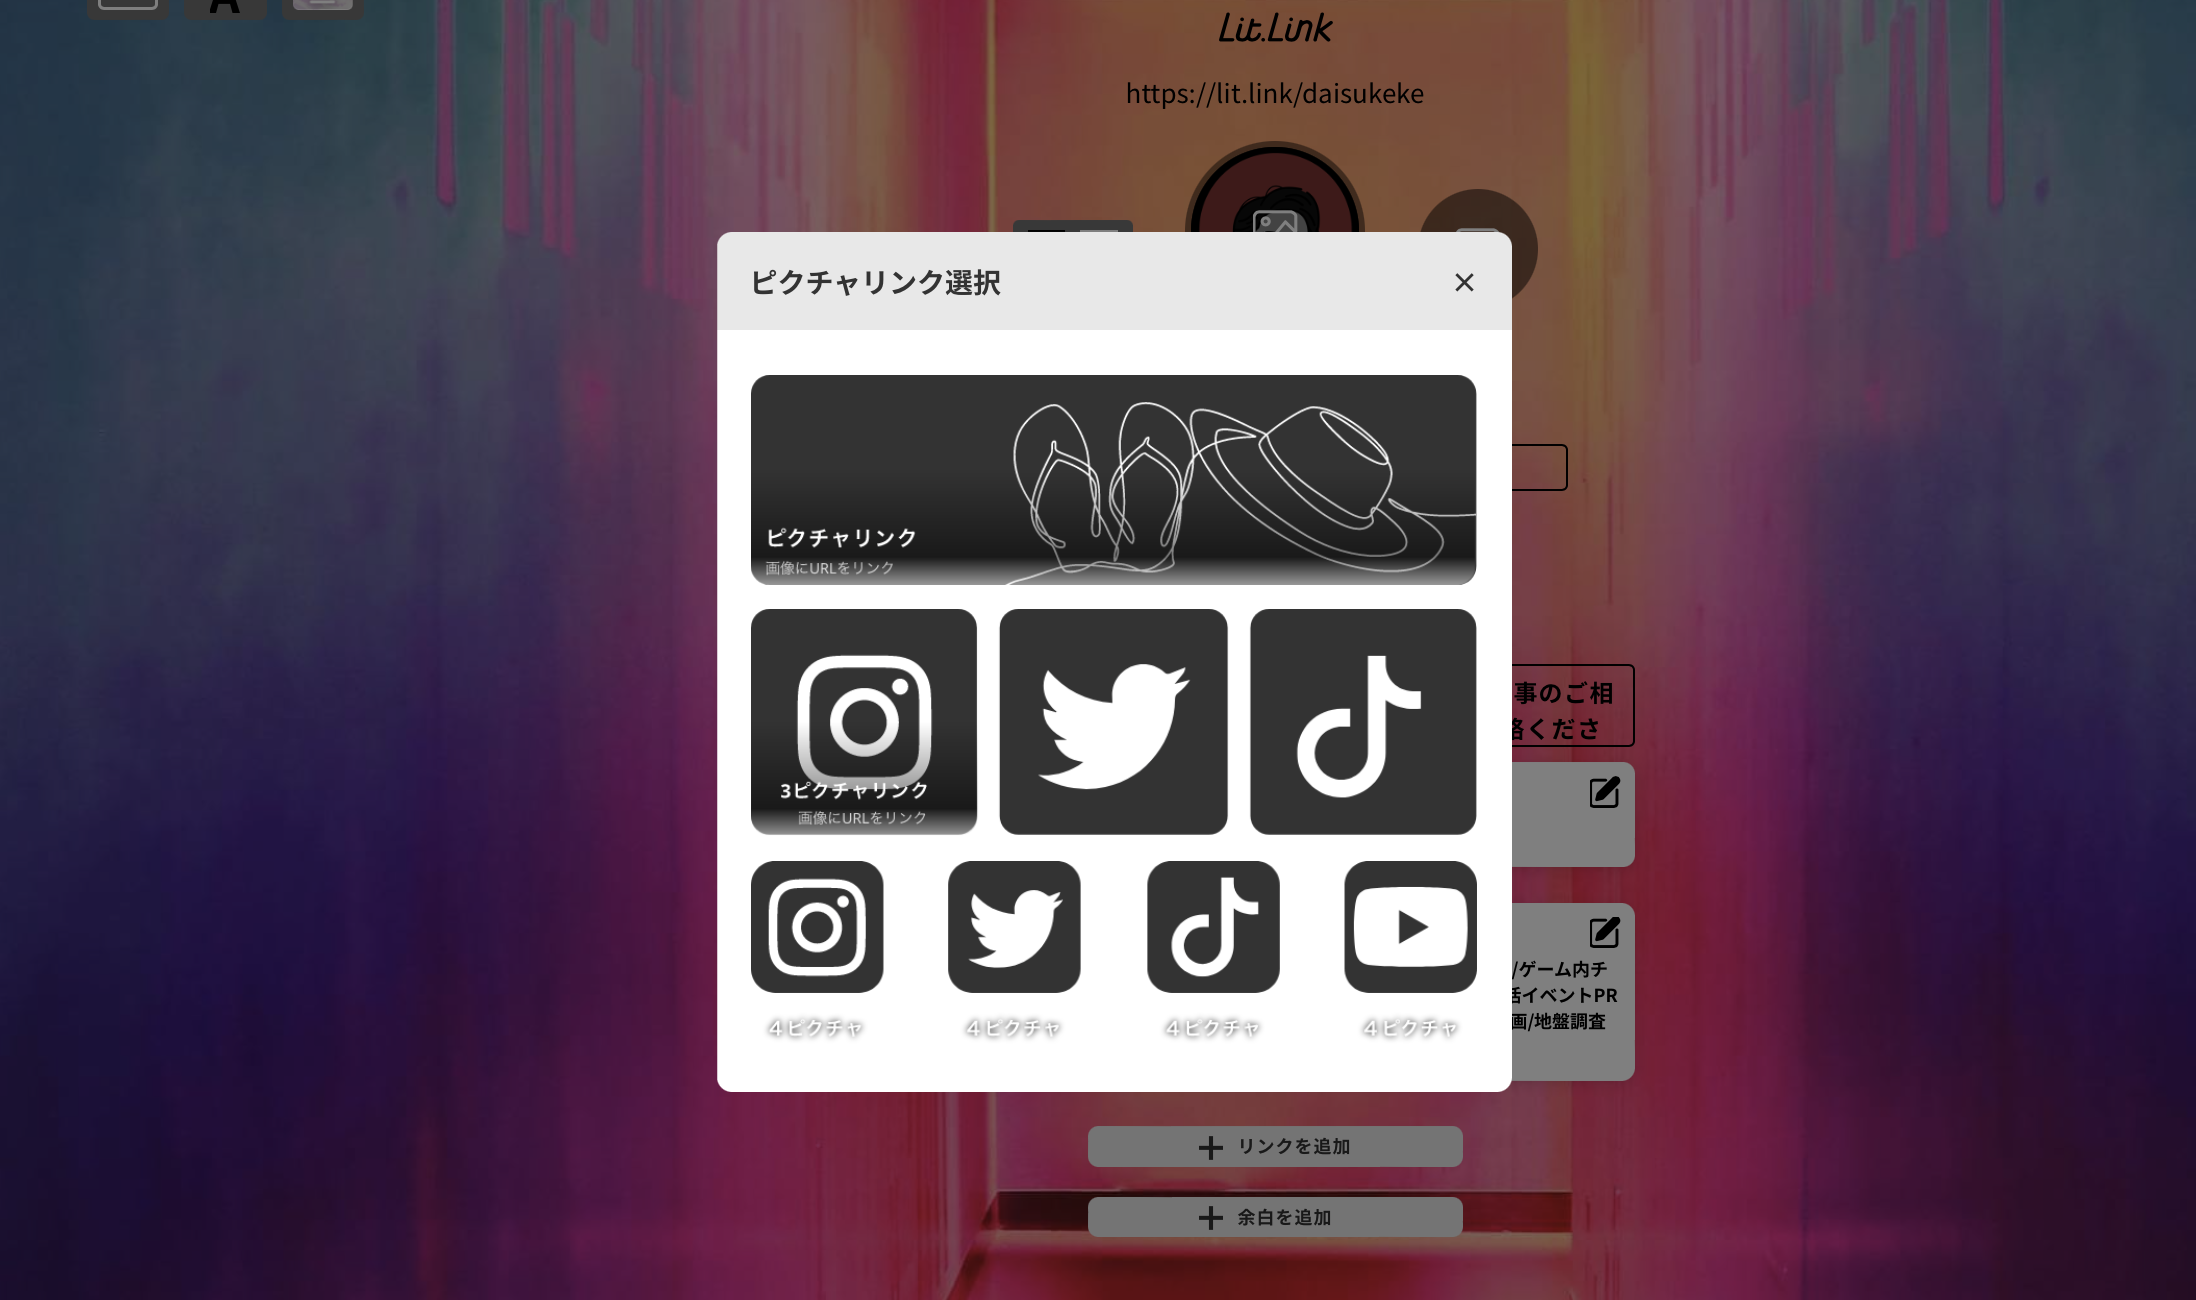 運営者
運営者キャプチャ画像と説明テキストで構成されるリンクです。ピクチャリンクは1カラム~3カラムまで選べます。
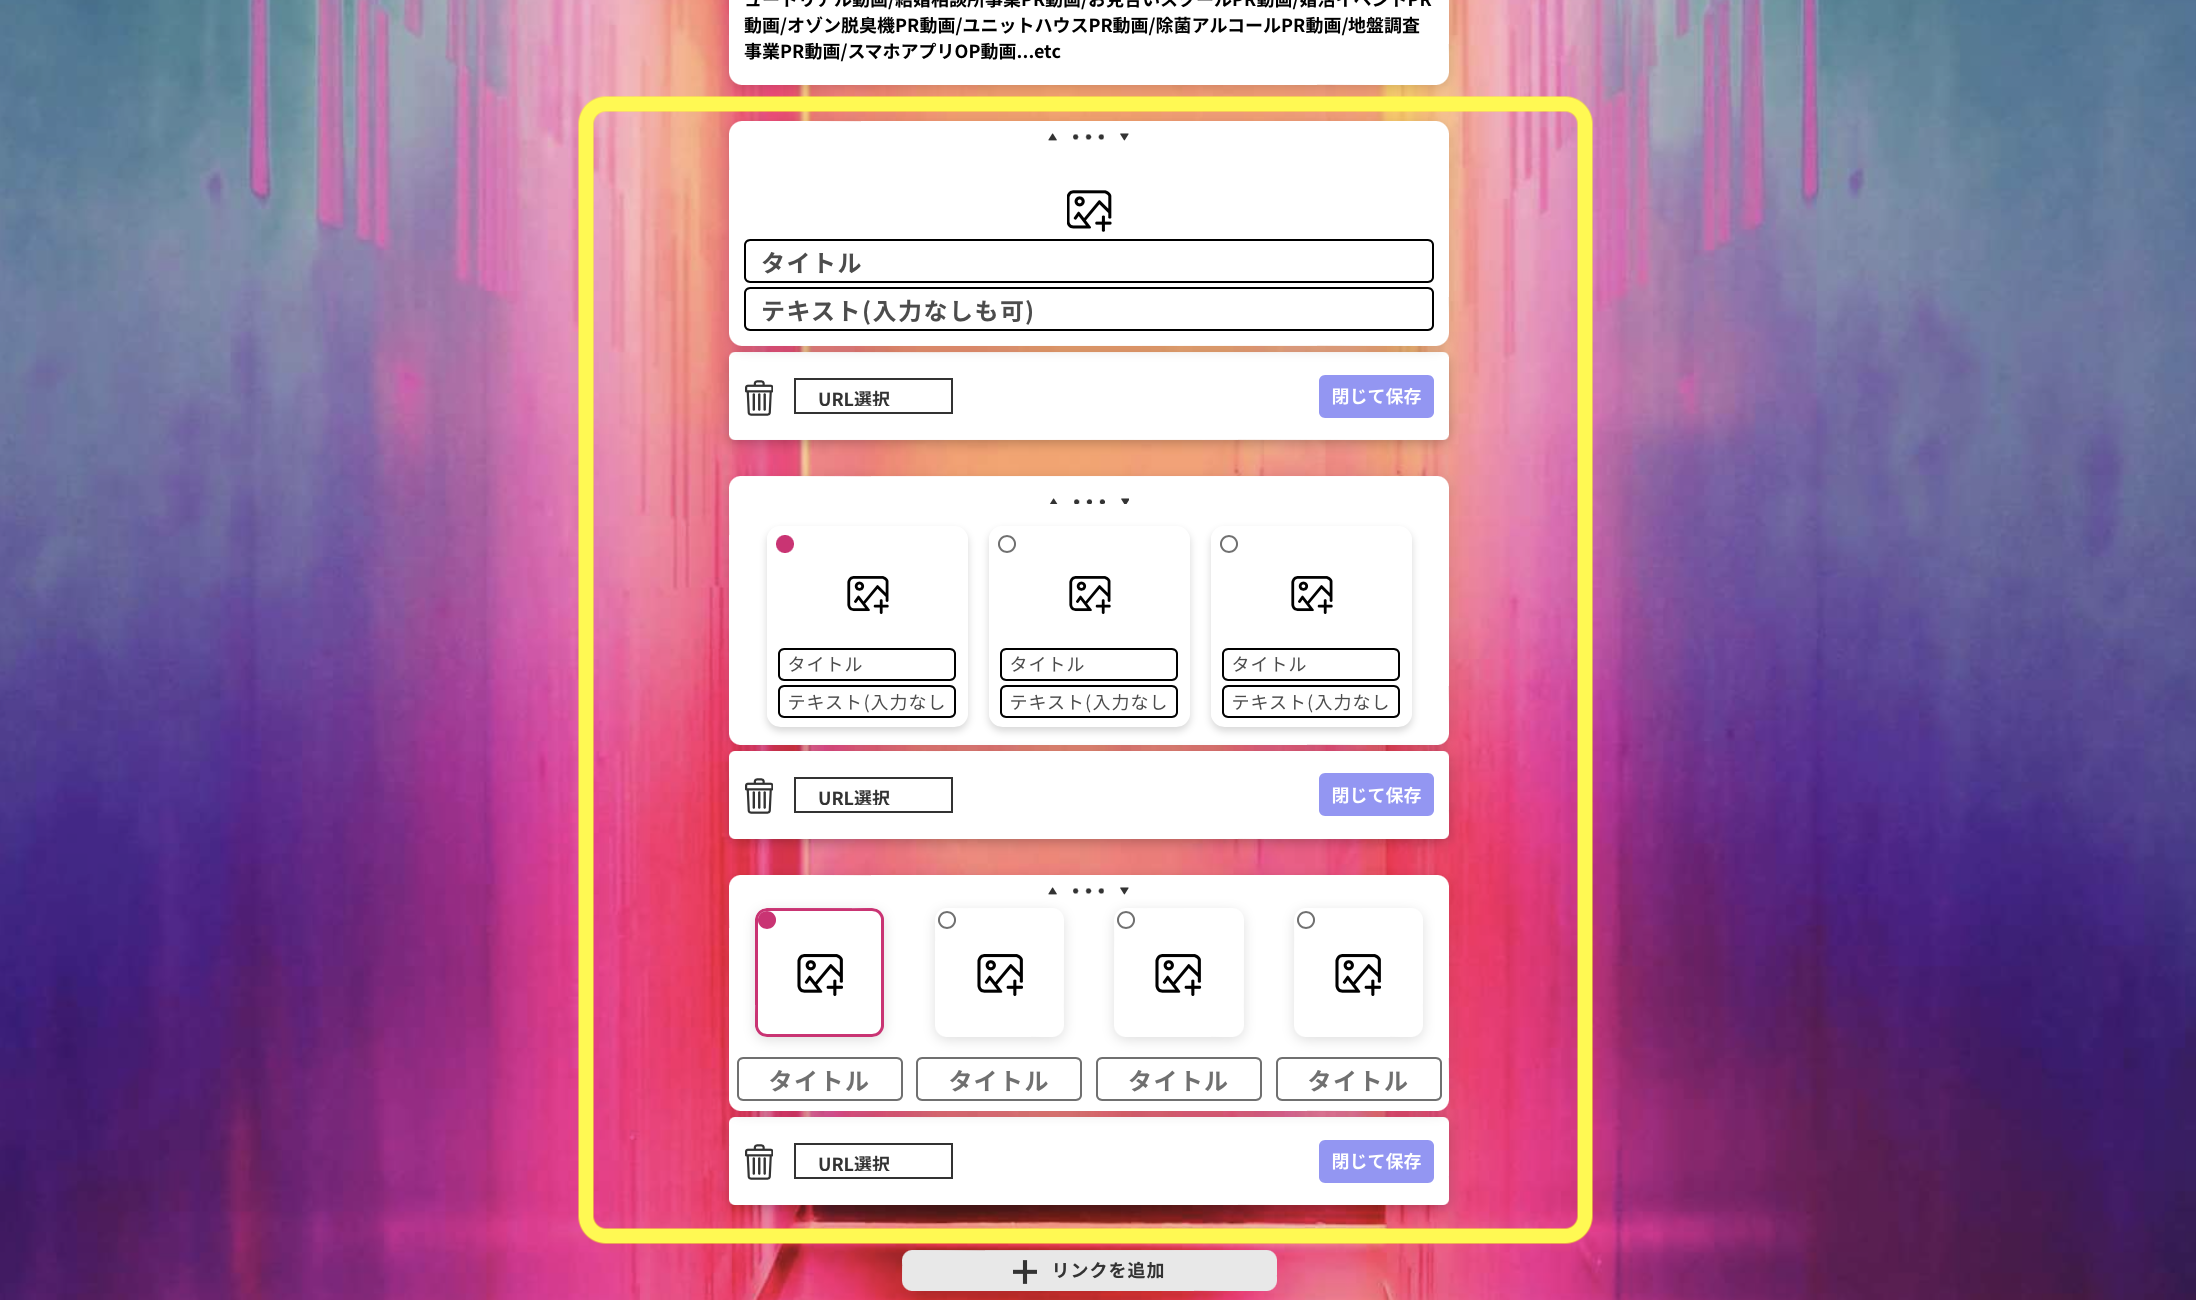
 運営者
運営者画像・タイトル・テキスト・リンクが挿入できます。1カラムを編集すると右のように反映します。
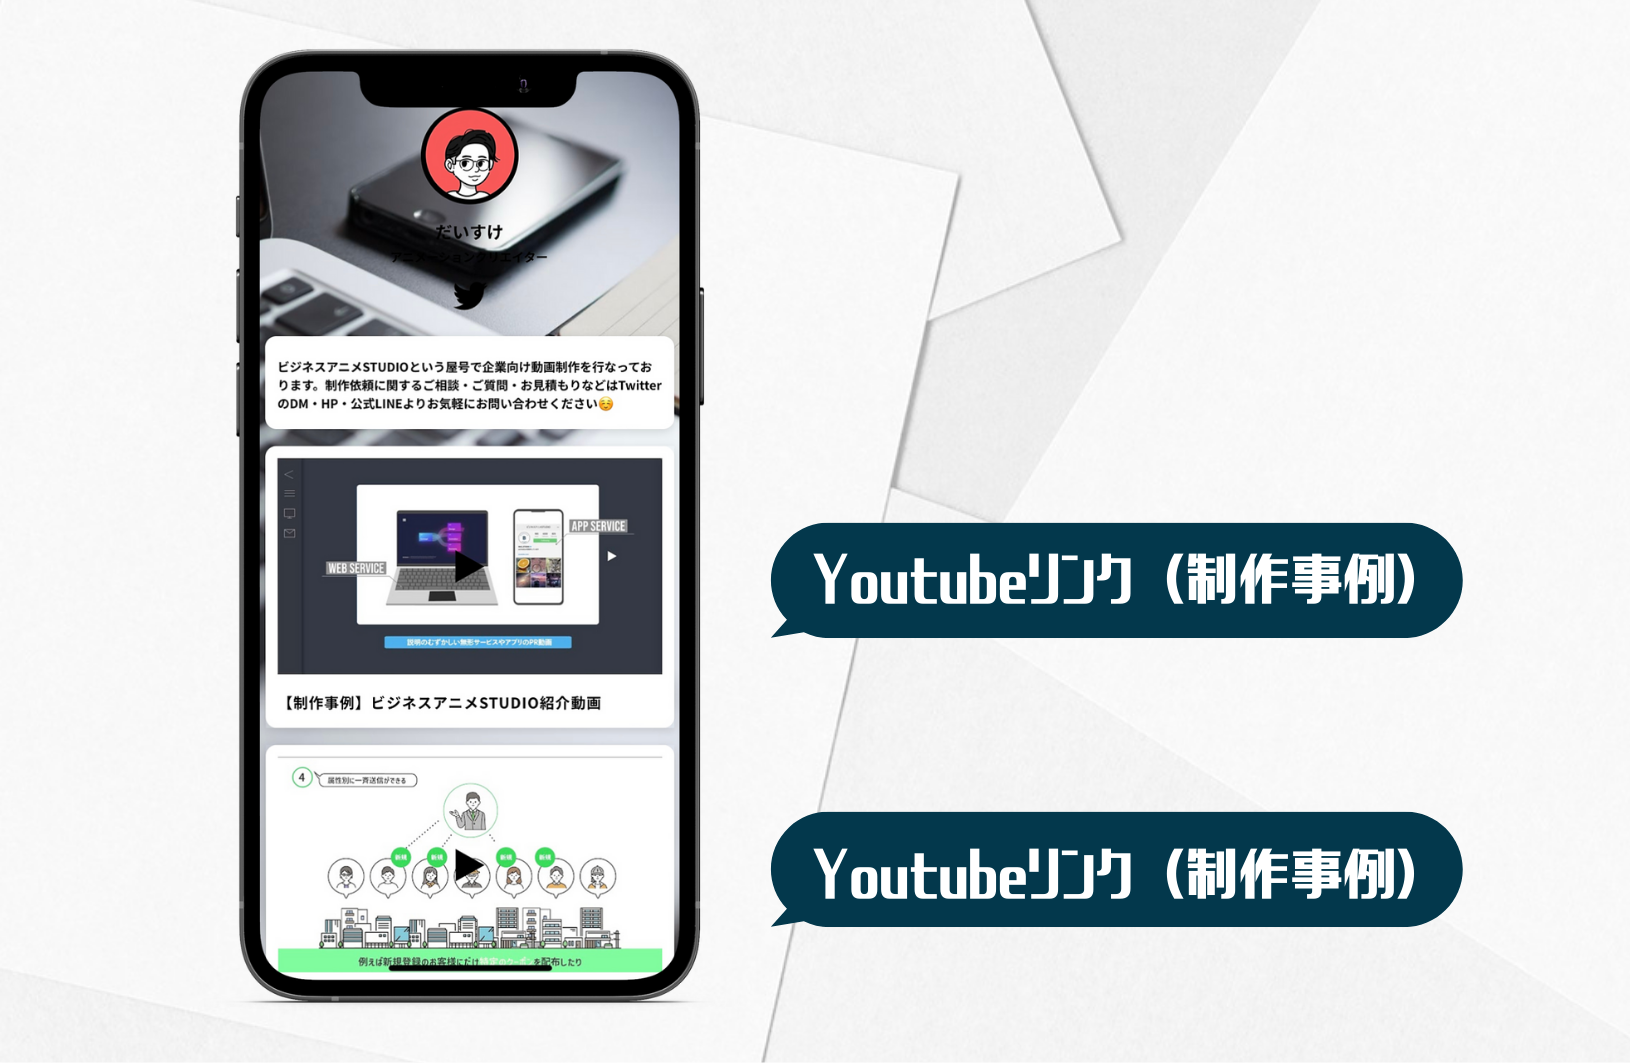
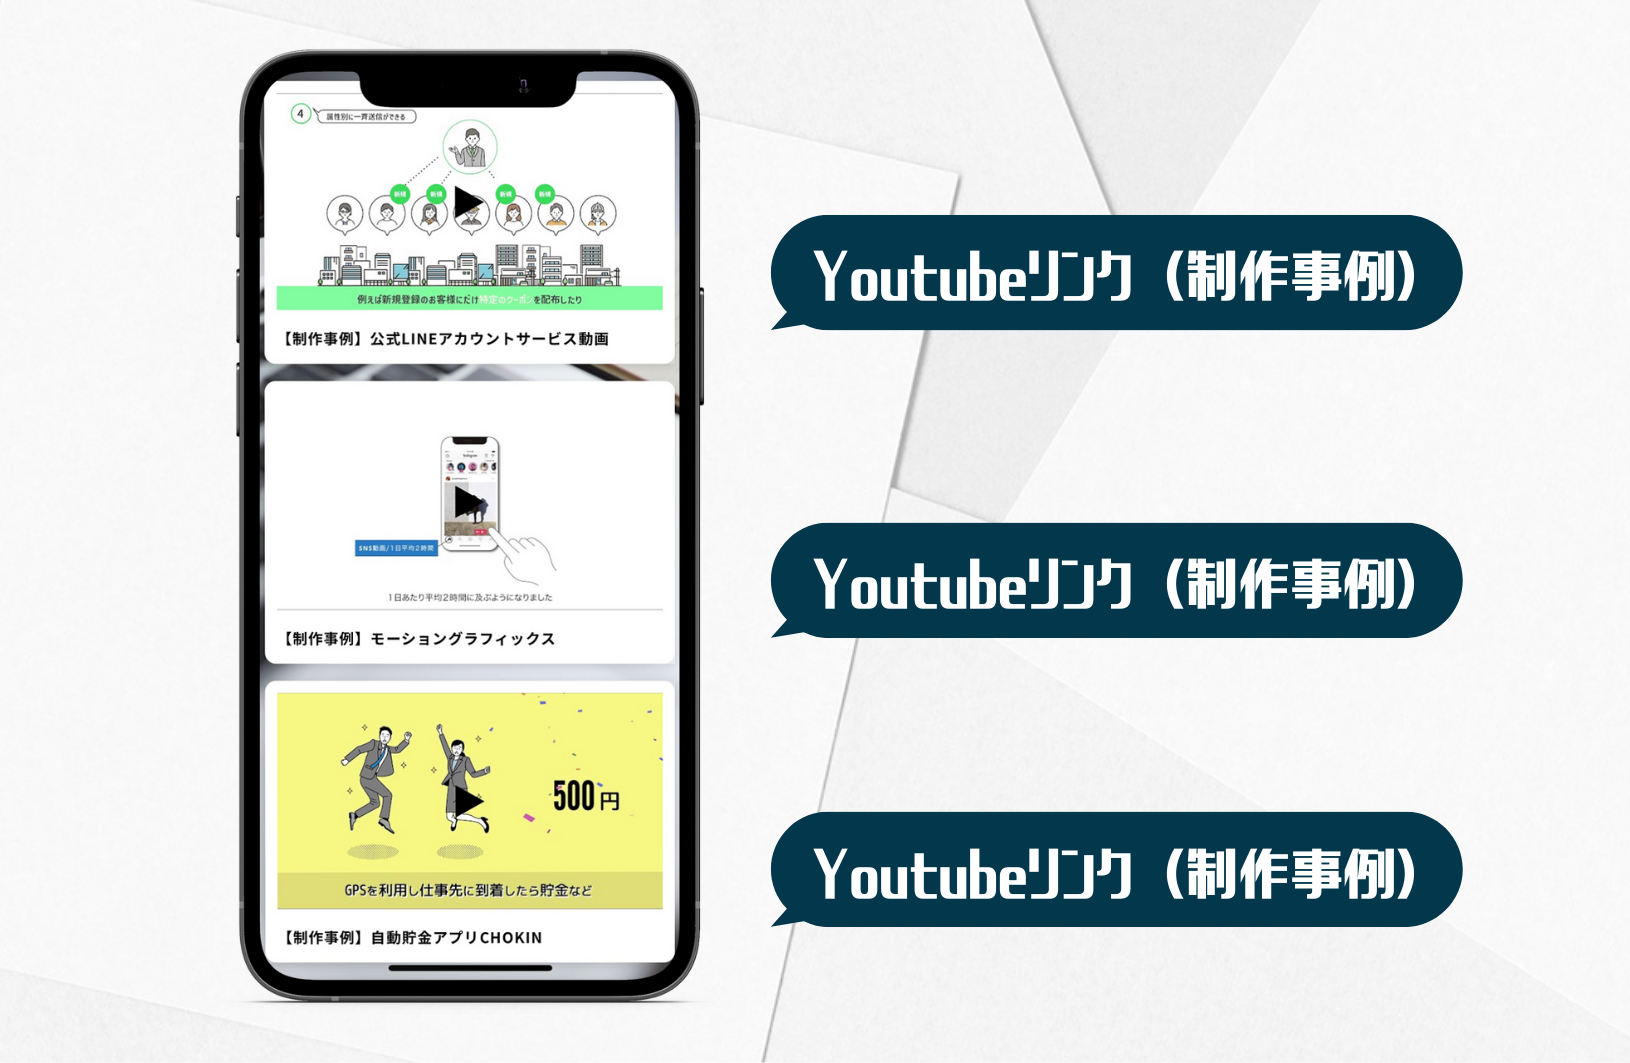
Youtubeリンク
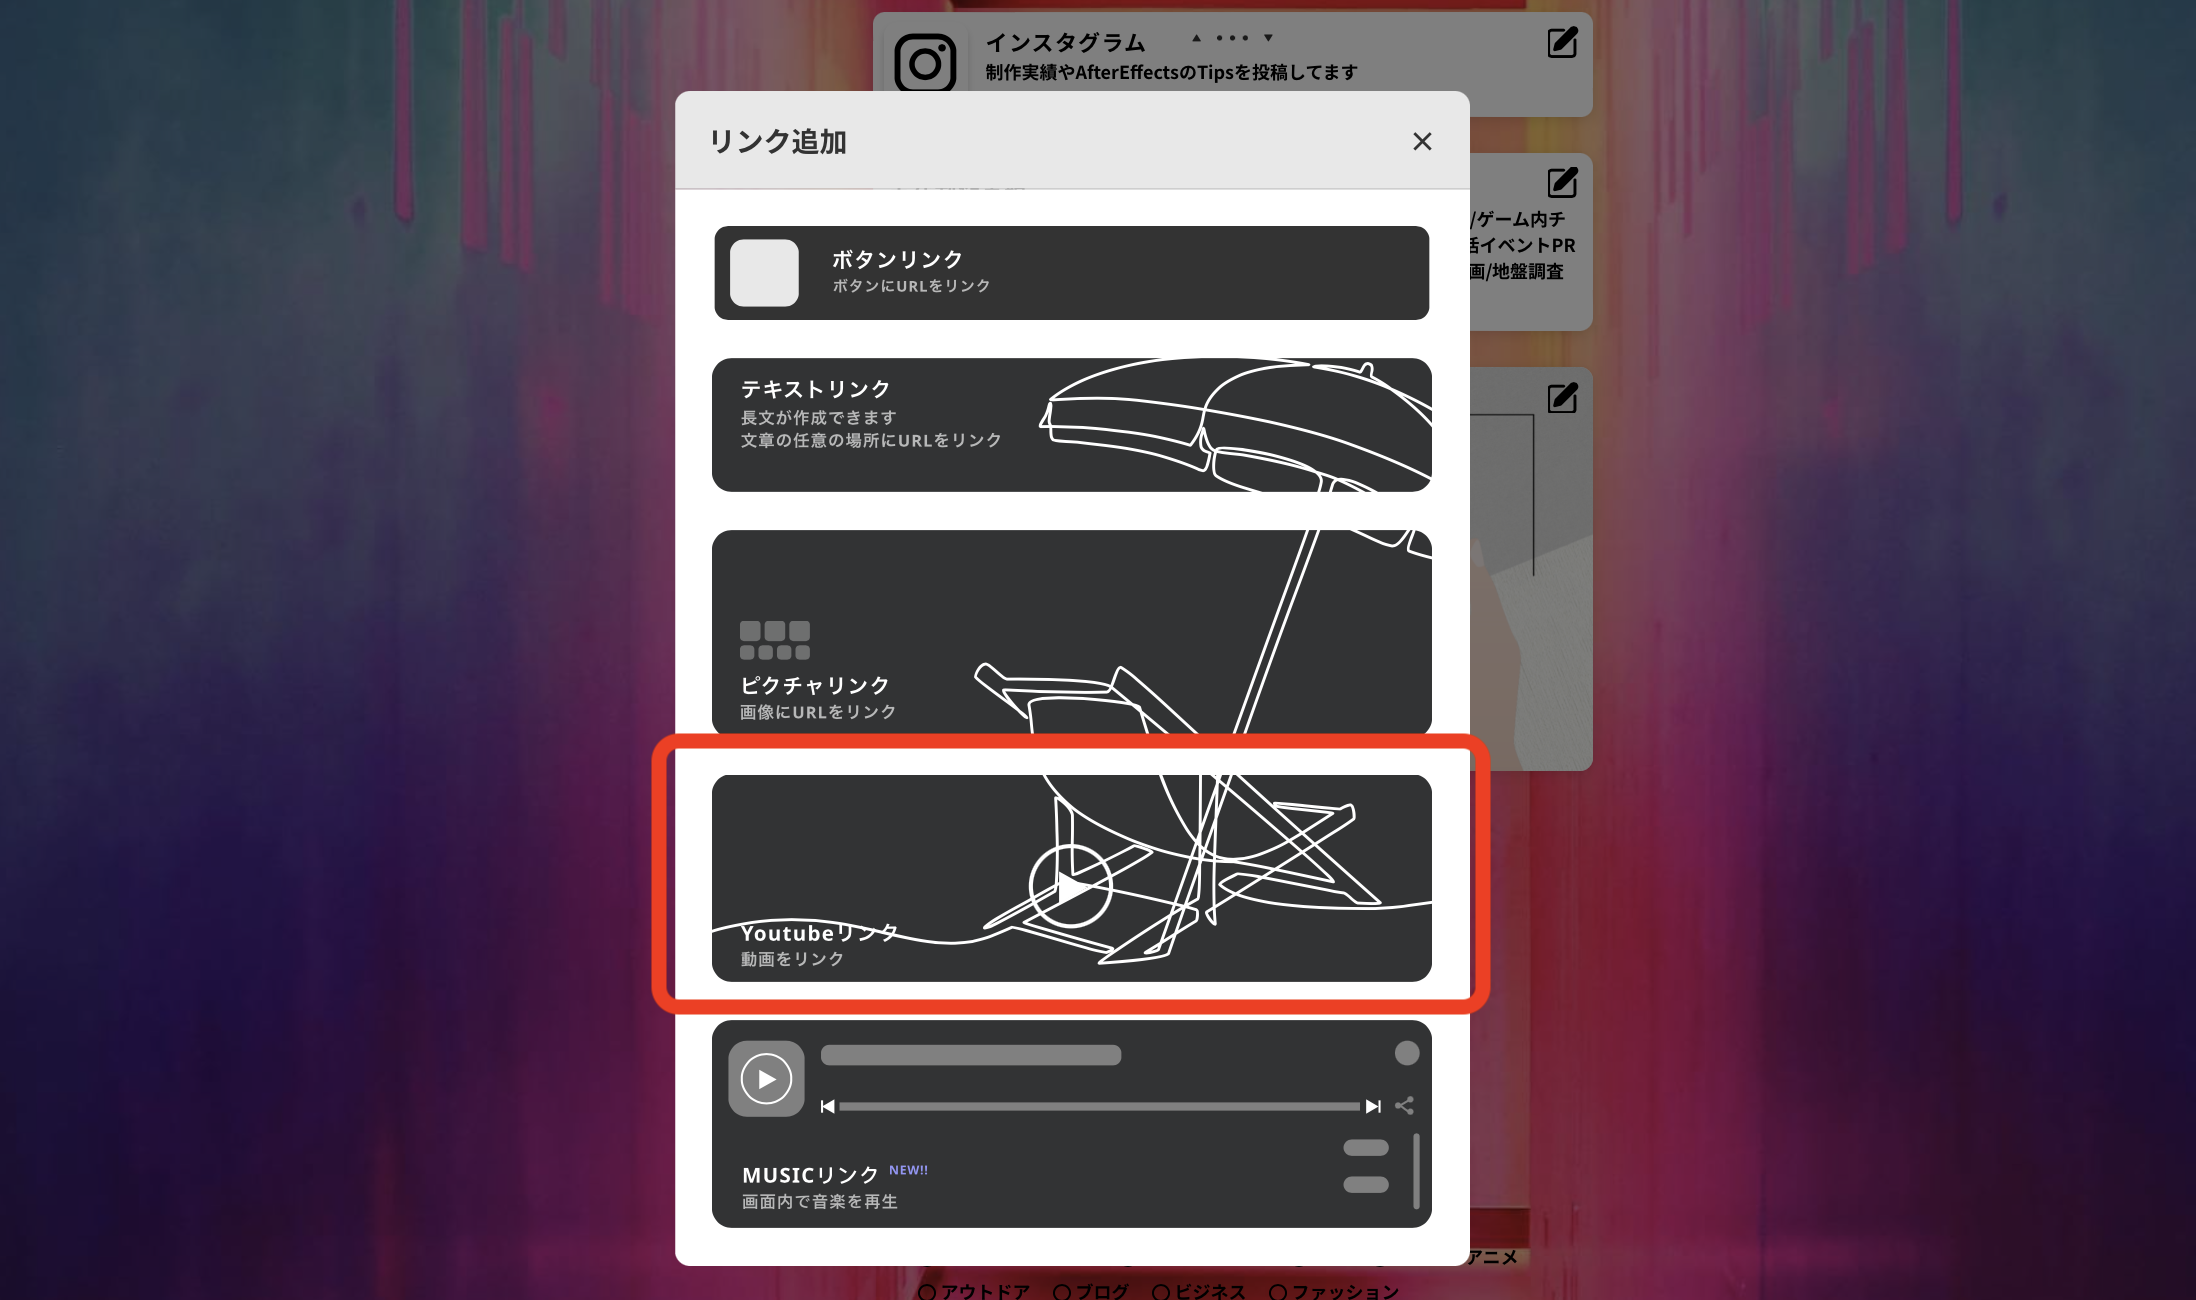
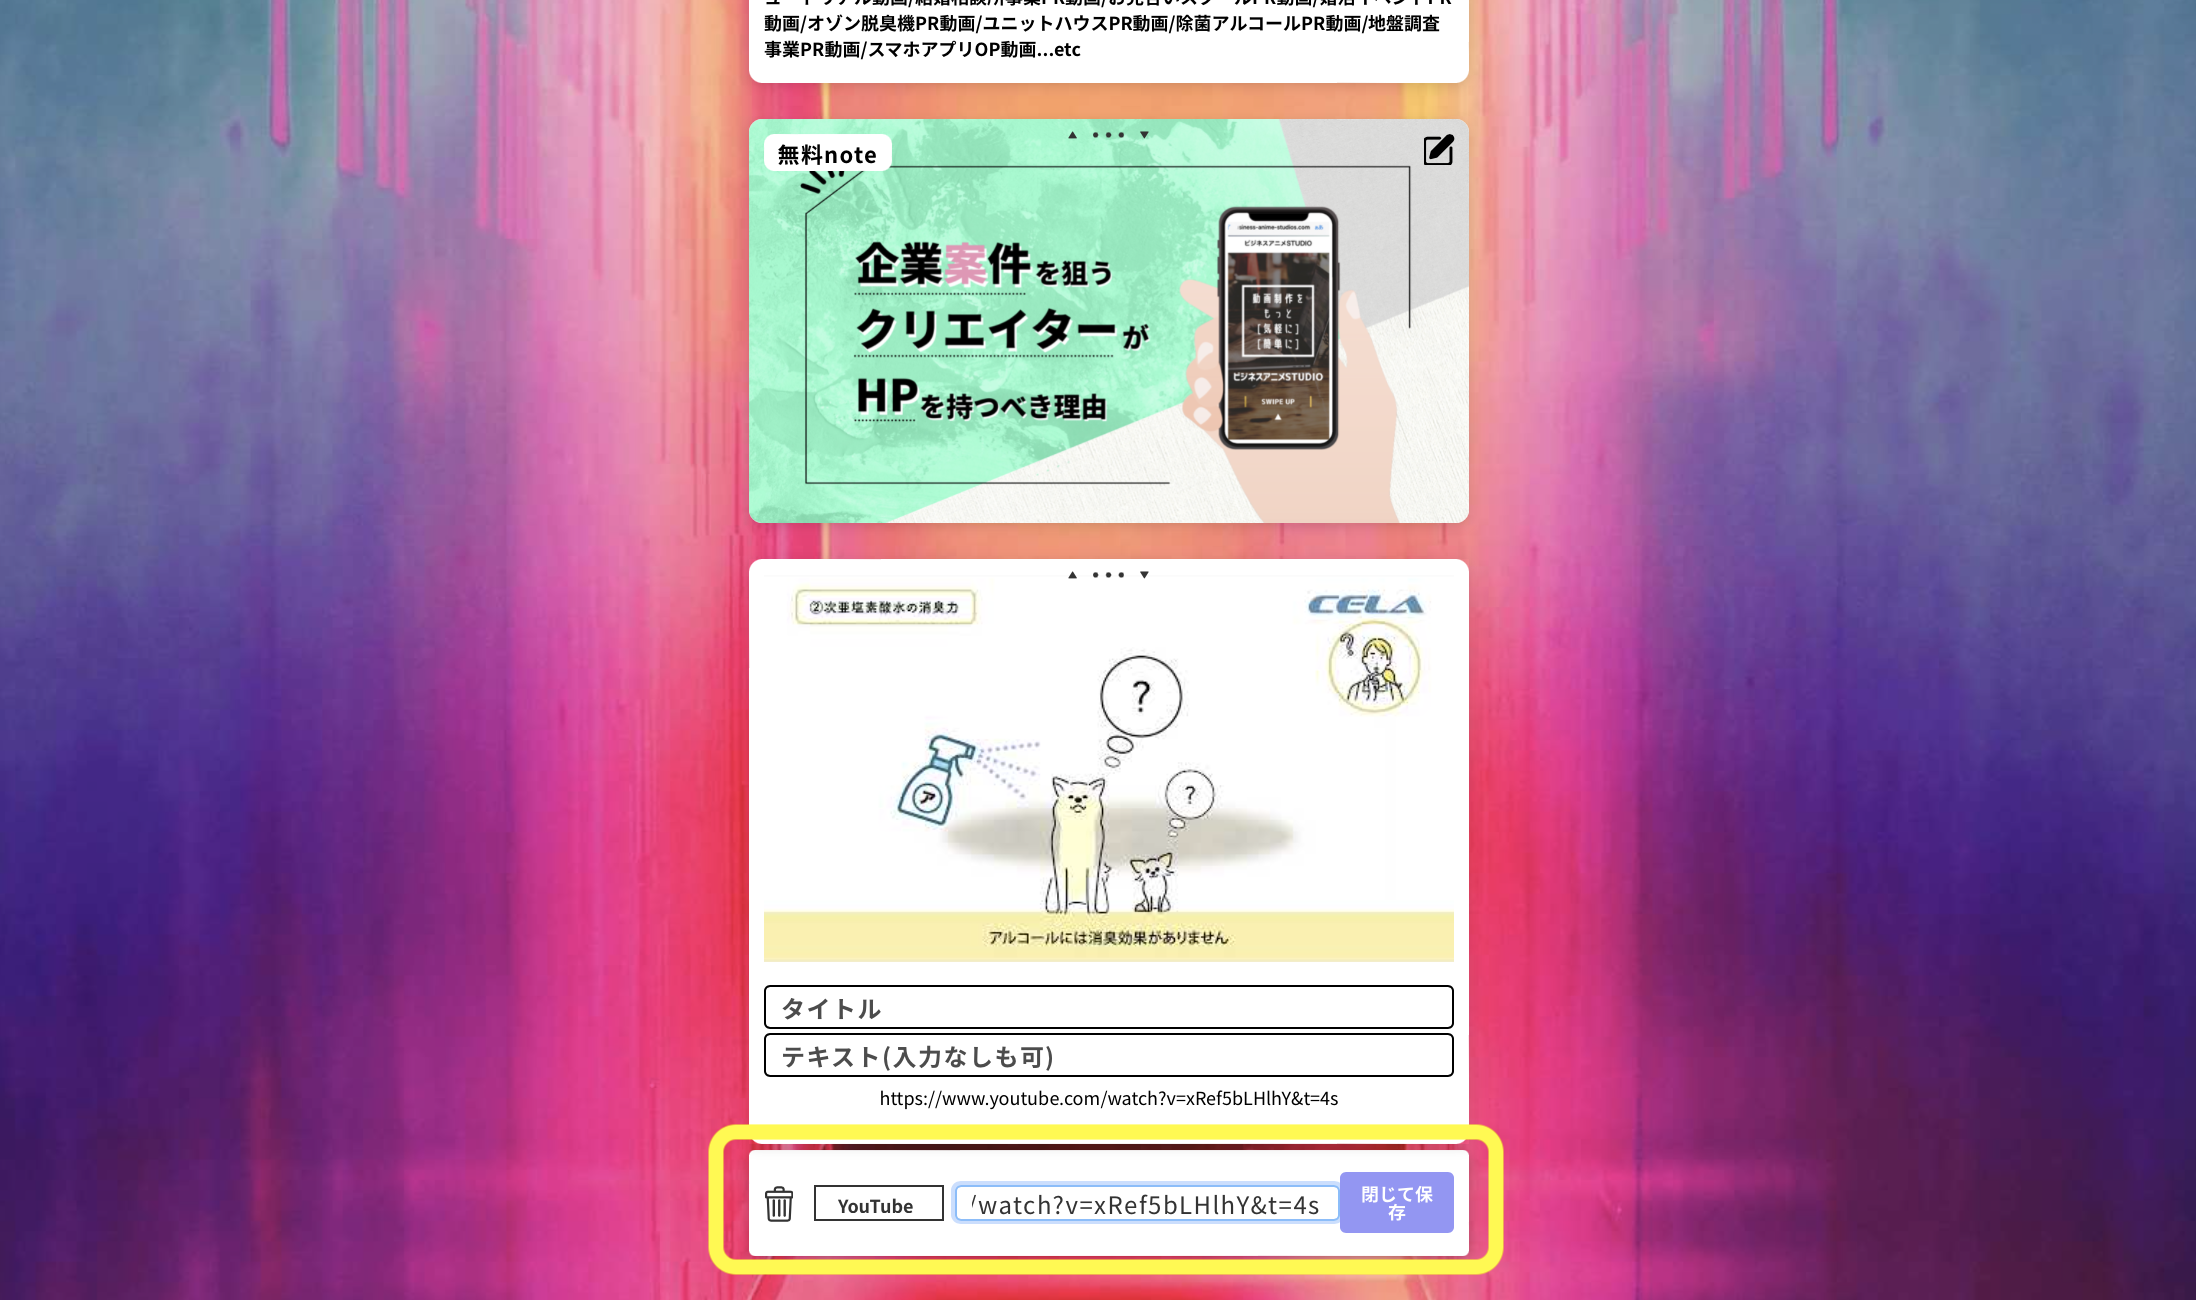 運営者
運営者Youtubeのリンクを経由して動画を挿入できます。動画先のリンクを貼れば右のように反映します。
Musicリンク
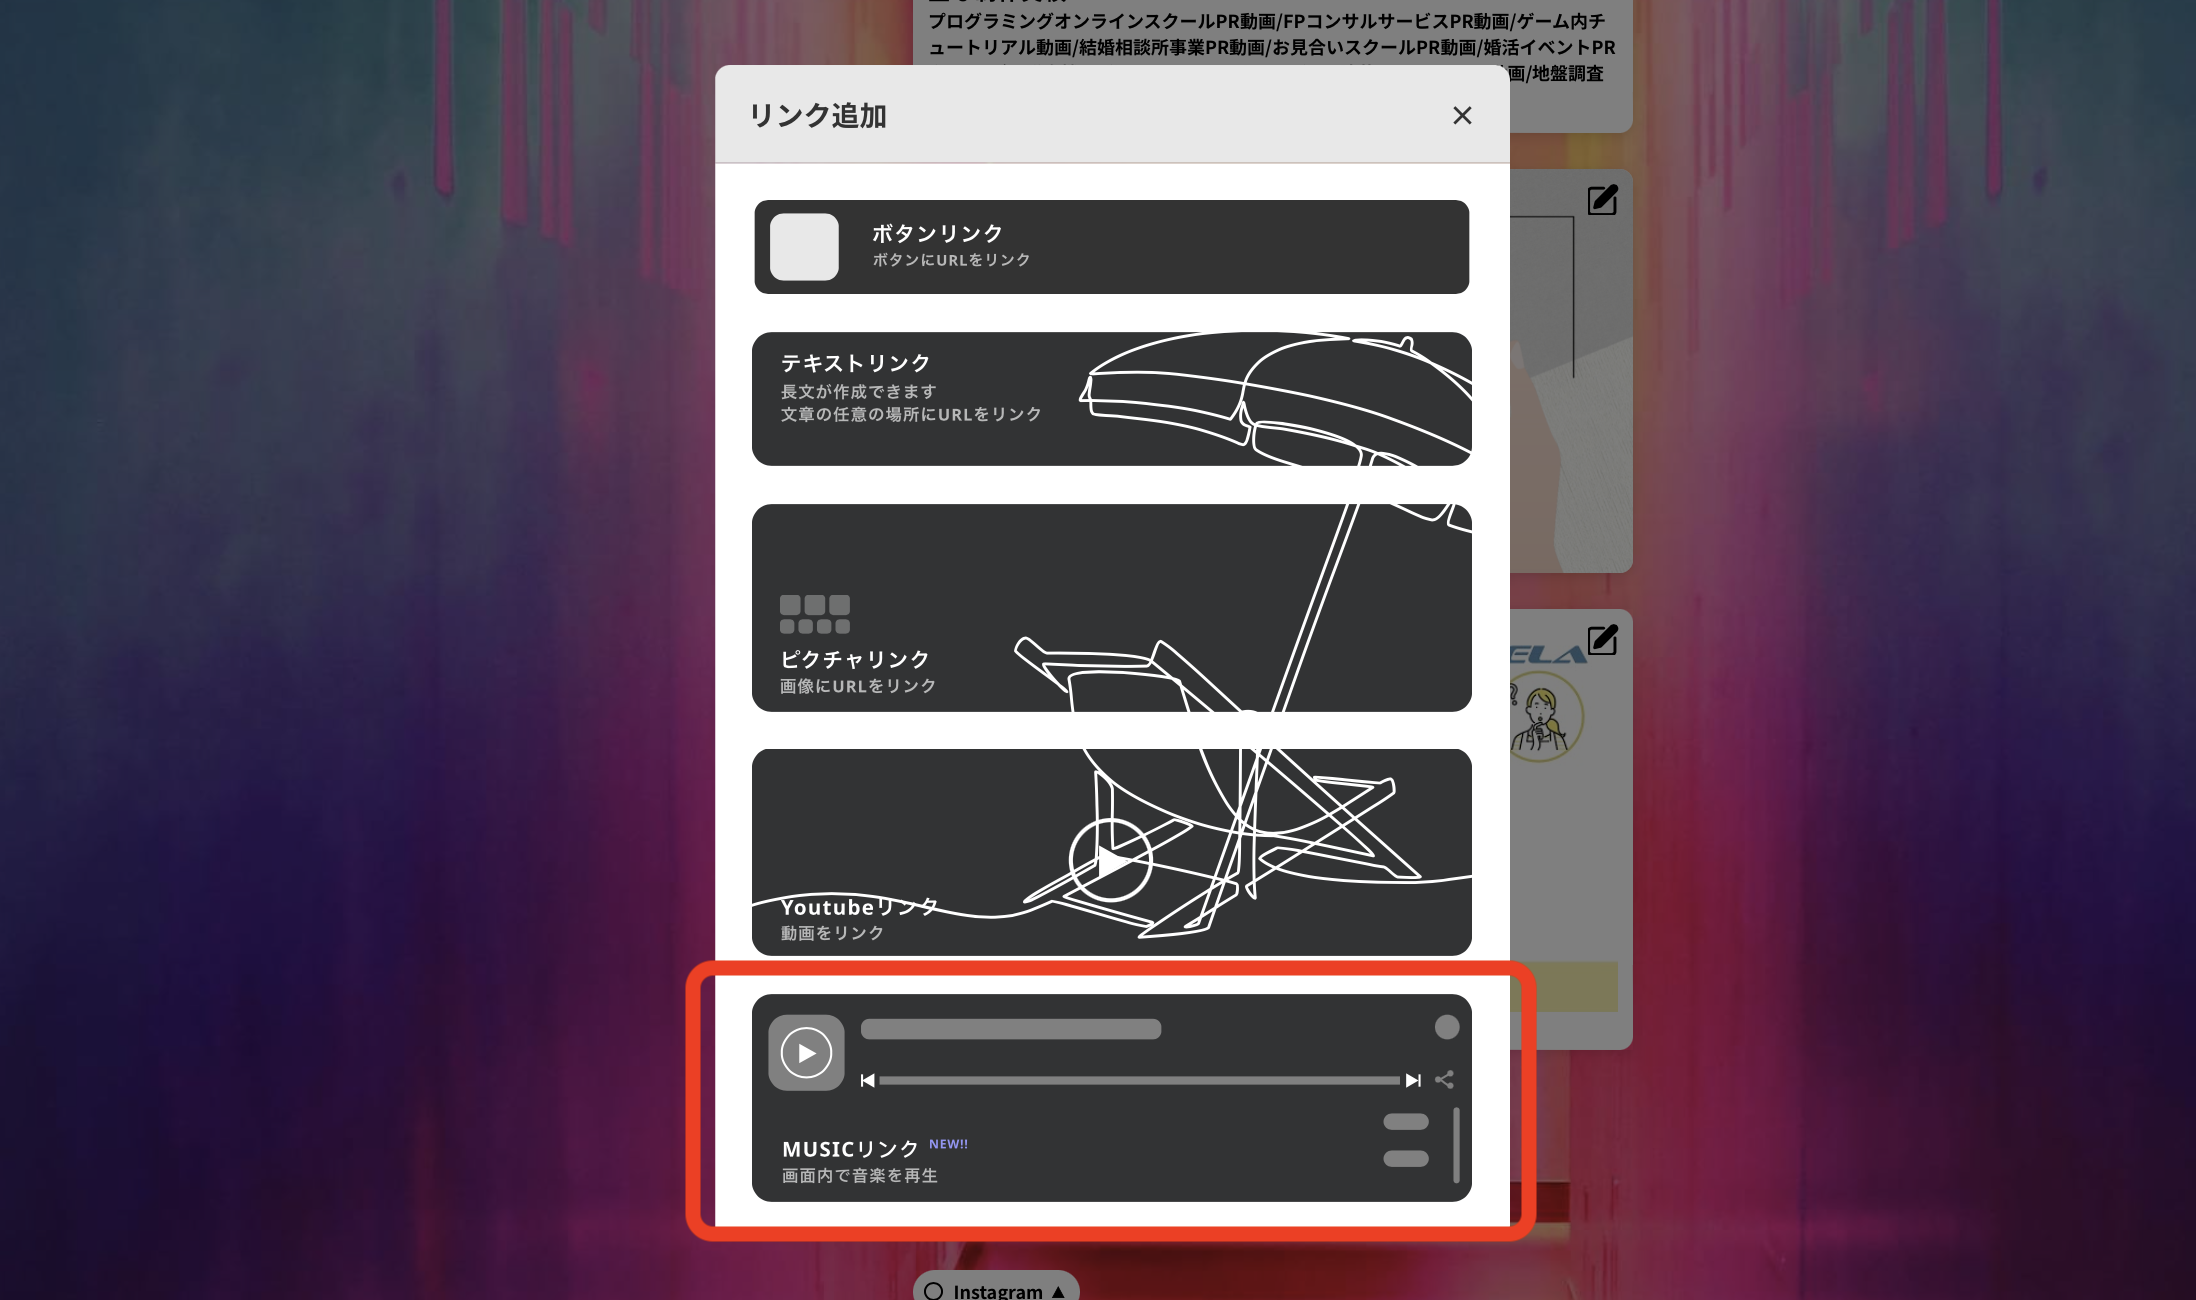
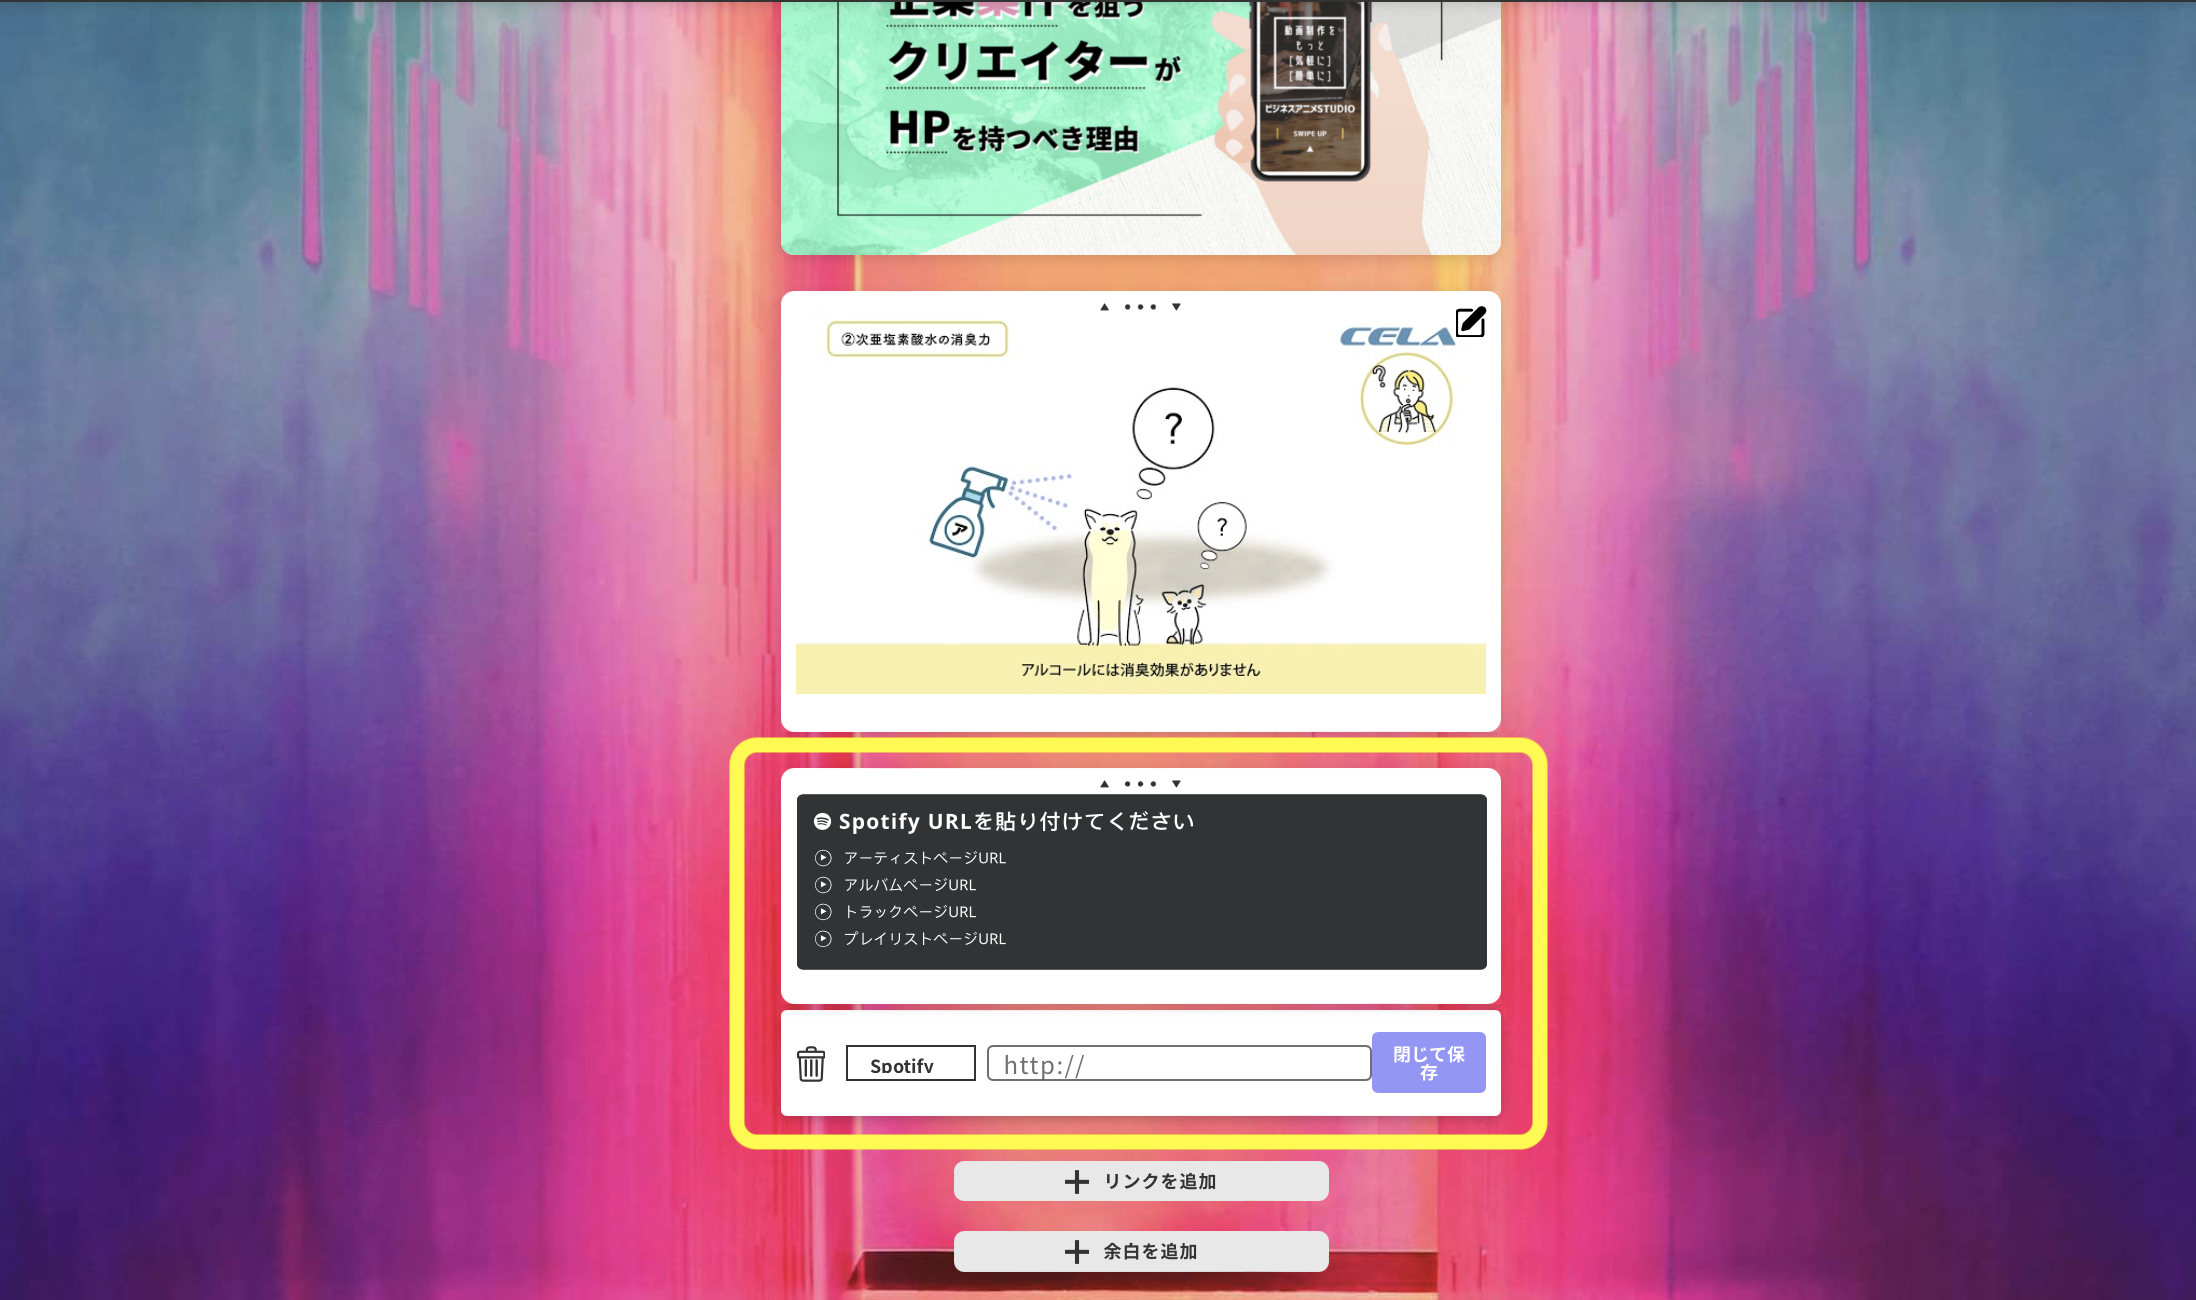 運営者
運営者音楽ストリーミングサービスのSpotifyと連動します。クリエイターは特に使うことがなさそうです。
その他の設定
枠のカスタム

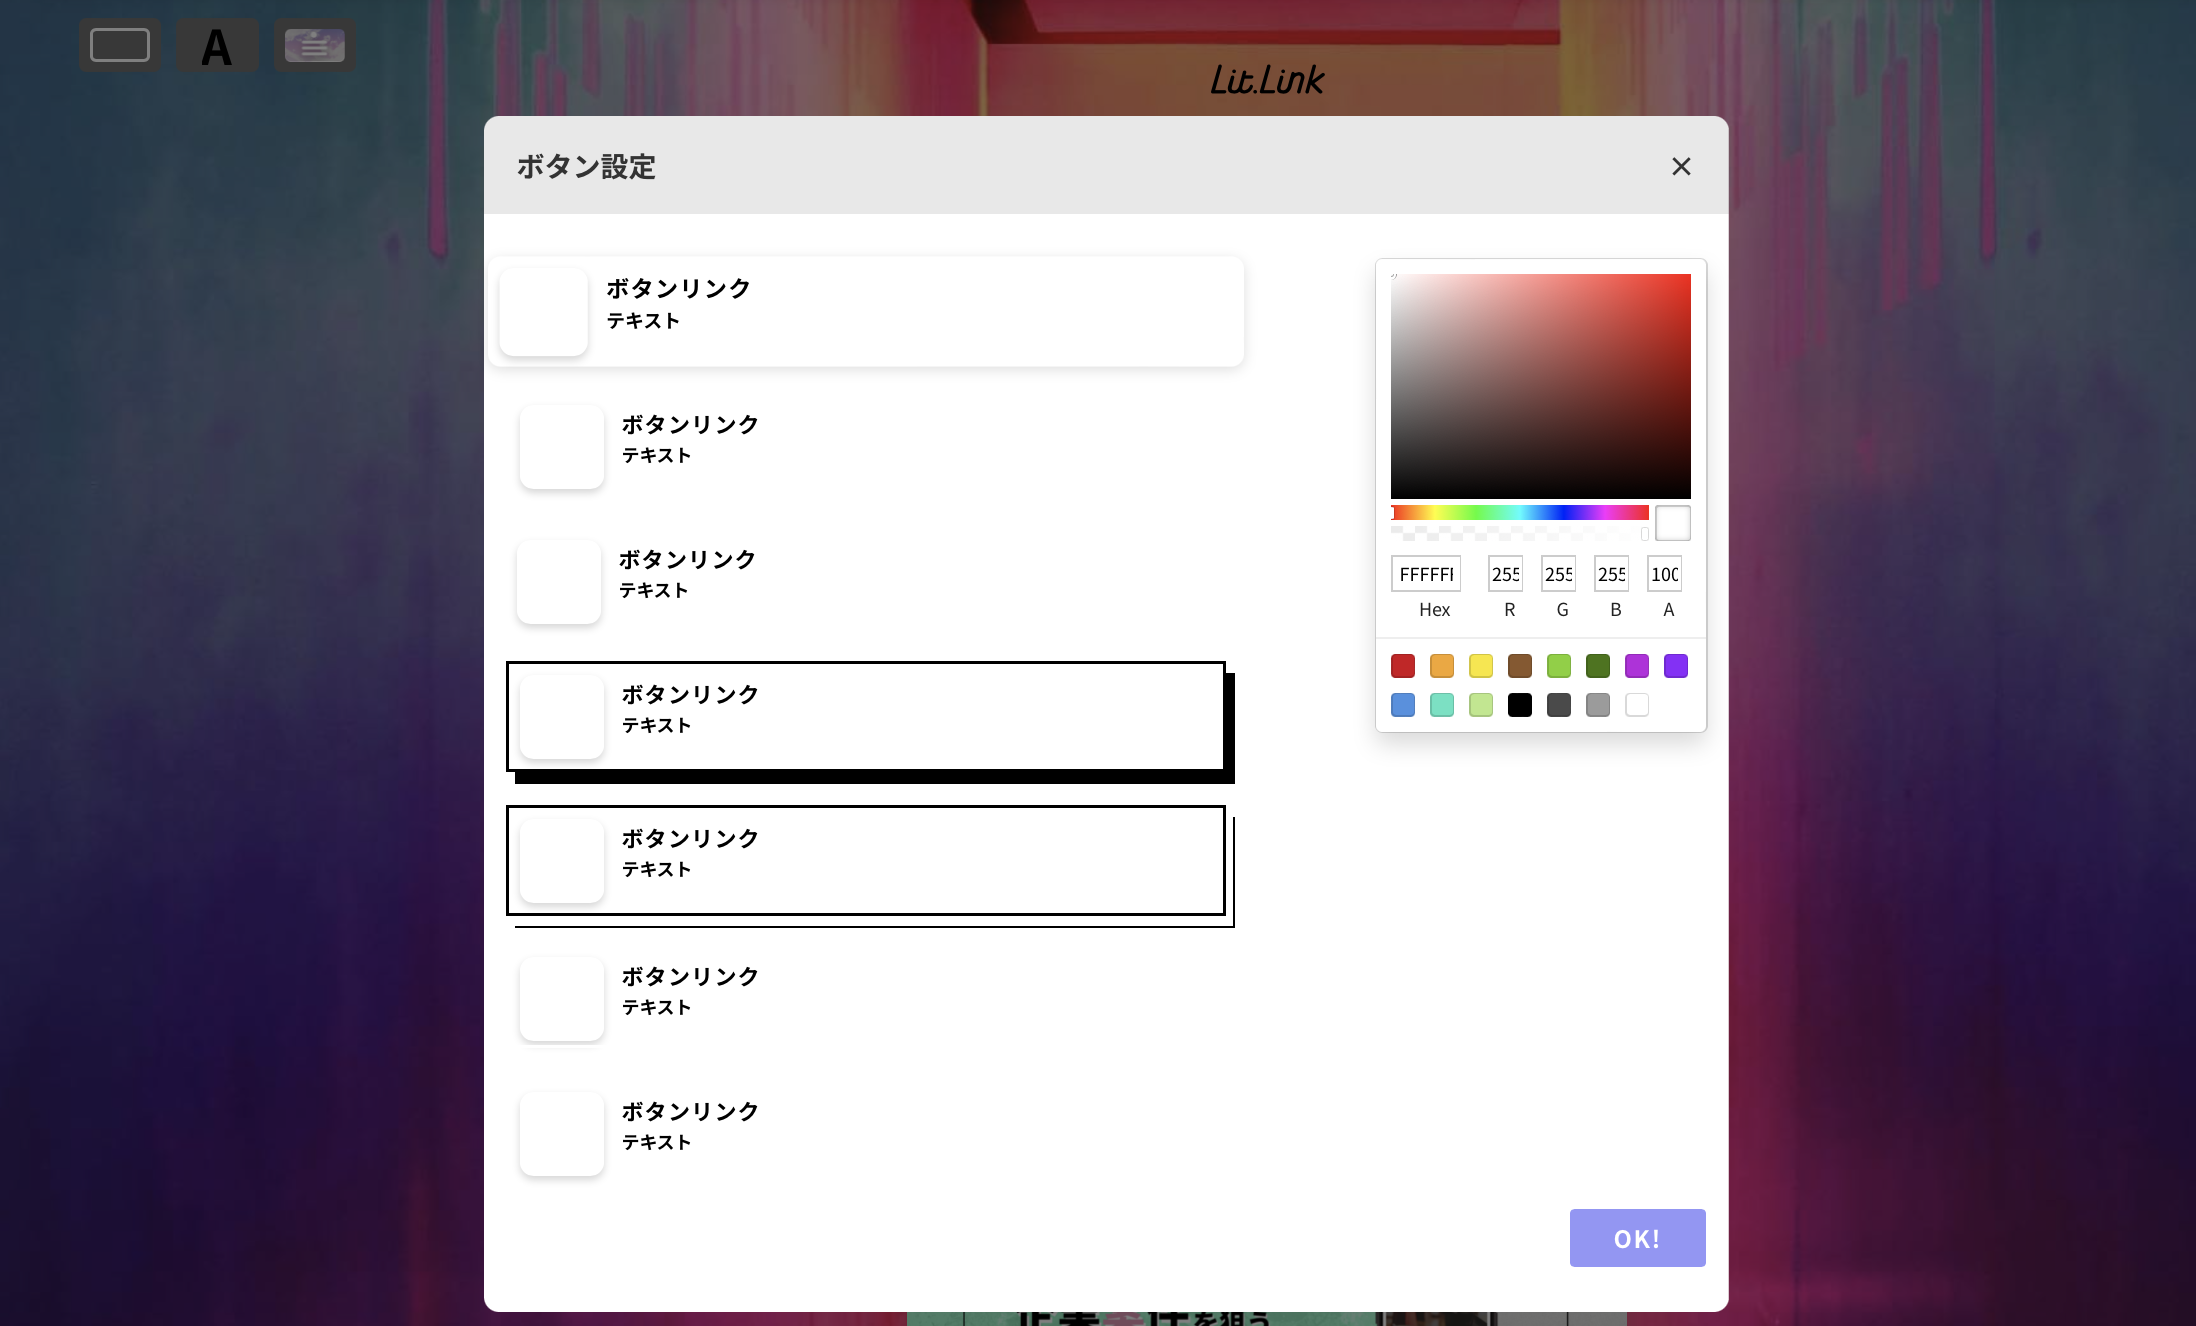 運営者
運営者枠の装飾を変更できます。自分の好みに合わせたカスタムをしてみましょう。
フォントのカスタム

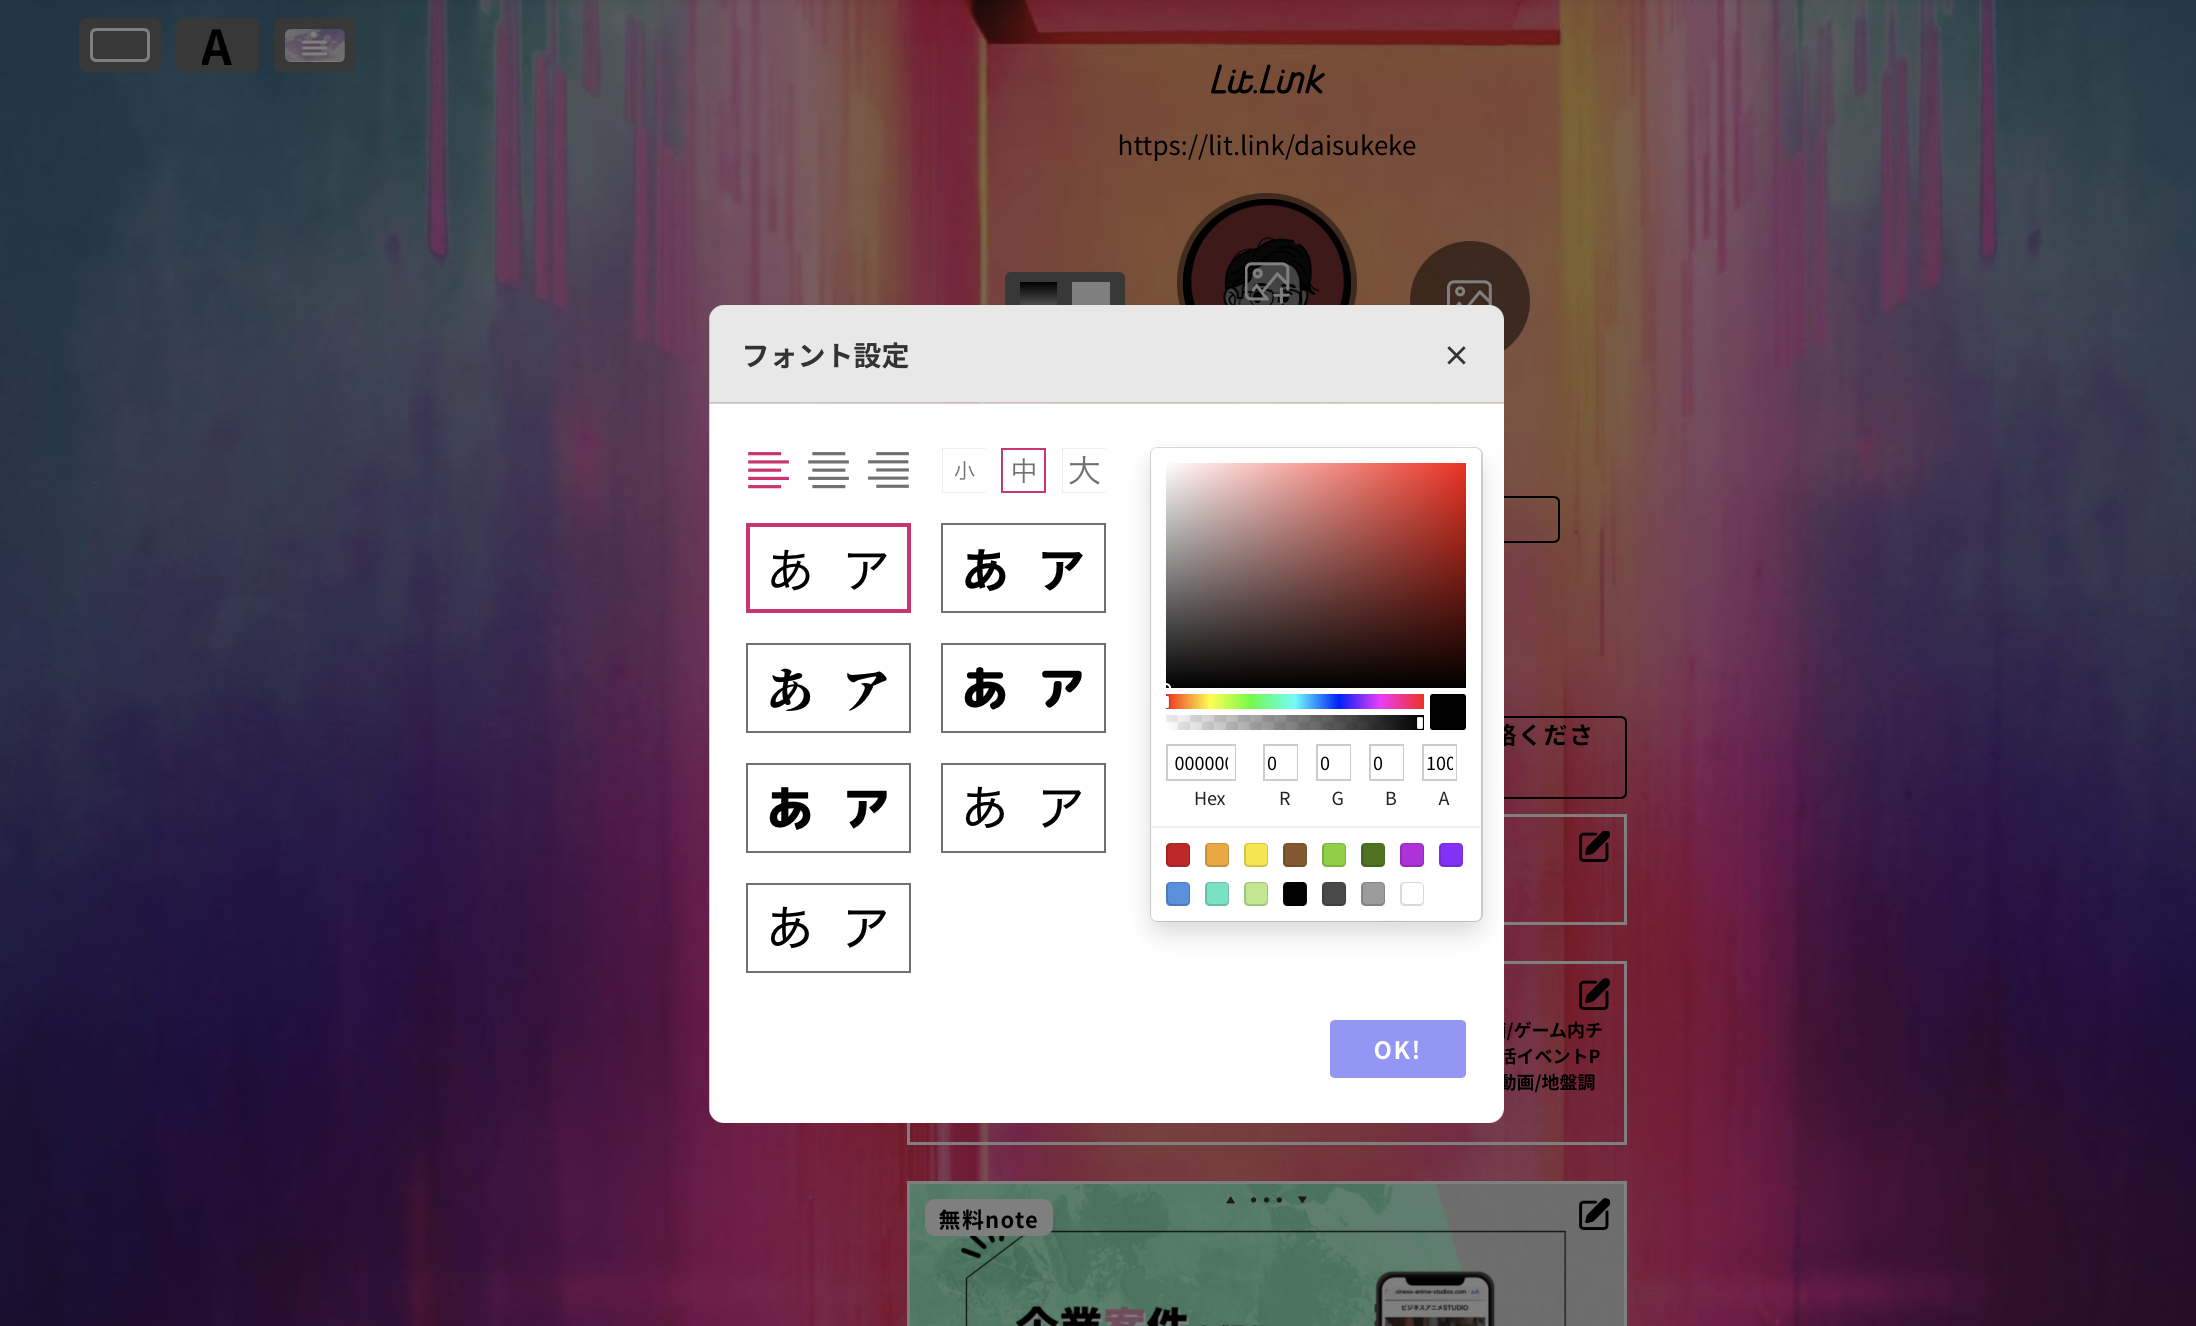 運営者
運営者フォントの細かな設定ができます。書式・大きさ・カラーがカスタム可能です。
テンプレート
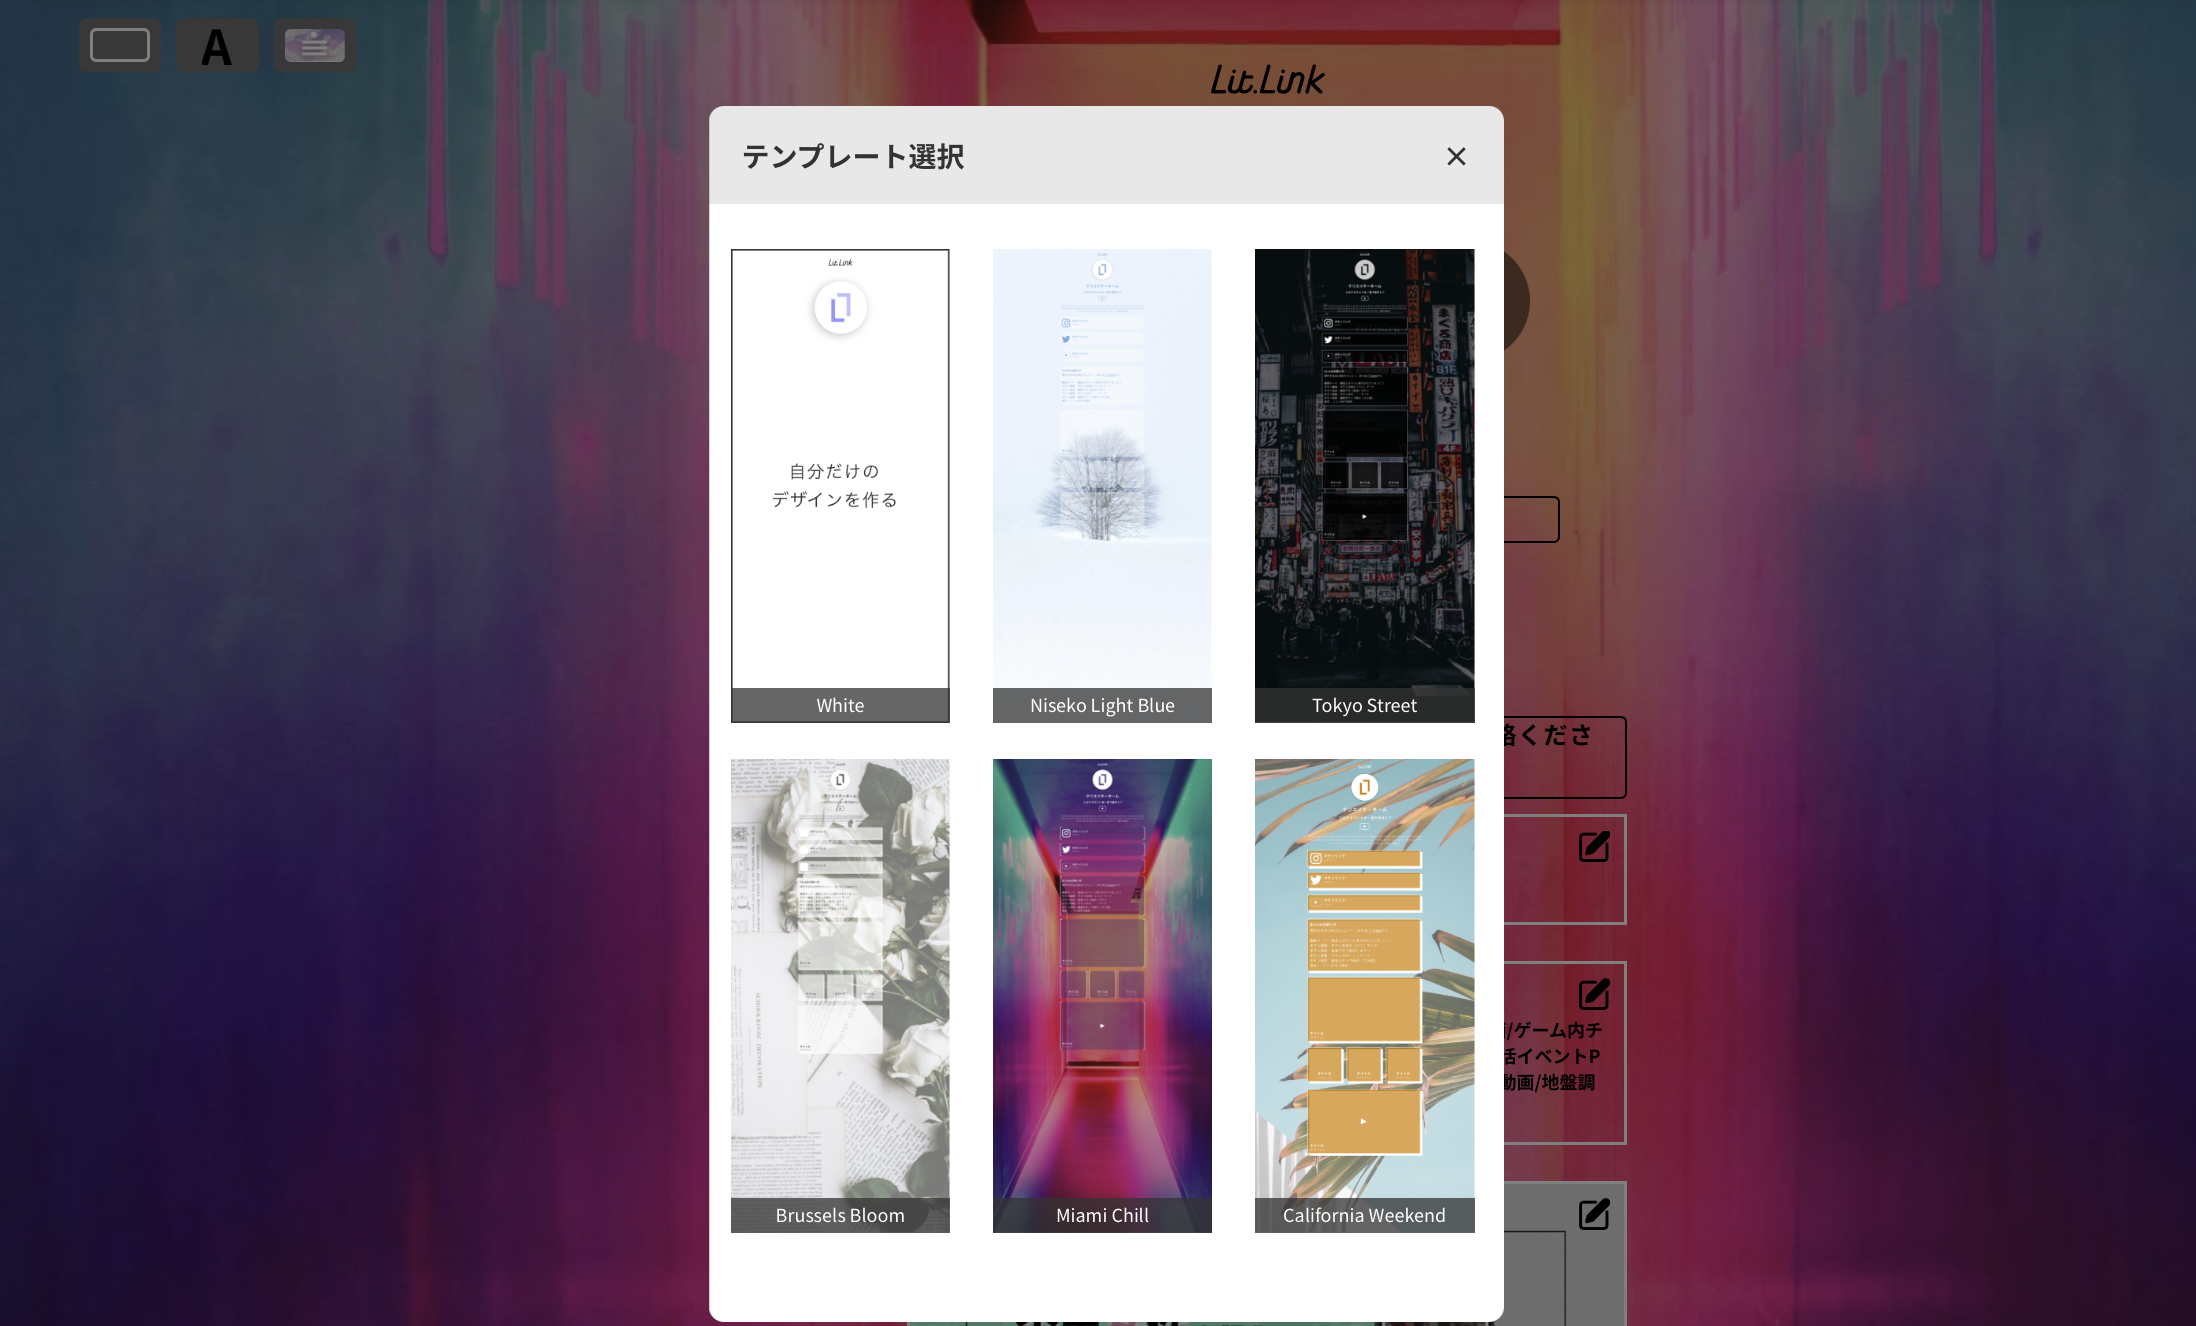 運営者
運営者テンプレートもあるのでカスタムのベースにできます。
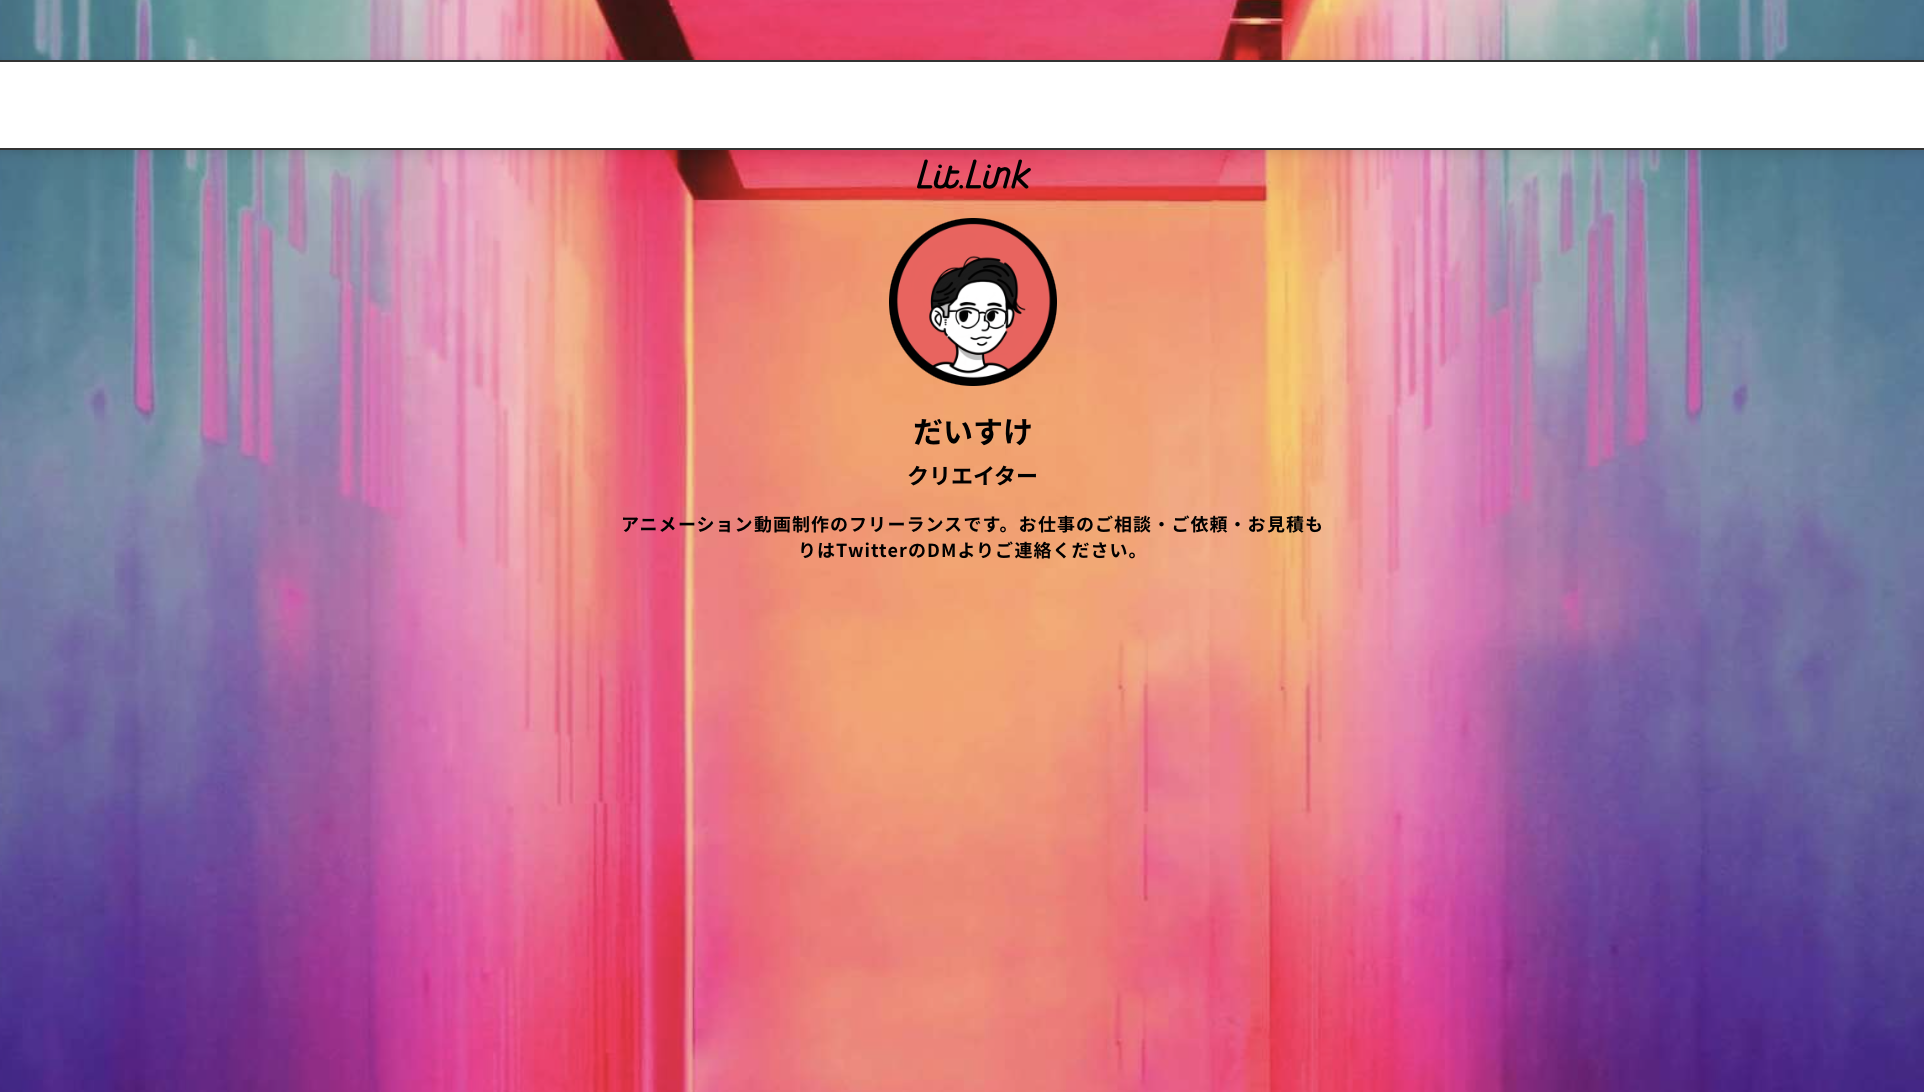
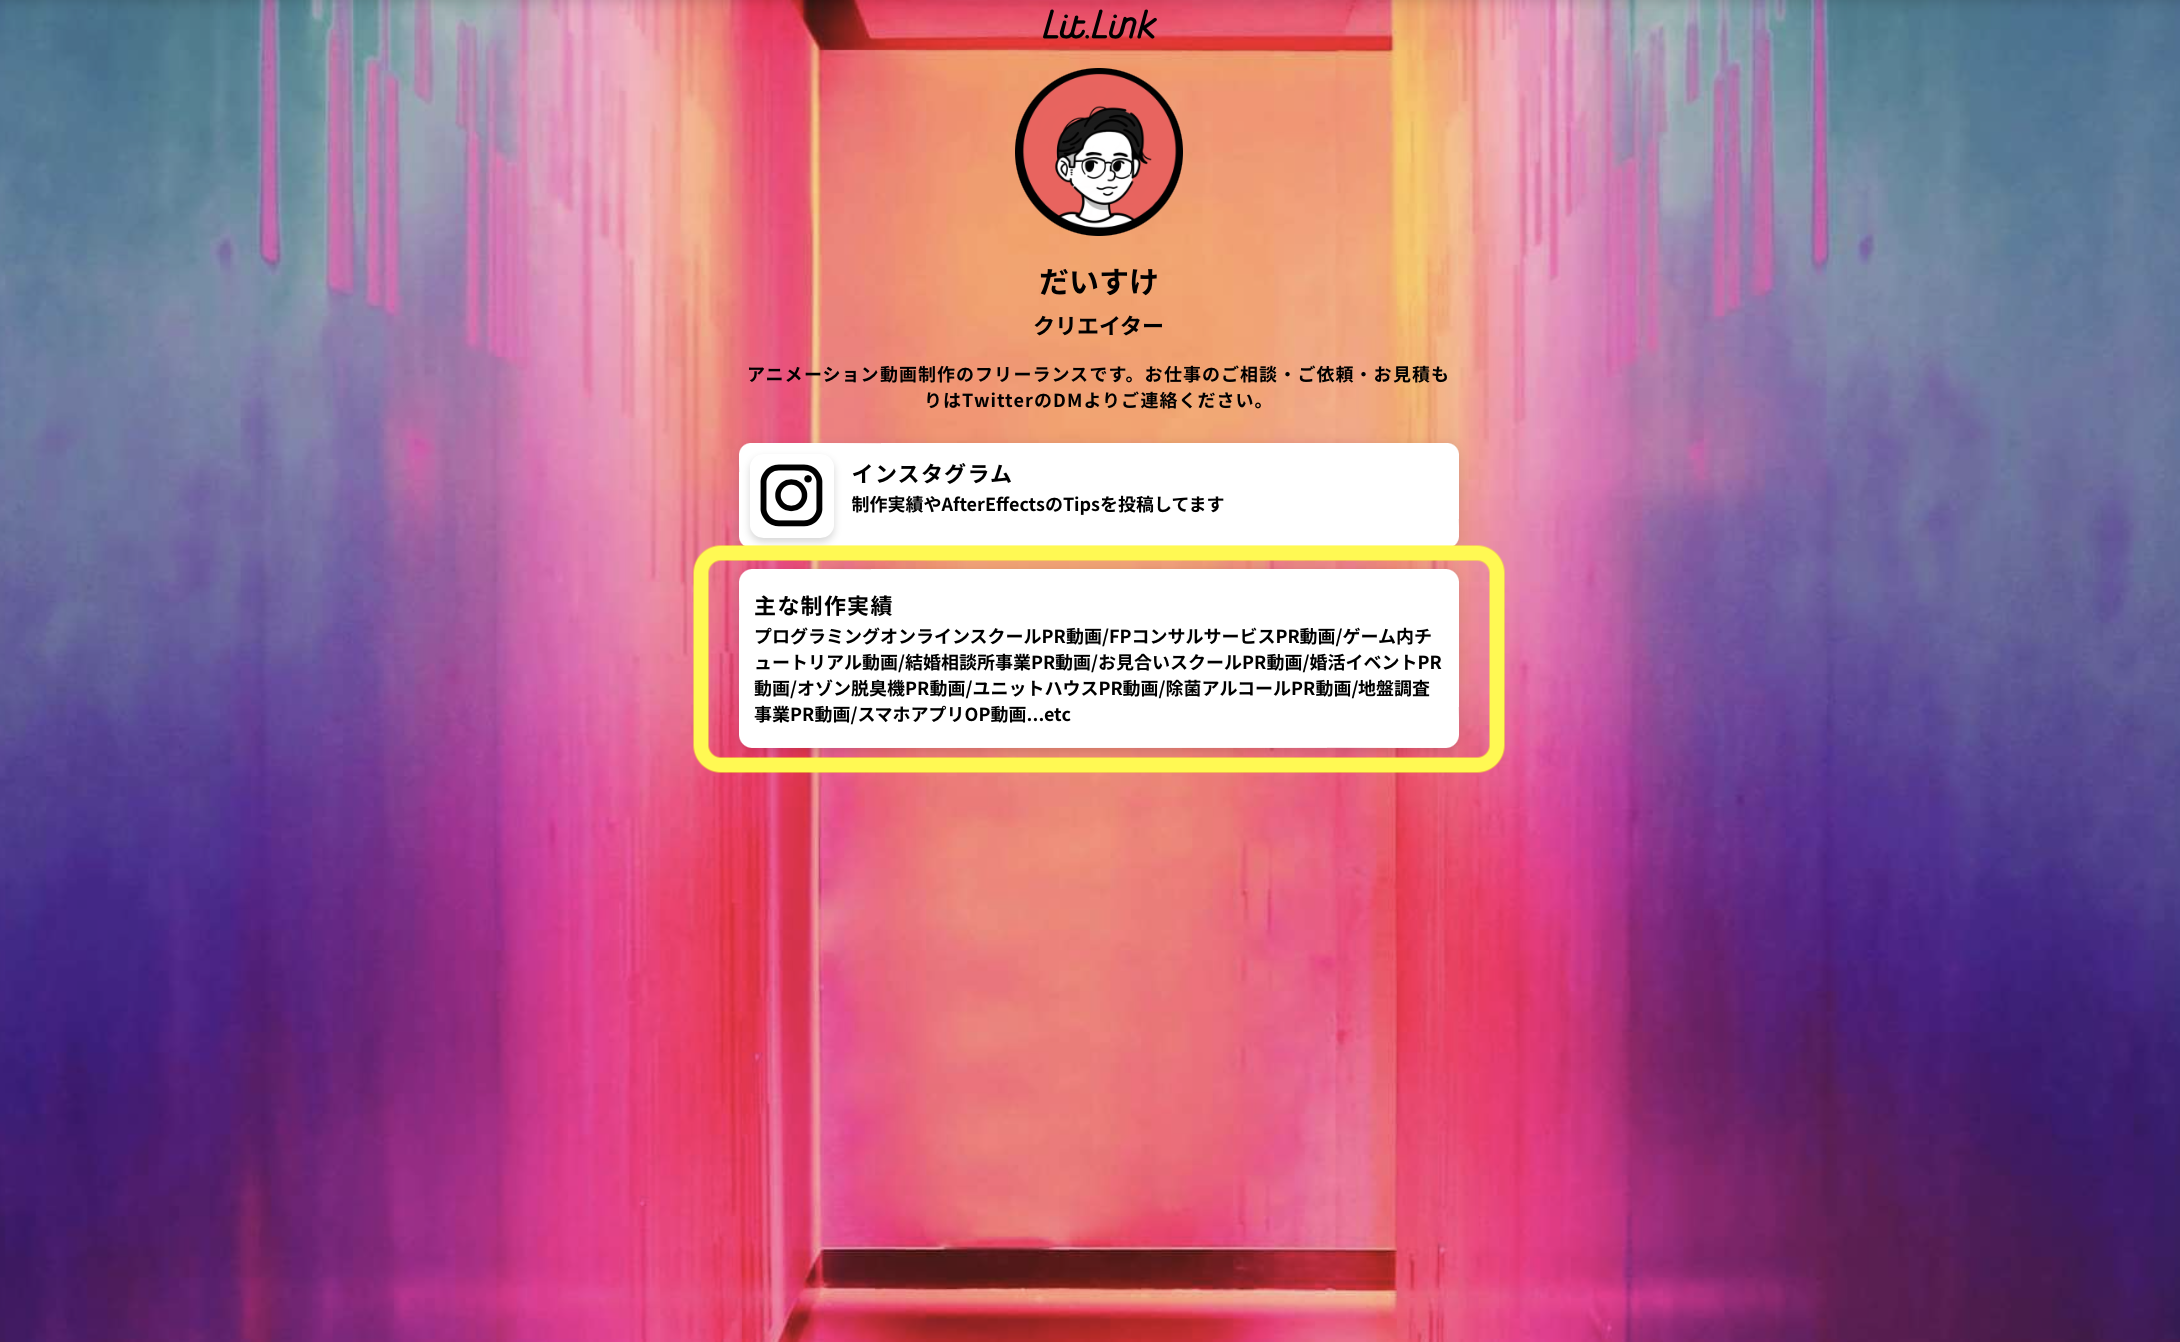
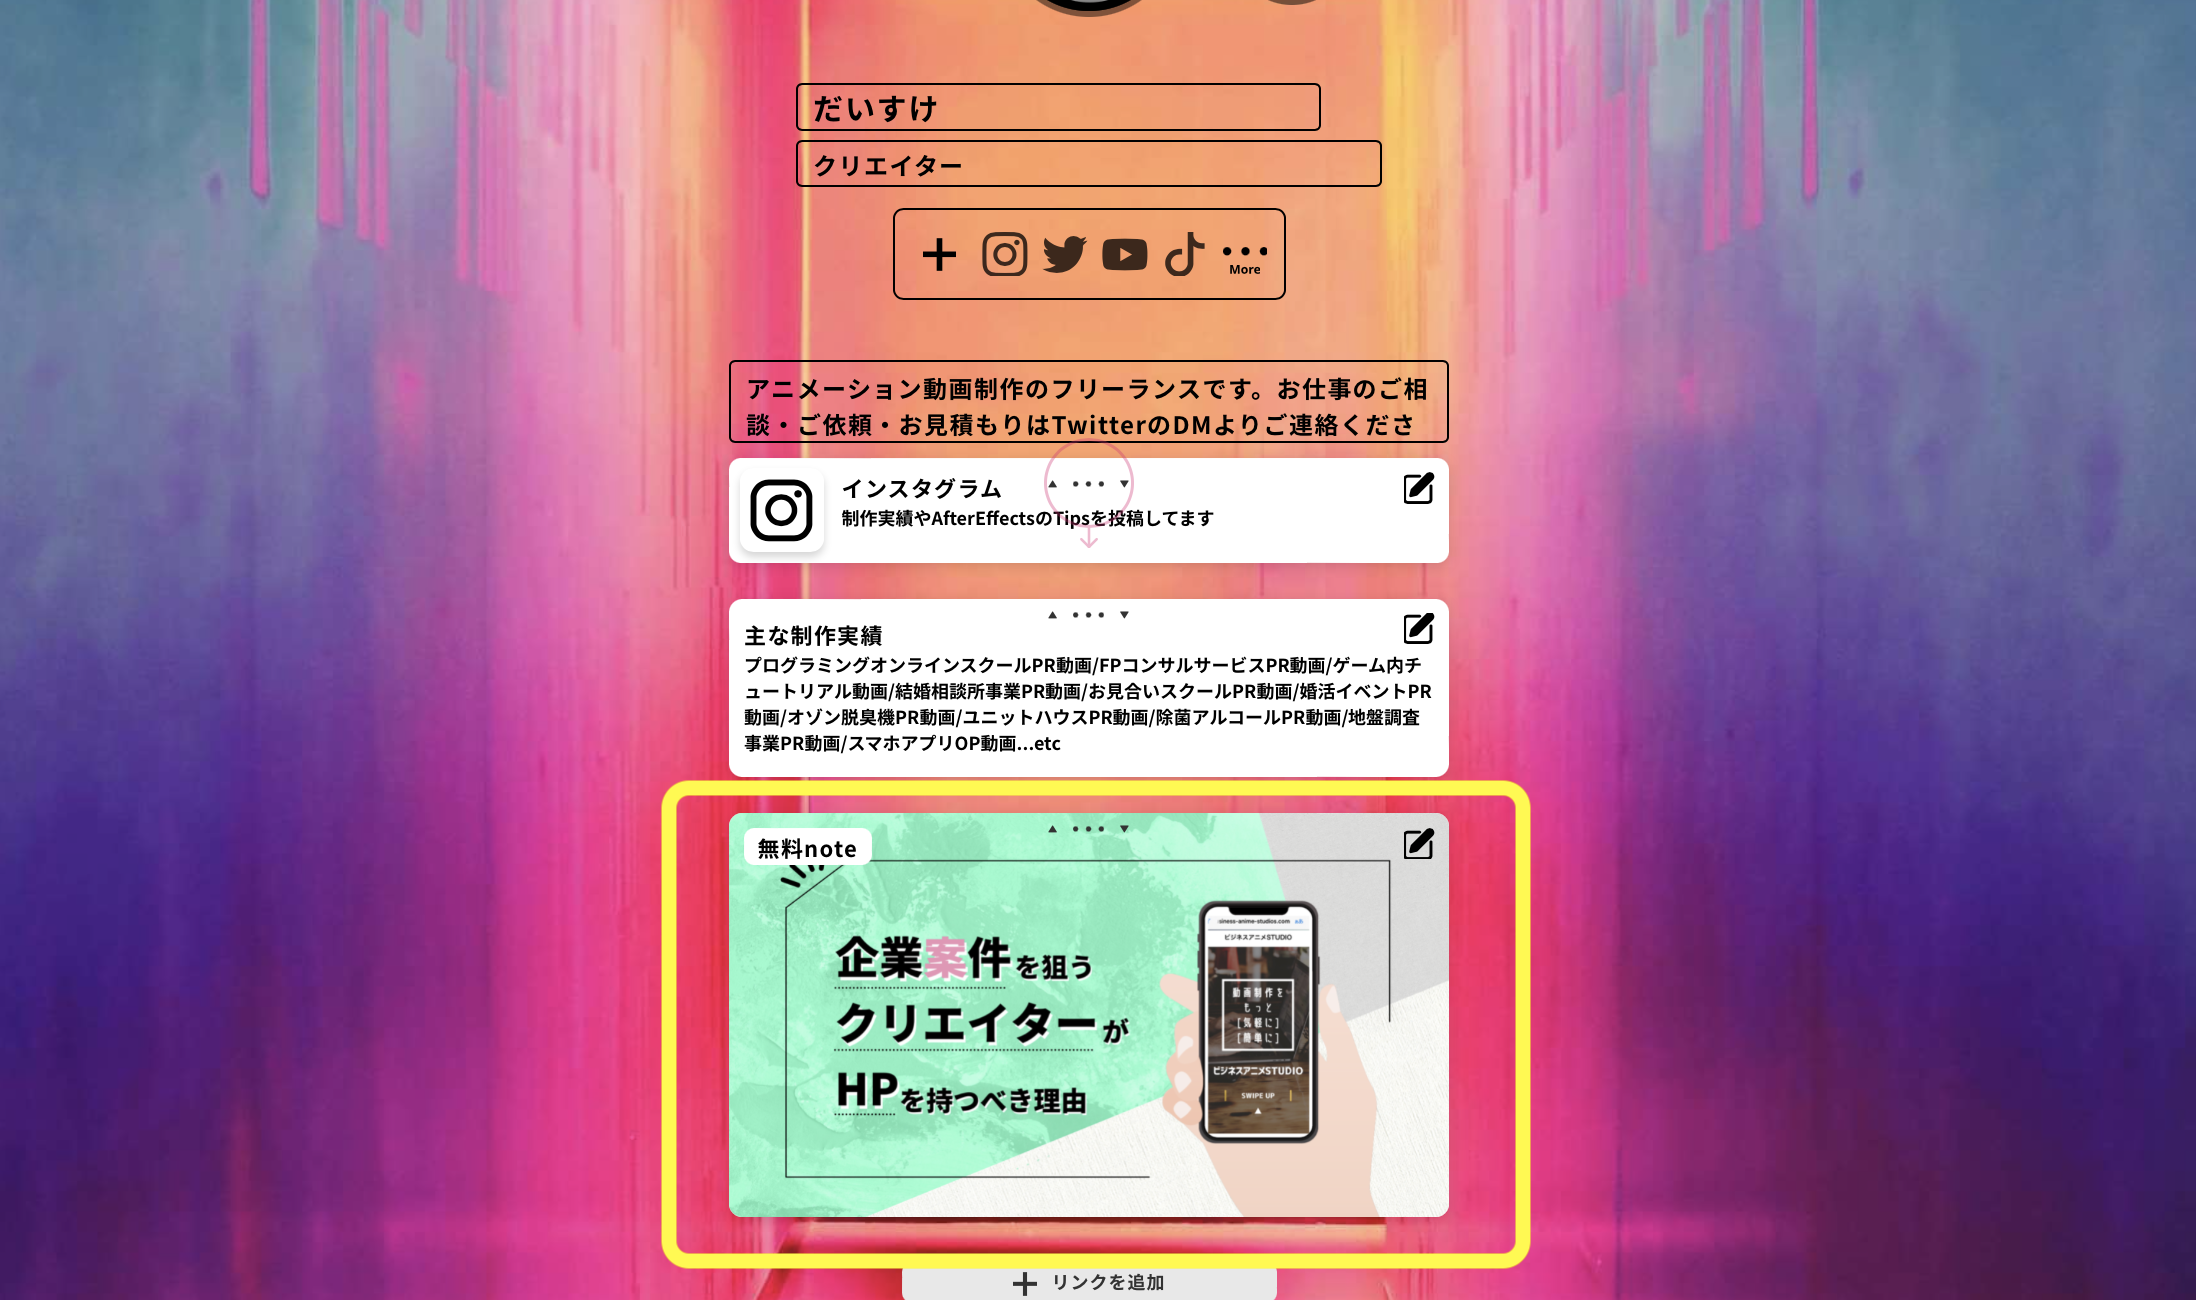
運営者のLitLink
 運営者
運営者ざっくりですがこのような構成にしています。よければご参考ください。
まとめ
このように[リンクを追加][ボタンリンク][テキストリンク][タイトル][削除] など全ての記載がありワンクリックで編集できるので自分のイメージに合わせてどんどんカスタムすることができます。
運営者LitLinkのページを1つ作っておけばSNSのプロフ欄などにリンクを1行貼るだけで実績や事業内容をまとめてアピールできるので大変便利です。
ぜひ自分だけのオリジナルページを作ってみてくださいね。